How to draw watermelon to be like a real one. How to draw watermelon pencil stages for beginners Draw watermelon with children in stages
Read also
How to draw watermelon?
Are these options here - from nature or on imagination? By imagination. For the development of hands and the chacomer is useful, and as a picture, of course, it turned out very conditionally. Therefore, today we draw from nature.
Whole or cut? ... both! Of course, a whole portray, and then cut, see what he is inside and also to draw.
Draw a pencil or paints? Well, the contour is definitely a simple pencil, but then I will continue with watercolor paints - the thought of the gray-white pattern of watermelon in my opinion is absolutely colorless and you will not feel any taste.
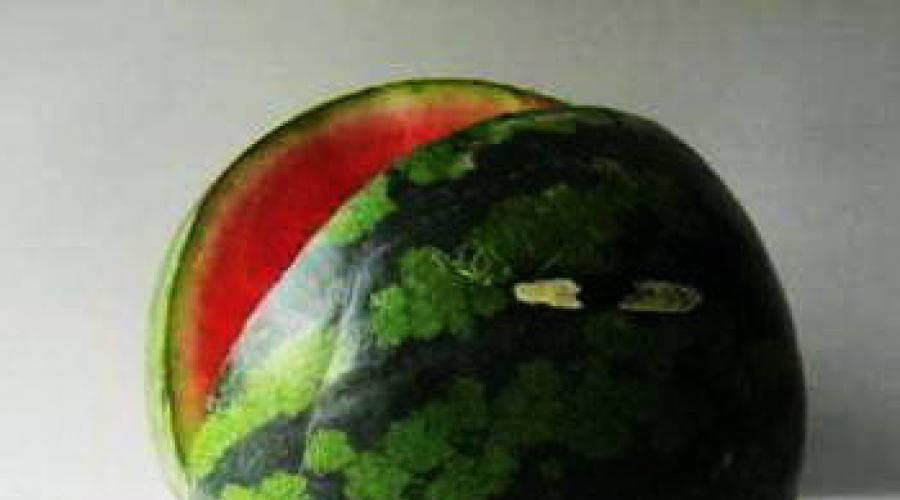
Watermelon I really painted twice. The lesson for drawing a whole watermelon will be on the website of Nonsenspictures.ru, here is a drawing - watermelon from that lesson:
And here we will be happy to be the fact that this watermelon turned out to be very tasty with a beautiful juicy flesh.

The composition is not easy - cut watermelon on a plate and nearby - what to call? - Cut slicing. Whole still life. And then there is also no flaps. Real still life! Sketch with a pencil looks like this:

In general, I teach the painting of children, and I know what rakes they are, mostly come. So - the children avoid drawing flaps. The idea that the line partially obscured by some object, located in the foreground, continues logically and naturally - it is very difficult for children an idea. So, watermelon and his slice draw it easy. But now it is necessary to be very consciously not to break the line of the boundaries between the horizontal and vertical planes.

So, with the construction figured out, the horizon line was drawn correctly:

Well, if it were a lesson for adults, we would now grow a very detailed ellipse plate and corrected it with the table plane, but for children and our constructions there will be enough above the roof.
Well, it's time to take paint. We need herbal greens.

Add brown and beige. Oh! I remembered - we are waiting for another ambush - shadows and glare! Shadows - dark, glare - light, almost white. They are, but it is still necessary to realize.

Children who are accustomed to draw not from nature, but on the vague imagination, usually everything is painted as a roller - flat in one color without shades. And knowing that the crust of the watermelon "Green" paint in precisely in acid-fluorescent green. Mixing paints is also the same quarrel. In kindergartens, this seems to be taught ... on the example of Guashi. But this is all forgotten by school and at the sight of a set with a watercolor, any student is not even miserable to torment himself with a selection of color.
And will have to.
Yes, we mix the paints, do not hesitate.
Wow, so I got to the pulp. Do you think - is it red or, like, pink? I thought so too, but it turned out that there was no ocher here.

And the shadows are both purple-brown.

Taaapa, Shadows ... Shadows? For sure! Draw a shadow from watermelon and from a slice. And do not forget the fragment of the plates - he is also visible.

Materials:
- Pencil;
- Watercolor paper - good quality, dense paper. I like to use at least 140-pound;
- Watercolor paints: Quinacridone Red (Quinacridone Red), Green Ftalocian (Phthalo Green), Yellow Cadmium (Cadmium Yellow), keyboard black (Ivory Black);
- Tassel with a subtle tip.
Before you begin to draw, remember these tips:
- It is important to work with wet paints for most of our classes, so work quickly and try to prevent your paints dry in between the steps besides the most last part.
- Our goal is that this watermelon looks fresh. To do this, you need to apply paint simultaneously to a specified area. We will not draw layers. Drawing over the areas you have already painted, can make a picture of muddy, heavy, as if it worked too much over her. Make everything easy and freely.
Let's start drawing watermelon! Repeat every step to create your own picture.
Step 1: Draw the outline
Start with drawing a light, triangular contour. A piece of watermelon with a pencil. Make it easily so that later pencil lines are not visible through the paint.
You can sample a triangle or use the paper corner to be smooth. Be sure to make the bottom curved so that the drawing is similar to a piece of watermelon.
Step 2: Slide the pink part of the watermelon

Mix the Hinakridon Red (Quinacridone Red) with a small amount of water in the palette and apply a piece of watermelon on the top. You can leave spaces there and to vary thin and thick layers of paint. We strive for it to look a little spotted, a little transparent, in some parts darker than in others. Also, the gaps give the livelism of watercolor drawing.
The liquid paint makes the drawing softer, fresh, do not forget about it as work. Thick paints make edges tough, and this we want to avoid.
Leave a wide, empty space from below for watermelon crust.
Step 3: Draw a watermelon crust using different shades of green


Take a brush a little green phthalocyanine (Phthalo Green) and draw the bottom of the crust. This part can be depicted evenly along the entire bottom boundary.
Now, mix the green phthalocyanine (Phthalo Green) with a small amount of yellow cadmium (Cadmium Yellow) to make light green. Apply this color right above dark green until it dry, allowing two shades of green a little mixed in places of contact. Leave a small gap between the yellow-green and pink part of the watermelon.
Now, take a yellow-green brush, and attach a brush to several places in the remaining clean place so that the green is mixed with pink. Also leave some white space in this place.
Step 4: Draw Watermelon Bones


While the pink paint has not yet dried, leave several marks of black paint, creating the impression of the bones inside. Let dry.
Take a brush more black paint and add a little more specks. Now, when the pink paint dried, these bones look clearer, creating the impression that they are on the surface. This adds depth and interest to your image of watermelon.

Happened! Simple but expressive watercolor picture.
The characteristic features of this huge berry can be divided into several categories: shape, drawing, color and size. The origin of the watermelon is associated with South Africa, it was from there that he received distribution worldwide. Fruit and today grows in Africa, but only in a wild. In Europe, where the watermelon got only in the 15th century, conducted a selection, as a result of which the fruits became more juicy and sweet. In Russia, the delicacy appeared on the dining tables in sufficient quantities only at the beginning of the 19th century.
How to draw watermelon so that the drawing contains all the external signs and was reliable? First of all, it is necessary to choose a form in which the fruit will appear in the image. Watermelon is round, oblong or pear-shaped. In Japan, it is grown in the form of Cuba, but it is rather a designer move that does not make any sense from a culinary point of view.
How to draw watermelon pencil
Ways to create an image on paper set. But in any case, you first need to stock materials and tools. For the picture, the standard sheet of white A4 and a pencil type "Designer TM" is suitable, with which it will be possible to designate contours. Sticky sharpening should be made not too acute so that the strokes are softer and smooth.
How to draw watermelon stages
The drawing may consist of several stages. First of all, it is necessary to designate the external boundaries of the subject, draw a circle with a small displacement so that the contour corresponds to the natural form of watermelon, i.e. was in the form of an incorrect circle. At the next stage, several lines should be held, peculiar "meridians", which will connect the upper and lower circle points. This lines will be characterized by green stripes, which are the main sign of watermelon. The edges of each line are drawn by gear strokes, and the band itself must be dried in the upper and lower part. Upstairs, the "tail" should be drawn, it usually has the shape of a curved dark green or brown stem. Near the watermelon you can depict a sliced \u200b\u200bchunk.

Coloring drawing
How to draw watermelon to be like a real one? It is easy - the drawing must be painted. This can be done or the surface of the watermelon surface should be light, yellow-green shade. Strips are better to draw dark green color. It should be remembered that it is the strips on the watermelon crust that the main "decoration" of the fetus, and they must be depicted very carefully. Special attention should be paid to the cloves along the edge of the strips.
A good drawing should be diverse through plot content. The most interesting image will turn out if the watermelon is drawn cut. In this case, "still life" will consist of the watermelon itself and its slices of beautiful red color, with black bones. In this embodiment, your drawing will become a classic image, and the question of how to draw watermelon will be resolved at the best.

Leaves and stem
For greater persuasive, you can draw stem and several leaves, which organically complement the picture. The mandatory attribute of all mudflows, and watermelons, including, is the image of thin curly beefing, departing from the main stem, which the plant clings for everything that is located next to it on the field. It can be stones, snags, neighboring plants. When depicting leaves, stalks and mustache, it is necessary to remember that they are also green as the watermelon itself, but lighter. When compliance with color compliance, you will have a beautiful drawing.
Watermelon is a great idea for the drawing, because Summer is soon, which means that the summer still-life season can be considered open. Many mistakenly believe that only children paint this wonderful berry, as well as beginner artists for practice. There are many well-known masters, such as Giovanni Machines or Diego Rivera, using watermelon in their painting.
Picture on the canvas this bright, juicy fruit is not so easy, so we offer to draw watermelon according to the schemes, which will significantly simplify the process of the beginning of the artist. So, today we draw watermelon.
To understand how to draw watermelon to begin with, it should be disassembled which species of this berry exist in nature. This needs to be done to determine the color palette, which we will use when creating a picture. The following varieties of this fetus are distinguished:
- Sun gift (yellow robe with orange stripes, red flesh);
- Carolina-Cross (huge fruit of an elongated shape with green leather and red flesh);
- White watermelon (white peel, red flesh);
- Marble (light green robe with dark green veins and red pulp);
- Astrakhansky (green robe with dark green stripes, with red pulp);
- "Moon and Stars" (dark green peel with yellow spots, with a red or yellow flesh);
- Danzuke (black peel with a bright red flesh);
- Yellow (green peel, yellow pulp).

Having understood how these summer berries are, you can proceed to the next step - the choice of tool for drawing.
Before starting to draw watermelon, you need to select a drawing tool. You can draw this bright and summer yoke with help:
- Simple or watercolor pencils;
- Oil, watercolor or acrylic paint;
- photoshop or other program for drawing on a PC;
- Chalk;
- Nail polish;
- Pastels.
To begin with, you can try to use a simple pencil to learn how to create the right form, details. And then go to watercolor or acrylic paints.
On a note! If the novice artist wants to transfer the entire brightness and juiciness of the fetus, it is advisable to choose a gouache or oil paint. But making a choice in favor of the paints, you need to be patient: to master the paint drawing technique from the first time is very difficult, for this you need to practic a lot.
Getting to work
Having understood with all the preparation stages, you can proceed to work. Draw watermelon will be much easier or simple pencil or watercolor. Consider each option in more detail.
Phased pencil
After the novice artist decided on the palette of the pencils, you can proceed to the drawing of the watermelon in stages. At the same time, one must adhere to such an action algorithm:
- Draw a circle, mark the tail.
- Draw stripes on the peel.
- Select light yellow or light green shade and lightly paint the surface of the fetus.
- With the help of a dark green shade, draw the strips on the surface of the berries.
- From the palette, choose saturated colors and draw the existing sketches with a pencil.
- Warmly shade to scratch the upper part, cold - lower. Do not forget to leave a place for a gloss.
- On the bright part of the surface of the berries draw small bodies.
- The last step is to work the tail. We take gray and brown and score the process. Do not forget to add a shadow.

Watercolor stages
Before you begin drawing with watercolor, you need to prepare a simple pencil, dense high-quality paper, thin brushes and watercolor paints.

Step-by-step instruction:
- Create an outline with a simple pencil. If you wish, you can draw the fruit on the plate and near the slices.
- Paint the bulk of the fetus of green paint. Indicate the place for the highlight and shadow. For shadows, use purple or brown paint.
- The pulp slices stain in bright red or pink color.
- The peel of the fetus is black stripes and highlight the glare.
On a note! When creating a drawing, you should not allow the drying of the paints. It is necessary to work in a rapid pace so that the paints remain wet. So the fruit will be more realistic.
Realistic watermelon
In order to make a drawing realistic, you need to understand all the subtleties of creating light and shadow. It is these two components that will make the object deep and tangible. The newcomer will be difficult to cope with this from the first time - to create a drawing of the most close to the photo, years of practice are needed. For a novice artist, it is enough to designate the glare, the shadow, then the fruit will look more voluminous.
By cells
The desire to draw in the notebook watermelon in the cells arises from the embroidery lovers with a cross. It is incredibly easy to do: it's enough to take a rated paper and fill the cells with the corresponding colors. For this use markers, color handles or pencils.
In the style of anime
In order to create a watermelon pattern in anime style, you need to adhere to the following instructions:
- Dolk the felt-tip pen and designate the location of the crust.
- Draw eyes and smile. Near the pupil to draw two small miseos. Eyes to paint the felt-tip pen. Pupil and circles do not touch.
- Along the line of the peel, we draw seeds in the form of droplets.
- Pain the peel with a green felt-tip pen, and flesh - red or pink.
- Denote the borders with a dark felt-tip pen.
- Around a piece of berries to draw multicolored drops.
Draw along with the child
Creating a drawing for children - fun and useful pastime. You need to instill love for painting since childhood, because it develops memory, speech, thinking and coordination. In addition, many good professions are associated with creativity, so regular classes with a child will not be superfluous. First time you can use coloring, and then go to creating drawings with pencils or markers.
Whole watermelon
To create a whole fetal, we take simple and colored pencils or markers. Figure you need step by step:
- Create the basis of berries - blacks around. On the side, you can still draw a slicer;

- We denote the top;
- Detail the fruit - draw stripes along the peel;

- Dolk are drawing seeds and designate the location of the peel;

- Clearly designate the boundaries of the watermelon, and the first sketches erase the eraser;
- You can begin apart.

Cute piece with eyes
Before you teach your child to draw slices of watermelon with eyes, you need to stock pencils or felt-fackers. Make it is very simple, performing the following steps:
- Create the basis for the slices - cone;
- Draw a drawn figure volume - blacksmith parallel base line;
- Draw eyes, mouth, watermelon grains;
- Decrade.
For greater realistic, you can add a shadow and light glare. You can also trust cheeks, eyelashes, blush for our slices.
Drawing is a very useful, exciting occupation. Creating a bright, juicy watermelon on the canvas will fill each of us memories of summer, picnics, outdoor walks. For this case, both professional artists and newcomers can take on, because there are so many ways to draw this wonderful berry.