Like watercolor to draw the sea. For beginners
Read also
Landscape is one of the most beautiful directions of painting. It is perfect for the development of novice artists, as it does not require such a construction accuracy as people or animals. Among the landscapes there is a special place.
Draw a picture is always easier from nature. Therefore, if you are not at sea, it will be not bad if you have a picture of the landscape that you want to draw.
Watercolor is best drawing on a special paper for watercolors attached by the stationery buttons to the board set under the tilting. Buttons will not give paper to turn around when it wureswards, but it will be more convenient to draw a tilt.
First of all, a pencil should be sketched the main contours of the future landscape. The sketch is better to make a tough pencil, so as not to leave the fat lines, which will then be viewed under the paint. Such things like the sun and clouds, do not draw a pencil at all, because they will be drawn very diluted, transparent paint and pencil lines can spoil them.
We draw only the horizon line and cliff contours.
After the sketch is made, the paper must be weted with water so that it absorbs the paint well. In addition, on wet paper it will be possible to make smooth transitions from one color to another. It should always draw from light tones and ending with dark. The brightest in our landscape is the sun, and we begin to draw from it. In addition to the sun, the brightest places in the picture is the reflection of the sun in the water and the sky around the sun.

After that, we draw a common background, paint a little darkened. Heaven, during sunset, takes all the colors of the rainbow. Some of them, such as red or orange, are pronounced, but as the color of the sky goes into blue, it becomes yellow and even green. If you draw the sunset from the bottom to the top, gradually mixing the paint, starting with the red and moving to yellow, then from yellow in blue and blue, then we will naturally get all the colors that are in the sky at sunset.
Try not to draw everything the same one color. Always mix the colors, so that the picture was picturesque, but, at the same time, make sure that the color is not too dirty. You should have a palette at hand to try color.
At the same time, we also draw the sea, because it practically reflects the sky and the sun, and there are the same colors. But, drawing the sea, we still focus only on its light colors.

After the general background is set, draw the clouds in the sky. Clouds, like the sky, can have a different shade.

In order for the clouds to be voluminous, it is necessary to divide them into light and shadow. The side facing the sun should be left bright, and the opposite to make the dark. Also, you can darken some sections of the sky so that the clouds stand out stronger.

Then switched to the sea. At the beginning, it is necessary to highlight the horizon line. Right under the sun, the sea is darker, but closer to the edges, on the contrary - the sky with clouds is darker than the sun. Since the horizon line has shuddered excess paint, it must be blurred and smeared with a tassel as a sponge.
We also leave the middle of the sea, and closer to the edges, thickening paints. So it turns out the reflection of the sun in the water. To draw the waves, dark paint should be applied with separate strokes, so that there are light gaps between them. At the same time, we must not forget that the closer, the fact that the waves are large. Small waves in Dali can be drawn by chaotic strokes, and the waves close to note more accurately. Foam waves near the shore, we will leave light.

Together with the sea, you can draw cliffs. Rocks in the distance should be a little lighter and blur than those closer to the picture looked natural.

In principle, the landscape is almost ready and remains only to draw small parts, transitions from light to the shadow on the waves and rocks. Watercolor this can be done like causing paint and eroding it.
Do not forget, the same, very important rule in painting - you need to stop in time so that you do not spoil everything.

That's all, dry tassels.
To draw seaMost of all needed mood and desire to draw, skill and talent will open in the process of work.
Necessary materials for work:
- Protsed cardboard or canvas for oil painting (in this case, a used cardboard was used 23x30.
- Mastichein and brush (№1).
- Oil paints (any firm), sky-blue, blue FC, turquoise, red, mars black, brazed titanium, gold, mars brown, red, and ararat green cadmium.
- Linseed oil or solvent.
- Palette.
Warning work on this picture - 3 hours.
Now, we will analyze the stages of oil drawing.
First of all to prepare a palette - Let's squeeze the paint, the smaller the canvas format, the less and we will use the paints. I took the format 23x30, so the paints used not so much.
Palette, previously wrapped the food film to not wash it after use.

Next stage - We make sketch on canvas, which consists of two lines: horizon lines - it is slightly lower than the middle of the canvas and the coastline. 
Next stage- We start to write with oil, start with the background.
Use for the sky:
Blue FC + Belil + Red (drop at all) + linseed oil.

Next stage - We work on the background of the sea and the coast.
We use paints of such colors:
sea \u200b\u200b- Blue FC + Belil + Ararat Green+ Linen oil.
shore - Ocher + brown (drop) + Belil+ Linen oil (if a bit falls in the colors from the sea, you can also).

Next stage– the sky is above the horizon line, the sea on the horizon line and placing the waves.
For the sky, we use such paints like Belil + ocked (a little) and rub along the horizon line in 1/4 part of the sky. Mixing, already existing color of blue sky and ocher, can give a green shade, it is even on hand, the main thing is that it was not too saturated color. Must be similar to the haze at dawn.
For the sea of \u200b\u200bthe rear background - this is the line of the horizon, we use Blue FC + turquoise.This is the darkest person in the picture, we write a mastichery, making strokes visually similar to the marine smooth.
And we plan two, three waves that converge at one point on the right.

Next stage - Draw the rear background of the sea and go to work with the middle and foreground, we write waves and sea foam.
For the waves, we use the paint tighter, as for the rear background, only maybe somewhere lighter, somewhere darker, and we write a marine foam Belil + heavenly blue (or blue FC + Belil)and somewhere Only Belil,between the waves Heavenly blue.
Foam over falling waves We write vertical lines, movement of the Mastichene from top to bottom to create movement and rhythm in the picture. And between the waves we make white stripes by the edge of Mastichene - foam from already fallen waves.

Next stage - We refine the waves and go back to the sky.
Using Kraplak red (pink) + Belil and blue FC.We make clouds and clouds, darken the sky chaotically, not evenly. And this color is Kraplak + Belil enter into someone in the waves, mixing with blue can be violet shades, trust your intuition and make the color where you will tell your creative thinking.

Next stage - I add the sky, draw the seagulls and on the right we have the clearance of the sun due to the spring clouds and the track from this light, display it on the sea.


In this world, it is quite difficult to imagine something more romantic than a sailboat, lonely floating in the waves to the meeting unknown. Of course, a journey through the sea is in itself - romance, but the sailboat is just the peak of all romantic dreams.
We are dreaming sailboats from early childhood, reading Jack London, Vladislav Krapivina or Jules Verne. But the adult man swimming even on a tiny sailing yacht will definitely not leave indifferent. When a large real sailboat with several masts, a complete set of straight and oblique sails appears on the horizon, then it simply captures the spirit.
Long before the Titanic went to the seabed, people on water mostly moved on ordinary boards with attached sheets. A unique tradition to send sheets to the sea remained to this day, the truth is already as entertainment. Nevertheless, the topic is interesting, so in today's lesson you will see how to draw a sailboat with a pencil. Sailboat - Flood-use, using wind power for moving. It is brilliant and just angrily and cheap, but in full calm is extremely uncomfortable.
The whole truth about life:
- A sailboat is also such a fish that lived among the ships for a long time and her upper fin simply mutated into the sheet.
- The best way to grab the famous sea disease is to go backward along the deck at the moment of the storm.
- The Black Workforce appeared when the first ships went down to the shores of Africa. With the wind were real problems, and the ship was still to move. Therefore, the peoples of Africa gave the oars and meaning of life.
- The sailboat usually does not swim on the ground, but when he does it, it is worth expecting a lot of victims among Civile.
Draw a sailboat easier than to build or buy, but it will still look beautiful.
On this master class, we will find out with you how to draw the sea gouache with a sailboat. So, the drawing technique is gouache.
Did not keep brushes in the hands since school times? This does not mean anything at all. Gouache drawings will be an excellent start for beginners.
Why is this technique?
Gouache is the optimal stamp material.
First of all, it is very affordable and it can be purchased in fact every step (compared to acrylic or oil).
Secondly, the water base of this type of paint makes it possible to easily vary the delicate of paint, the level of application, as well as the formation of textures on canvas.
Thirdly, the fact that gouache is absolutely non-toxic paint is very important. Thus, gouache lessons are completely safe for children and people with certain diseases and the presence of various allergic reactions.
Fourthly, such paint is quite flexibly combining some watercolor qualities and, in some cases, even oil paints, therefore, drawing a gouache will give the opportunity to work out practical skills in other techniques.
The thick consistency of the paint allows you to impose different layers on each other, while painting the bright areas with darker or vice versa. This makes it possible to make many changes in the image before it drying. At the same time, it is also possible to blur paint, dilution with more transparent layers, which gives a drawing of realistic.
It is in connection with the above-described advantages that in this lesson we will use the paint type gouache.
Place the sheet on which you are going to draw, vertically and divide it approximately in half. The top of the leaf will be a little more. Large brush Start painted sky.

White gouache draw a small moon. It is necessary to circle a bright yellow color. You can also hold a little orange.

While the gouache did not dry, add more dark color across the edges. To do this, on the palette simply mix black and blue paint.

Draw an external cloud cut.

Mix blue, white and some black paint. Add to the clouds so that it turns out a very smooth transition with a bright part near the moon.

From the inside of the picture, the clouds should be painted clouds as they reflect the light of the moon. While the paint did not dry, mix the color is quite easy. You can take a clean brush and when you assist mix two colors in which you want to get a smooth and smooth transition.

For the stars, you mix the paint paint on the palette and draw a small circle. When the paint dries, put a thin brush with a small point of white paint.
Then it should be carefully drawn with a pencil image of a sailboat.

Draw the sea gouache gradually. The sea first should be painted with uneven long horizontal smears, alternating with dark blue, blue and turquoise paint. In the foreground draw a big wave of blue-green paint.

Continue drawing the sea. Blue bright paint draw small waves near the ship itself.

White gouache draw on the waves glare. Pain the gouache sailboat. Note that the sails should be drawn with a very smooth transition from blue to white, from left to right.

On the waves it remains to draw small lambs of foam, as well as a thin brush to apply light glare. Foam, I splashed with a rigid brush gouache. Initially, it is better to practice on a piece of paper.

As a result, such a job was a sailboat that floats home through the mysterious lunar night.

Draw waves
We have already painted the waves in the example with a sailboat, but we want you to once again see how they are drawn.
Many second-graders as home to the surrounding world are invited to test their creative abilities, depicting on a white sheet paper drawing "Sea in one of his outfits". As a prompt, a junior teacher invites children a poem of famous poets, describing all the beauty of immense marine latitudes, southern sunsets and flourishing, precious shada of water and a unique foamy breeze. However, not every child manages to catch the meaning of the task, mentally imagining the picture before his eyes, and after - by portraying on a sheet of paper. Difficulties arise in two cases. The first reason lies in the inclination to the study of the main items, and the lack of time to creativity. The second reason is "misunderstanding" (no idea what is the sea). After all, not every family can afford an expensive vacation to the azure coast ... That is why in today's article we decided to give another prompt to children and their parents about the picture in one of his outfits.
What does the sea look like in one of his outfits drawing?
You can portray the sea with paints, colored pencils and even flomuses in different ways. It all depends on how much the child has been developed fantasy. To change their outfits, the sea can many times throughout the day. Therefore, there are no restrictions in creativity! Color range can vary from gentle, to extremely deep and saturated tones. It all depends exclusively from the weather transmitted on the pattern sheet. For example, the calm is dominated on a sunny day, so the shade of water may be emerald, blue and even turquoise. With a storm - dirty and even black. During sunset - burgundy, red and dark blue.
During the coloring drawing, do not limit the child. Allow it to use several shades at once. Let the picture of the sea in one of his outfits will be truly "elegant" and even a little extraordinary.
Looking at the photo below, it is impossible not to note that children often use classical solutions that include up to 4 color solutions: green, blue, white and blue, as well as all of their variations. But it absolutely does not mean that other colors cannot be used. Any shades are permissible if they are combined with each other.
Sea in one of his outfits, drawing in a photo for grade 2:


Figure based on poems of famous poets
To draw the sea in all its glory, it is enough to see examples of work and read the author's works.
How good you, about the sea night, -
Here is radiant, there is a siece-dark ...
In lunar radiance, as if alive,
Walks and breathes, and it shines ...
On the basis of this paragraph, you can make an idea of \u200b\u200bhow the sea should look like. Just imagine the night, the moon falls on the dark SIZY Sea forming the lunar path to almost to the shore itself. Stars are reflected on the water as if fireflies illuminating the sacrament of sleeping nature. Beautiful, isn't it?!

- But the sea in one of his outfits on the representation of the Dolganovian Yulia Viktorovna.
Many seas pigeons on maps -
Atlas Children will open on the desks.
Sea flowers flourished on the planet,
Colored seas exist in the world!
Even little children know that the sea is not one in the world. And most importantly, that the name is different. Red, white, black, yellow - only part of what can be conveyed in colors on a landscape sheet.

Photo examples of the sea in one of his outfits:


Additional task on the textbook "Water Wealth" Grade 2 (Workbook)
- Task number 1 - Table Water wealth of our planet
First Stage (Natural Origin): Lake, Sea, River, Ocean.
Question "How to draw the sea?" Not only artists are asked. Almost everyone who admires by sea species wants somehow to capture this gift of nature, which is as asking for canvas. Or at least in the camera lens.
Small certificate. Landscape in art is such a genre in which nature is depicted. Also landscapes are called individual pictures of this genre. The landscape may be urban - here nature is already transformed by a person to their needs, or, for example, rural. If the sea is depicted, then such a landscape is called - Marina. And artists, respectively, marinists.
So let me give you some useful recommendations. In this article, our main task is to include observation, as well as consider some laws of composition and color solutions.
1. Horizon
Do you know where is the horizon? Do not read the answer immediately, think, try to answer intuitively. Differed where the sky turns into the sea? Or where does the Earth end? That's not. Horizon - It is always at the level of our eyes. You can check today on the street, especially if you are outside the city where the horizon is visible clearly. Sit down, stand up - the horizon will move with you.
And where to position it on the sheet? In the middle? Do not. The answer to this question has long been found by artists. You need to decide what is more important (more beautiful, more interesting) - the sky or the sea? If the sea, then more place to him, and if the sky, then heaven. It is better to solve the problem of the horizon in the so-called "regulation of the third", try, not mistaken. Deliver a sheet on 3 parts vertically, spend two features. If you are more interesting to the sea, it will take 2 parts if the sky is it. Excellent example: the third part is given to the sky, the Third - the Sea, the Third - the Beach (Sand):

And here more sea:

Of course, it may also prevail the sky, especially this:

2. What darker?
Before drawing a marine landscape, the artist is important to solve the question - what's darker, the sea or the sky? And stick to this contrast. And the sea and the sky have blue shades, so the question is very important. And they decide, as a rule, towards the dark sea.

3. Drawing sky
The sky draw is quite simple - carefully look at the sky and you will understand everything. It is usually dark blue at the top, and to the horizon smoothly brightened. As in the photo from above. Therefore, just add gradually lightness into the sky, it sometimes is almost white.
4. Clouds
They are usually depicted white. First, juicy smears are usually made with white paint without water and solvent. Then, the book, they can be smoothly launched into the sky a very dry brush (another) or the bottom of the clouds to make light purple-gray. All transitions are plays.

5. Sea
The sea is also drawn from the dark to bright. At the horizon it is dark blue, which creates excellent contrast with the sky, and the depth of the space. You can simply take the blue paint, without mixing it. Then, closer to the third part of the sea, add a little emerald green and white in blue, more and more lighting and "green" water to the shore.

6. Sand.
It is sometimes not drawn, but if there is a desire ... it is better to mix a light oh with a small amount of red and white for sand. And make the transition from the sea to the sand smooth. It is possible to achieve this, set next to the smears "maritime" and "sandy" colors, gradually "interfering" one color in another.

We invite you to write as many as 4 solar marine paintings on the course.
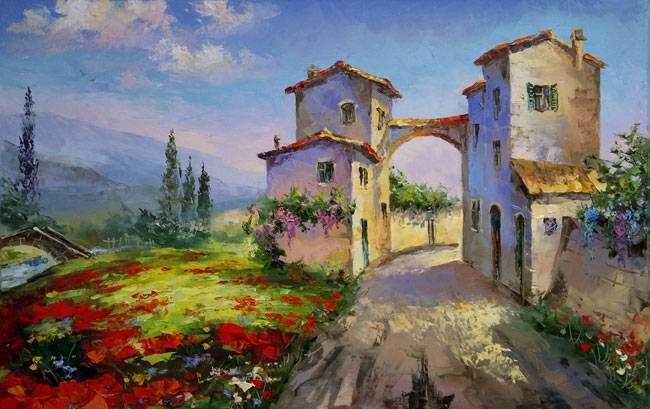
Italian landscape
Frequency of meetings: 1 time per week
The level of preparation of participants: from scratch and higher.
Ether time: 20:00 Moscow time, recording is provided the next day to all participants
Feedback: Given the teacher in all your work during the course and 2 weeks after it is completed.


Cost of participation
Four online lessons + lesson records + feedback during the course
5500 rubles
\u003e\u003eCheckout
It is expensive?
Let's see. The cost of full-time painting lesson in Moscow - from 1500 rubles. Add to this time and money that will go to the road. And also the need to go somewhere in the evening after work or negotiate with grandmothers, husband or nanny, to have looked after children.
Another thing is to pour yourself a cup of tea, take close to anything interesting or arrange close to tassels and paints, and draw. Online lessons help do what you want and when it is convenient for you. So much more pleasant, right?