Anime: Draw the body. How to draw a male body in anime style how to draw anime female body
You just imagine how much lessons came about anime, but the style of them as always does not change. Here I will show you how it is draw anime body Stepodno, as well as in full growth step by step by a simple pencil, it is drawn simple, and it is not required to use any new bindings.
The name is the name of Yun, she is a great fighter, she is only 19 years old and she has two multicolored eyes. She owns a perfectly staff and two powerful pistols that all this can be noticed in the picture below.
Simple pencil phased and colored pencils.
Draw anime the body stages:
Step one. We start drawing a sketch of the girl's body, then draw a big oval for the head, then vertical lines for, body and lines for pistols.

Step second. We turn to drawing hairstyles on the head and the back of a big braid, then draw hands with guns and straighten your feet with a dress.

Step Three. Improve the face and hair with a pencil, then draw small details to weapons, legs, dresses and torso.

The Japanese style of drawing - anime uses wide popularity in adults and children. Many would like to master this technique.
A lot of guides and tutorials were issued on this topic aimed at achieving a single goal - stepwise teach a person to correctly perform the drawing, first with a pencil, then paints.
The art of Anime arose in Japan at the end of the sixties of the last century and was originally used exclusively in animation.
With the introduction of modern technologies, it became possible to quickly and easily create a computer graphic image, but also the fans of the man-made genre still remained.
Consider how to learn to draw in the style of anime one or another drawing from scratch.
How to learn to draw in anime style from scratch?
A heavy and intricate pattern with a detailed analysis turns out to be completely simple.
To master the equipment of the Japanese drawing, you should be patient, to show perishability and, adhering to the methodology in the manual, to gradually develop an anime from scratch.

To begin with, it is necessary to prepare and familiarize yourself with some requirements shown in the table:

- His Apply a sharp pencil, correctly performing hatching.
- First stage - Application contour. To this end, it is originally used by a ruler or a student notebook, making sketches through the cells.
- Selected Details of the pictures are depicted close from each other, otherwise there will be no integrity.
- Hatching Performed at a minimum distance of lines, preventing departure from parallelism.
- Shadow Apply by rubbing an accraved toilet paper or dry finger.
- Caution Working an eraser using only soft. It should be remembered that it is impossible to draw a beautiful drawing on the damaged surface of the paper.
- To Remove the extra touches or drop the shadow of the pattern, use the special erasing mass, externally similar to the plasticine.
It can easily cope with the task. If you do not have, you can apply bread crumpled.
After reading the main rules of the anime technology, proceed to the drawing itself. Do not immediately take on the performance of a complex composition. You should always start with the simplest.
The main thing is to correctly put the hand and learn to perform simple figures.
Gradually, the understanding of the picture technique will come, a hand will be brought and it will be possible to try the elements more complicated: fabulous heroes (in anathetic or profile), nature, cars.
Last but, postpone the skills, begin to image portraits of people. This is a very difficult task, especially if you want to express human emotions with a kiss, anger, joy and other feelings and states.
How beautiful to draw anime face?
Beautifully depiction a person's face - the task is not from the lungs, but strictly adhering to the proposed leadership, it will become simple and pleasant.

Phased instructions for performing a person's face drawing:
- Circular Draw a circle - it will be a head.
- Obtained The circle is divided vertically in half.
- Located The center and the vertical marking axial line is performed.
- Everyone The resulting vertical area also divide the segments.
- TOTAL: Three vertical lines. They are needed to correctly draw eyes, hair and forehead.
- Best To applying a person.
To do this, it will be necessary to extend our circle for two thirds down, catching vertical lines on the lower segment on both sides to a height equal to the declared length.
The average vertical line should be extended until the end of the segment.
- Obtained Segments split vertically: the first - the final bottom point of the circle, the second - the end of the stated markup, in the middle - the axial.
- On these Plots will be located the nose and lips of a person.
- Start To face forms. From how we derive them, the type of character depends.
To do this, starting with the bottom horizontal line of the circle, we deposit two vertical at an angle convergent at the bottom point of the middle vertical line, depicting the letter V.
- Before, How to start painting your eyes, you need to make sure that they will be evenly located on the face.
Eyes can be wide open, or depicted in the form of a curved line. Different variants of the image of the eye countless, smoothly, as well as ways to perform.
- In the bottom Circle separation draw nose. The form depends on what character will depict. The main thing is to make it a symmetrically central vertical axis.
- Mouth and lip. Applied strictly under the nose, without getting beyond the scope of the resulting letter V.
- Follow Stage depicts cheeks. From how they were drawn, it depends, the character will be thin or thick.
They are performed symmetrically axial line from the lower angle to the top of the lines adjacent to the circle.
- Ears The character is located in the upper sections of the rectangle adjacent to the circle. They must be at eye level.
- Best To the hair. They should begin with the intersection of the upper horizontal line with the average vertical (axial).
The configuration is automatically set depending on the type of character.
- Necessary Pay attention to the eyes, drawing a rainbow shell, pupils and glare, if this requires a drawing.
Anime - Creativity of the Soul. From how you place the line relative to a friend, which bend will prefer, the type of the resulting person and the character depends in principle.
How to statenly draw anime a girl in full height?
If you decide to draw an anime girl in full growth, it should be borne in mind that the drawing should have a similarity with a living person.

Therefore, it is necessary to follow the following sequence:
- First Draw a collar line along with the spine, shoulders and legs. Here you can immediately decide whether there will be a picture in the dynamics, and decide on the pose.
- Further Skeleton is pounced thin lines - this is a schematic image with circles in the location of the joints and other parts of the body.
- Head. It is drawn, as mentioned above. But you need to remember that the features of the face in the figure should be expressive, the eyes are large.
- Hair. Any hairstyle is selected and executed according to the previously specified rules.
- Schematic The image is described by real forms, but do not forget that the girls have a great grace, compared with the guys, therefore a slim waist and magnificent hips are removed.
Special attention is paid to the chest - it should look as much as possible.
- Selects Clothing - It can be a beautiful dress or a slim suit, a choice for you.
- Limb Girls are always thinner than a man. It should be remembered that hands and legs cannot be perfectly smooth - it is necessary to perform bends.
- Picture Stop and hands. Do not forget to allocate elbow and cranky joints.
- Auxiliarylines are erased - this is completed.
How to draw anime animal pencil?
Anime - Universal drawing technique. Having learned to depict anything one and having mastered the technique, you can draw anything.

Especially interesting to teach children such a technique on the example of drawing various fabulous characters and animals:
- Wolf.
- Dogs.
- Pony.
- Angel.
- Foxes, etc.
We will analyze this drawing technique with a simple pencil for beginners on the example of a cat:
- First you need to draw a big oval - it will be an animal head. It is placed on the same principle as for humans, auxiliary lines, with ears, eyes, nose, mouth.
- Next, the ball has a smaller, directly intersecting with large in the neck area is a housing. Paws and tail are outlined.
- It must be remembered that the eyes of the cat are large and located symmetrically axial line; In the middle of it, just below, a round nose is drawn, the ears are performed behind the upper boundary of the oval and have a pointed form.
- It remains to decorate the resulting kitten with luxurious mustes, fluffy wool, adding drawing with bright colors.
Any drawing, and even more so anime, is an exciting pastime not only for children, but also adults. Learn, draw and enjoy.
Useful video
In this lesson, we will analyze the basic rules for drawing a figure, also consider: the proportions of the human body in the FAS and profile, the structure of the muscles and the balance of the body.
Ideal body proportions are used to study anatomy, which is one of the important stages of the learning process. body drawing (It simplifies a very difficult subject for students). However, this does not mean that ideal proportions must be observed all the time, since they are slightly different from reality. After you understand the basic principles, you will be able to develop your own style, - but I do not recommend running forward. Understanding the basics, first of all, is the key to know how to change body proportions, not distorting it.
Before drawing the human body, first, it is necessary to make the sketch of the main volumes. Circles and lines. Note gestures and body position. Never start detail the details from the head, and then gradually fall down. It is necessary to work with the whole figure moving from a rough form to small parts. This will help clearly see the proportions of the body and prevent an error in time before you spend too much time on the details, and ultimately you can not change anything else.
For clarity, the following phases of the body drawing are shown below:
II. The proportions of the human body
The unit of measuring the human body is a head. In Western art, men usually have 8 heads in height, and women have a little less, 7.5 goals. In fact, the structure of a person is usually closer to 7 heads, not to mention other types of structure, because the proportions can be the most different.
However, the 8 -head model (shown in the figure) is very useful for beginners, because it makes it easy to remember the main parts:
- Head;
- Nipples;
- Navel and elbows;
- Crotch and wrists;
- Fingers and hips;
- Bottom of the knee cups;
- Lower part of the icy muscles;
- Soles feet.

Female body structure:
The main differences between the male and female proportional body are described below.
- The torso consists of an oval, a soft form;
- The shoulders are already hips (hip joints are outside the pelvis area);
- Elbows at the waist level;
- Fingers in the middle of the hip;
- Feet cone inside from the hips (more pronounced cone than in men).

Male body structure:
- Elbows at the level of the waist, but the waist of a man looks significantly lower;
- Fingers in the middle of the hip;
- Feet cone inside from the hips (less pronounced cone);
- Men are usually higher than women;
- The torso consists of a trapezium, angular forms;
- The shoulders are wider than hips (hip joints are inside the pelvis area).

III Small reminder
Here are several picturesWith which you can remember the proportions. Visualization will help you when you come up to the scaling of the joints and limbs.
The knee level is equal to the level of the elbow, and the level of the fingers is equal to the level of heel.

From the shoulder to the buttocks. Shoulder on the same level with the knee, the fingers begin on the level of the buttock.
At heels never protrude berries.

The palm of the hand is reached to the shoulder.

When the hand is bent, the palm size is placed from the wrist to the fold of the hand.

When the hand is extended, the size of the foot is placed from the wrist to the elbow.

Proportions of hands and feet relative to the male and female face
- Male face (feet and palm occupy most of the face).
- Female face (note that the feet and palm occupy a smaller part of the face).

In the lower figure (drawing with head), all measurements will be equal to the distance from the end of the thumb to the end of the index (drawing with hand).
- pupil to pupil;
- the inner angle of the eye to the outer corner;
- hair line;
- eyebrows;
- the chin.

IV. Muscles
Understanding the muscle structure gives a huge advantage in creating a human body. Therefore, in this section we will look at some structures. And despite the fact that the description will be simplistic, it will be enough for most drawings. Muscles or protruding bones will be shown as areas of different colors, black outline - muscle line, which is visible on the body. In order for you better figured out, the muscles on the examples are pronounced. Therefore, remember that such a structure is mainly found in athletes, and the muscles are less pronounced among ordinary people. Also remember that the muscles have more elegant and less bulky than men.
Torchishche
Front view:
- Superior muscle;
- Bones of the clavicle;
- Deltoid;
- Chest;
- Press.

Back view:
- Deltoid;
- The widest muscles of the back;
- Delta.

- Neck should not be like a straight cylinder.
- The shoulder line should not be a straight horizontal line.

- To the bottom of the neck narrows
- The transition from neck to shoulders is drawn using a trapezoidal form.

Hands
The very role in the behavior of the muscles is played by her position itself, so I propose to consider different types. Please note how muscles appear in different situations.
Straight hand bent palm (inner side)
- Wrist beam flexor;
- Radiation extensor wrist;
- Elbow \\ "peak \\";
- Round Pronator;
- Line of transition to the body.

Relaxed (outer side)
- Delta;
- Biceps;
- Triceps;
- Extensors.
Bent (outer side)
- Gets the volume if there is resistance, for example, if the hand holds something heavy, and triceps;
- Gets the volume if the hand makes effort to break anything;
- The forearm begins with a large volume and partially narrows.

Pay attention to the alternation of the changing line of the hand.

- When a person stands, hands do not hang straight. Pay attention to the link line and the back of the neck.
- Consider how the hand changes when you turn the palm.

Legs
- Medial wide thigh muscle;
- Straight muscle thigh;
- Sartorius;
- Patella;
- Ionic muscles;
- Front Tibra Muscle;
- Front muscle;
- Long finger extensor;
- Adductor;
- Muscle Muscle;
- Achillovo tendon;
- Ankle bones;
- Biceps.

Bending foot
- Biceps clearly visible during bent leg (inner side);
- When transferring weight to the leg, the straight muscle of the thigh increases (inner side);
- At the tension of the leg from the inside, the front tibial muscle strains is strained, and at the strain of the legs from the outside, the ion-colored muscles strains;
- When the power does not affect the leg, it is in a relaxed state and, accordingly, the muscle line is smooth (outer side).

When the leg stands straight, its lower part is strung back (side view) and outward (view directly).

Vi. Body in profile
Drawing silhouette to the profile begins with a conventional skeletal structure:
1. Shoulder joints are slightly distant from the spine, and are not on the same level with it, because \\ "line \\" shoulders in the form of an arc.
View from above:
Shoulder joint
Center of the Spine

2. The center of gravity of the body is below the navel, inside the body. The body is most balanced when this point is on the balance line.
3. The hip joint is connected with a knee ankle line under a small angle, so that the knees would fit with the center of gravity. If you look at the silhouette of a skeletal structure, then the arc passes from the head to the feet. However, such an arc is observed from straight people, and in our time many are stolen.
4. The spine has a curved form similar to the letter "S". How strong this curve depends on the person.
5. The top of the bend of the spine, which comes forward, is between the blades.
6. There is the opposite top of the bend of the spine, which acts inside and be slightly higher than the pelvic bone.
By occupating a chest and pelvic bones, you can create an individual figure by overlaying lines of different values.

1. Bending backs in women are more curved and more flexible than in men.
2. The stomach in women most often has a smooth bending, while men have a tendency to flatness.
3. Similarly, the women's buttocks are rounded while men are flatter.

VII. Chest
To draw the chest, tick the nipples inside the body loop, and then add the volume.

To draw a breast with the side, draw a circle, with a center on a horizontal line, which denotes the nipple level.
- Here you can show a small line to show the volume.
- The lower half of the circle corresponds to the bottom of the chest. The upper part of the chest is drawn by a small bend emanating from the nipple to the neck.

Breast shape begins in the axillary bending. She either bulges (large breast size) from it either has a small wpadink (with a small breast size).

On this figure You can clearly consider the connection between breasts and biceps. The bending of the armpits goes into the chest, although the bowl of all part of this line is not drawn (designated by the dotted line).

The proportions of the perfect breast, on Western standards:
- The recess and nipples are connected to an equilateral triangle, where the parties are about 20 cm.
- Areola diameter 3, 5 to 5 cm
- The ideal proportions of the bust are considered when the circle on the nipples by 15 cm is larger than the trigger of the chest under the breast (for example, 90 - 75 cm).
- Only in artificial chest there is a volume!
- The tips of the nipple sticks out slightly in different directions.
- The chest goes beyond the chest line 1 to 3 cm.
- 1/3 of the volume of the breast should be above the Aresol, and 2/3 under it.

For such an effect of breast compression, either a special bra, or artificial breasts in the shape of balls, is necessary.

Natural position. Distance between breasts from 1 to 3 cm.
Japan is a highly developed country whose technology is ahead of time. The visiting card of Japan, in addition to reliable cars and advanced technologies, performs anime. This variety of animation is popular in Asia and in other regions of the planet. It is not surprising that many are interested in how to learn to draw anime from scratch.
If you want to master this occupation, pay attention to my article. It will find useful tips and phased recommendations that facilitate the creation of anime drawings. If you did not attend art school, manifesting and patience, we will master this technique.
- Pick up the tool. We are talking about griffins and pencils of various hardness. Three different styles will be required, which are sold or in a rim of wood, or in the form of rods intended for mechanical tools.
- Alternatively, buy a set of graphite sticks covered with a special layer. With their help, make quick sketches and easily shake large surfaces.
- Do not do without a good elasty. Better soft model. Otherwise, during operation, the upper layers of paper will receive damage and "injury". In order to maximize the risk of such an event as much as possible, it is recommended to apply contours with thin lines.
- They draw anime sharply sharpened pencils and stylitis. Be sure to buy a good sharpener. Having collapsed, learn how to sharpen the tool with a knife.
- The proper performance of the hatching involves the use of a hollow sharpened tool. It accelerates and facilitates the task. True, this time does not focus on this moment. The newcomer is allowed to do as convenient and easier.
- Mastering art Start with drawing contour drawings. To begin with, several works do linearly, applying light shadows in certain places. It turns out a kind of fast sketch. Over time, the movement of the hand will become confident, and be able to pay more attention to the black and white drawing of the picture.
- The hatching is much more difficult to master. Elements draw as close as possible to each other. Otherwise, the integrity of the object will violate and the impression will appear. Initially, learning to rub the traces of a pencil can be mild leaf or finger.
- In the process of stroking the drawing, be sure to ensure that the distance between the individual strokes is minimal. You can not use crossed under the large corner of the line.
- Newbies make mistakes. Fortunately, the pencil is easily erased, only extremely careful. Otherwise, paper will be very damaged or a certain part of the work will be folded. Remember, put a new layer of graphite on a damaged surface is difficult.
- If you want to remove a large number of hatching or slightly weaken the tone, use a special mass resembling plasticine. It is characterized by the ability to easily choose excess graphite. If it is not at hand, take a chick of bread.
You got the first idea how to learn to draw anime from scratch. If I really like to draw, the occupation will become a hobby. Experts advise to start learning from simple projects, gradually increasing complexity. The species of the plot play a minor role.
The beginners are not recommended to use complex motives consisting of a large number of elements. To begin with, train on ordinary items and compositions. We are talking about fruits, vegetables and objects of a simple form. Looking at the video below, get a visual representation.
Video training and phased lessons
Over time, switch to more complex plots and learn how to draw animals, buildings and equipment. Lastly, proceed to drawing people. Draw a human face is not easy, and the image of human emotions is a completely difficult task.
The secrets of drawing anime pencil
Japanese cartoons, whose popularity is difficult to overestimate, always famous for the good plot, the active development of events and bright heroes. After viewing such a multiplication film, many people have a desire to master the art of drawing.
In this part of the article, I will tell you how to learn to draw anime pencil. Following my algorithm, draw beautiful drawings, having a sheet of paper at hand and several pencils. As an example, I will give a car drawing technique consisting of several stages.
Before consider step by step instructions, I note that Japanese drawings have certain technical nuances. In particular, the anime drawing is characterized by different from the rest of the genres of face drawing, eyes, nose and mouth. As the outlines of the face have an approximate form and are complemented by large eyes, draw them easy.
- Primary contours . Correct the contours of the picture correctly, and only after draw the main contour of the little boy. To facilitate the primary contour stage, perform from rectangular shape figures. The main thing is that they correspond to the size of body parts.
- Head . Draw a rectangle for the head, and under it, depict another rectangular shape for the neck. Starting from the neck, drew two arcs denoting shoulders. After spending the line for hands and put the circles on their center, which are destined to become elbows. Draw hands easier with rectangles and lines.
- Draw oval faces . In the genre of Anime, he resembles a conventional rectangle connected to a triangle. These geometric shapes draw together, and then delete the connecting line. The result is a friend made in Japanese style, which is characterized by a narrow and sharp chin. It will be left to add a few elements of a fashionable costume.
- Elements . The next step involves adding to the figure of various elements. With the help of an eraser, remove unnecessary contours and lines and proceed to detail the pictures. Purify the final form using the initial lines. Over your head, apply an arcuate visor along with the base for the cap. Also draw hair contours and ears.
- Start handling hands . Using the initial contours, hands neatly out. Then draw the collar and mark the legs. If within the framework of this stage, it will be possible to achieve the right proportions, it means that you were able to successfully complete this difficult process.
- Main details . As part of the final stage, special attention is paid to the main details of the picture. We are talking about eyes and face. Eye should have large sizes and large resin pupils. Add a small nose and a small mouth, resembling an inverted triangle.
- clothing . We pay attention to the boy's clothes, providing it with buttons and pockets. Additionally, work the T-shirt, draw gloves and complete work on triangular hair.
- Coloring . At the end, paint the drawing by making it bright and contrast. Since we draw anime with a pencil, it is enough to sharpen the drawing by adding bright shadows.
If you want to draw anime comics with a pencil and build a career in this industry, my instruction will help start. If you track news and learn, mastering various techniques, bring skill to a new level.
Draw Anime Eyes - Phased Instructions

People with great pleasure browsing Japanese cartoons. Some have a desire to draw something similar, plans and plan appear. They draw your favorite heroes, devoting a class of free time, but in most cases the quality of the drawings remains low.
The hardest thing to draw eyes is the hardest. Therefore, how to learn to draw anime eye, I will pay special attention. I hope with the help of my tips you draw beautiful and expressive eyes, which will allow, for example, to prepare for the new year, creating interesting gifts.

- Eyes in anime are of different shapes, size and color. Picture the arcs of the eyelids, and after spend two guide lines that must be intersecting. It is better to make guide lines a bit curved and the most thin.
- In most cases, the iris occupies a huge part of the eye. Instead of a circle, boldly paint the oval. Denoting the pupil, remember that the size determines the feelings of the hero. If the pupil is small, the hero is scared. As part of the stage, it is not necessary to highlight the pupil. Let's do it after drawing glare.
- Most often depicts one glare. Alternatively, draw some small glare, placing on different sides. Only after drawing glare make the pupil bright.
- In Anime, the number of eyelashes is small and in most cases does not exceed 7 pieces. Most often, they are depicted by the arrow, be sure to highlight the upper eyelid line, due to which the eyes become bulk and convex.
- The eyebrows do not draw in detail. However, they must be present at mandatory. Otherwise, you will not make the eyes of your cartoon hero expressive.
- Many newbies have issues related to the shape of the eyes. In most cases, this is a semicircle. The upper part of the eye is represented by a practically straight line, and the lower part is the perfect semicircle.
- Eyelashes paint the overall arrow, bending down or up. The direction of bending determines the shape of the eye. If you depict several cilias, large place in the upper eyelid, and small ones on the bottom.
Make an anime eyes alive and expressive with the help of oval glare by arrange them at the edges. You can use vertical or horizontal glare.
Video lesson
To underscore the main highlight, use a triangular glare with an angle elongated to the center. Often, both round glare are used that paint main or auxiliary. It depends on the style and preferences of the author.
Draw anime body

Continuing the conversation about the Japanese animation, we'll figure it out how to draw anime body at home. At first glance it seems that this is a complex occupation. In reality, everything is different.
Japanese animation differs from cartoons created in other states. It is focused on adolescents, and adult people. For this reason, multiplication films are quickly gaining popularity that has long been comparable to the popularity of the best New Year films.
Drawing the heroes of anime and the background, which unfolds events, is very different from the cartoons of other countries. In most cases, anime is a multi-veneer television distributed by optical drives. Recently, Japanese cartoons began to appear more often on widescreen screens.
After watching the Japanese cartoon, many people appear a desire to master the drawing anime. The main points relating to art, we have considered. It is time to talk about the drawing of the body.
- To achieve the goal, first of all, learn the proportions of the body and read the process of drawing it in Japanese style. Japanese Like distort the proportions. Many animated heroes that have certain parts of the body are disproportionate are bright evidence.
- The female figure of the Anime Master is depicted stretched, complementing with thin legs and an aspen waist. Men's figure is characterized by broad shoulders. At the same time, the sizes of the head do not always correspond to the size of the body. Perhaps this lies the secret of the attractiveness of images.
- The human figure is black in two points connected by the vertical, which means the center. Spend the lower and top line, and the central vertically divide into eight equal parts. Using the line to make it easy.
- Then draw the oval body, round pelvis, head and legs with hands. To revitalize the pattern of body parts, place on a slightly curved arc. This will demonstrate that the character, which depict, is moving.
Over time, it turns out to master the drawing technique of various parts of the body, which is used by Japanese animators.
Video instruction
Many newbies begin to study drawing from anime style. Such drawings look simple and attractive. However, to draw anime character from scratch, you need to know the proportions and understand how the body is arranged. And in order to draw anime-people from imagination, you need to know the foundations of anatomy. So this is not such a simple task, as it may seem at first glance! But in this lesson I will show you how to draw in the style of anime.
You will learn the basics of drawing tel. I will also teach you to pick up the position and follow the proportions. In the first part, we draw a simple "carcass", and in the second - draw muscles.
The lesson is very detailed and designed for newbies, so you should not get confused.
Body proportions in anime
Anime characters have no strict proportions and each artist has its own style. It is almost impossible to write the ideal set of rules for building tel. However, there are some universal techniques that will help create a harmonious character:
- As a rule, the body at anime character can be divided in half exactly at the crotch level. Sometimes the lower half makes more so that the legs seem longer, but they are extremely rarely made on the contrary - shorter (a).
- The length of the hand (above the elbow) is equal to the length of the forearm + palm (B).
- The distance from the crotch to the middle of the knee is equal to the distance from the middle of the knee to the ankle (C).
- Men above women, and men's breasts and hips are the same width. Women have a little differently - the thigh is wider, and the chest is already.
Remember these simple rules! Believe me, it is much easier to draw with them than to calculate the growth of heads every time. How are you going to start drawing in anime style if you know just how the final result should look like? Let's start from the head, then add six more and a half goals and somehow turn it into a dynamic pose? As for me, this method of measuring proportions looks ridiculous. Let's better show you your simpler way!
Step 1
To draw anime character, we need any reference. Even the professionals enjoy them, because it is very difficult to draw a realistic posture, using only imagination. You can use a special puppet for drawing or pick up a photo on the network. I used a picture with two boxers, but on the ENVATO Elements website (https://elements.envato.com/photos/tagged-fighter) there are many other options.
Featuring a reference, determine the main lines that set the pose dynamics. If you need to simplify the entire character to one line, how would she look?

Easy and fast movement spend a line.

Step 2.
Easy, isn't it? Let's add the first line new. Usually, the legs go further. Repeat quickly and easily, without stopping on the details.


Step 3.
Now hands! Do not think now about their length. It is much more important to "catch" the dynamics of lines.

Here you may encounter the first problem - where to draw shoulders? In fact, it does not matter. The main thing is that between them there is a distance, and everything else we will straighten later!

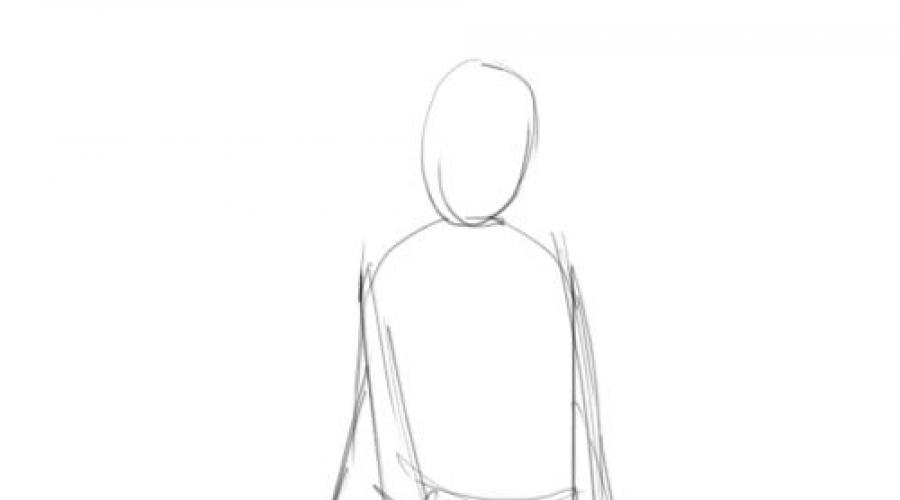
Step 4.
Now draw your head. We place it next to the main line of posture. Head size will allow us to fit the sizes of other parts of the body.

Step 5.
Remember the rule of halves? We approximately know where the head and legs ends, so we can outline the middle of the body - it will be the perineum of the character. Of course, you can freely adjust the proportions depending on your idea!

Step 6.
In the form of an hourglass, add the chest and hips. Here you can play with proportions and create a more stylized character. One of the heroes will be a piled man, and the second is a young sports woman. Please note how now the shape of the "hourglass" hints into the figures of heroes.

Step 7.
It's time to remember the remaining rules. We plan anklet, then crotch and in the middle put the label for the knee. We also determine the location of the elbow and mark the end of the palm.

Step 8.
We connect the labels and draw "bones". Do not try much, the lines should not be perfect.

How to draw in the style of anime: body
A simple "frame" is half the work. Deciding with proportions, then you are unlikely to be wrong. But the right skeleton of the character is just a skeleton. It needs to be filled with muscles to create a full-fledged body.
The body in anime can be depicted with the help of simple forms - spheres and ovals. But it is important not to forget that these figures are also three-dimensional objects that are distorted in perspective.

Let's look at each body detail separately. The torso is still similar to the hourglass. The main thing, do not forget about the inclination of the chest relative to the thighs.

The limbs look more difficult, but you just need to figure it out in their device and then it will be easier for you. Do not forget about the joints!


Step 1
We now turn to practice. To begin with drawing a torso. Carefully pon the perspective under the poses of the fighters. In anime, such dynamic poses are rarely painted in normal form in front or side.

Step 2.

Step 3.
In the form of oval add muscles. Pick their shape and size under the style of the character. The man's character will look like a big muscle pile in opposition to a slim woman.

Step 4.
At the end, add buttocks, crotch and chest.

Draw the torso and chest character
Having finished with the body of the body, we can proceed with the drawing of parts. Even if you do not plan to show certain details of the muscles, anatomy still affects the appearance, so let's consider the structure of anime-tel in more detail.
The torso is easiest to draw, because it has large and clear muscles, which are not particularly deformed when moving. Be sure to schedule cubes on the press and breast muscles.

Step 1
Let's try to simplify the muscles to the basic lines. To begin with smooth lines draw the waist. In women, she is narrower.


Step 2.
The chest horizontally can be divided into several departments: the upper and lower part of the breast muscles, the lower part of the ribs and the navel.


Step 3.
The central vertical line looks directly in the form of the front. From other angles, it outlines the shape of the muscles. Immediately under the navel there is a small elevation, which in women is stronger than.


Step 4.
Draw muscles of the abdomen. Breast muscles go under armpits and lightly overlapped by muscles. This is reflected in their shape.


Step 5.
Position of nipples can be determined by spending from the center of the clavicle diagonal lines down. The side muscles also create a relief that can be conveyed if you follow the direction of the ribs.


Step 6.
The neck is quite direct: from the center of the clavicle draw a line up to the level of the ears, then add volume. Do not forget about the blades on the back.


Step 7.
The muscles of the back are large enough and just arranged. The top has the shape of the air snake and supports the neck, and the lower is in the form of the letter V and connected to his hands.


The simplified version of the body with all the auxiliary lines is shown below. As you can see, despite the simplification, they clearly demonstrate the muscles of the body.

Step 8.
Some difficulties may arise with breasts. Instead of drawing balls attached to the chest, we draw a soft mass to which gravity applies. The chest does not have any definite form. It changes depending on the body position.

We start drawing from simple spheres of the desired size. For a more natural effect, placing them within the chest at a short distance from each other.

So that the chest looked symmetrically from any angle, imagine that it keeps on the neck with the help of "suspenders".

Since on my drawing, a woman has one hand bent in the elbow, I raised the appropriate chest, as it slightly pressed to the body.

Step 9.
Nipples by placing the same principle as a man's character. But we lower them slightly lower and closer to the center. Lines from the center of the clavicle and the nipples will help create the right shape of the top of the chest.


Step 10.
To more clearly see the amount of the chest, let's add two lines under the nipples forming a triangle.


This is how simplified pattern looks like with auxiliary lines.

Above, I said that the breast can change the form depending on the situation and it is important to take into account in the figure. In the natural position, the chest extremely rarely have a rounded form, only if they specifically lift or press each other, as shown in the figure below.

How to draw legs in the style of anime
Feet consist of a variety of muscles of different shapes, lengths and directions. They are very difficult to remember, but fortunately, we do not need it. You have enough to know how they affect the common shape of the legs.

Step 1
Our task is to find rhythm in motion and pose, and then display it using a smooth curve line. Let's start with the line in the form of the letter S, which is clearly visible in the side of the side.


Step 2.
We add a couple more mirror reflected lines:


Step 3.
The front and rear view have a slightly different rhythm that we plan new lines:


Step 4.
Draw a long line in the form of 3 form.


Step 5.
Almost done! Add the buttocks, teach the shin ...


Step 6.
... and other additional details. I think it is also important to outline the basic shape of the knee, ankle and bone of the lower leg. This can be stopped. Or continue if you draw a superhero with muscles on each body centimeter.


Below simplified scheme with auxiliary lines.

How to draw hands in anime style
I will not lie, the hands are the most complex part of the anatomy, because they consist of a variety of muscles that are very mobile and form a large number of poses. But they can also be easier!

Step 1
First you need to pay attention to the forearm. Its form varies depending on the turn and position of the hand. To better understand what I am talking about, turn the inside of your palm up and look at your forearm. Between the thumb and the outer part of the biceps there is a small rounding, and between the little finger and the elbow - the hand is more smooth. This is a basic form that does not change, regardless of turning and hand position.


Step 2.
Muscles hand covered part of the blade from behind and part of the chest muscles in front like a lid.


Step 3.
Biceps and triceps are on opposite sides of the hand. Elbow can be seen on the side of the triceps.


Step 4.
When it comes to drawing the forearm, we will need only two main muscles that will allow us to transfer the right form. The first one of them, which goes on the side of the thumb and creates rounding ...


Step 5.
... And the second starts in the same place of the top of the hand.


And simplified scheme with auxiliary lines.

Having finished, draw the final contour. The advantage of using auxiliary lines is that you can still at the study of the figure to notice errors and immediately correct them. Then you will not have to spoil the pure final outline and change something.

Now you know how to draw in the style of anime. You learned to determine the dynamics of postures, work with proportions and step by step using the auxiliary lines "Build" a full-fledged character. That's all! Pleasant creativity!