How to make cartoon
In order to make a cartoon, first of all, you need to have such qualities as fantasy, patience, efficiency. The ability to draw, artistic skills is already, in my opinion, secondary, because the creation of a cartoon is not even very large, the process of time consuming.
Nowadays, there are mass programs that will significantly automate and accelerate. These programs have serious shortcomings, the main of which is high cost and complexity for studying.
If you are not a professional multiplier, you are unlikely to purchase and long study programs - Monsters animation. They certainly have a lot of opportunities and the final product can be obtained at the highest level, but in a couple of evenings you do not master them and you can only repel all the hunt to continue.
That is why I suggest you pay attention to a simple program to create 2D cartoons, the study of which takes 5 minutes, while you can feel like a real multiplier in a classical understanding.
The program is called Pencil, it is free and downloaded on this site - http://www.pencil-animation.org/.
In principle, even without leadership and any explanations, everything is intuitive there, but I still give a brief description of the main elements of the interface, as well as make a small video about creating a short cartoon in Pencil.
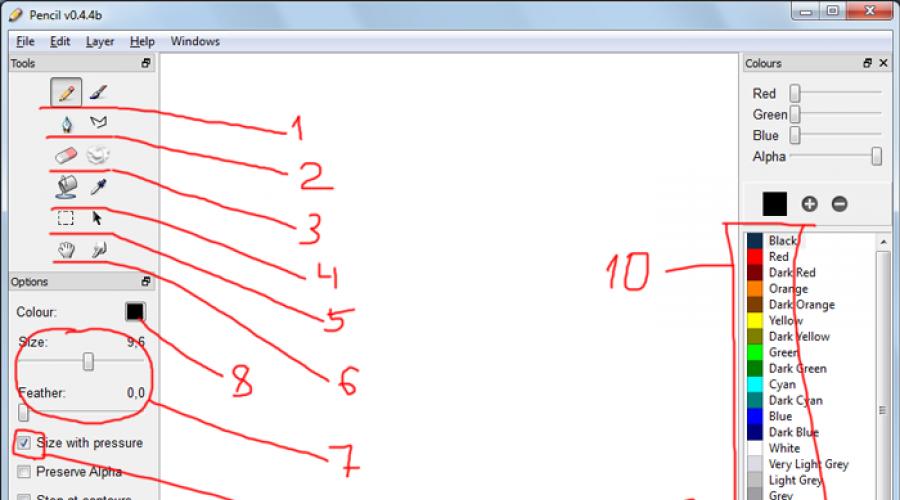
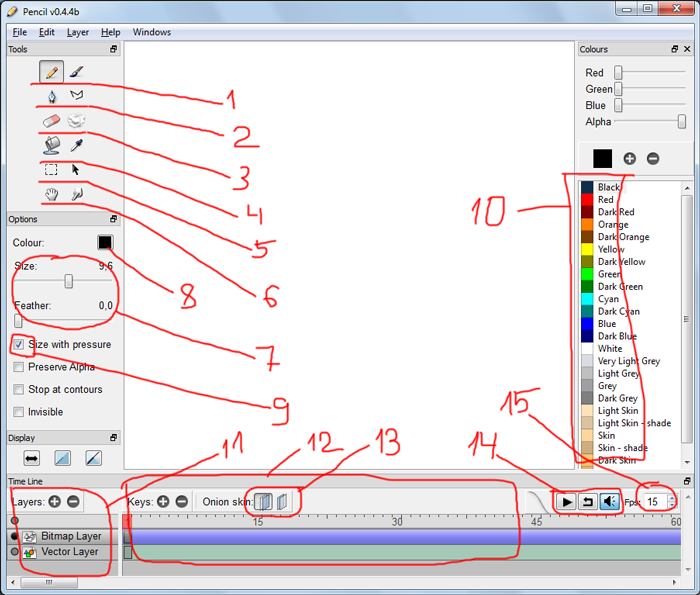
Overview of the main elements of the program interface for creating Pencil cartoons
- Pencil and brush are basic drawing tools. Act the same as in all major graphics programs (for example photoshop). The brush is different in that it is possible to set the magnitude of the blur.
- Feather and broken - serve for more smoothed drawing - as well as on the vector layer they can be drawing.
- Elastic and crumpled paper - for erasing. Elastic erases locally - acts like a brush. Crumpled paper erases everything on a sheet.
- A bucket and pipette - the bucket performs the casting color of the closed circuit, the pipette assigns the color of drawing according to the sample.
- Selection and arrow - selecting an object or part of it, and arbitrarily move the selected arrow.
- Hand and finger - Hand arbitrarily moving all the image on all frames. Finger edits vector objects via nodes.
- The size and blur is the size (diameter) of the brush (pencil) and the magnitude of the blur at the edges (for the brush only).
- Current drawing color.
- This option includes / disables the dependence on the strength of the thickness of the stroke / saturation for the brush / pencil, respectively, works only for.
- The color palette - serves to assign a specific color to the current drawing color.
- Layer panel - serves to create / remove new independent layers. The layers are 4 species: raster, vector, sound, layer - camera.
- Time scale - Displays frames and time. Buttons +/- create / delete new key frames.
- These buttons are made visible previous frames - that is, they include the pattern of the tracing. This allows you to more accurately draw the following frame relative to the previous one.
- Video playback management elements. The curved arrow turns on / off the endless playing of the roller.
- The number of frames per second for your cartoon.
Look below, see a small video about how to make a cartoon in the Pencil program.
Leave please comments and questions! Please click on the social networks buttons!