How hard and soft pencils are labeled. Pencil hardness designation
A pencil is a graphite rod in a wooden frame made of soft wood, such as cedar, approximately 18 cm long. Graphite pencils made from natural raw graphite were first used in the early 17th century. Prior to this, lead or silver rods (known as silver pencils) were used for drawing. The modern form of a lead or graphite pencil in a wooden frame came into use at the beginning of the 19th century.
Usually a pencil "works" if you guide it or press it with a lead on paper, the surface of which serves as a kind of grater that splits the lead into tiny particles. Due to the pressure on the pencil, the lead particles penetrate into the fiber of the paper, leaving a line, or trail.
Graphite, one of the forms of carbon, along with coal and diamond, is the main constituent of a pencil lead. The hardness of the lead depends on the amount of clay added to the graphite. The softest brands of pencils contain little or no clay. Artists and draftsmen work with a whole set of pencils, choosing them depending on the task at hand.
When the lead in the pencil is erased, you can continue to use it by sharpening it with a special sharpener or razor. Pencil sharpening is an important process that affects the type of lines drawn with a pencil. There are many ways to sharpen pencils, and each of them gives its own result. An artist should try to sharpen pencils in different ways so that they know exactly which lines can be drawn with one or another pencil with different sharpening methods.
You need to be well aware of the advantages and disadvantages of a pencil, as well as every material with which you work. Different brands of pencils are used in specific cases. The next section discusses some types of drawings with an indication of what brand of pencil or graphite material they were made.
These examples give an idea of the strokes and lines made with different pencils. As you look at them, take turns taking your pencils and see what strokes you can get by working with this or that pencil. Surely you will not only want to try every pencil and discover new possibilities for drawing, you will suddenly find that your "pencil feeling" has increased. We, as artists, feel the material we use, and this affects the work.
Materials and examples of strokes and lines.
HARD PENCIL
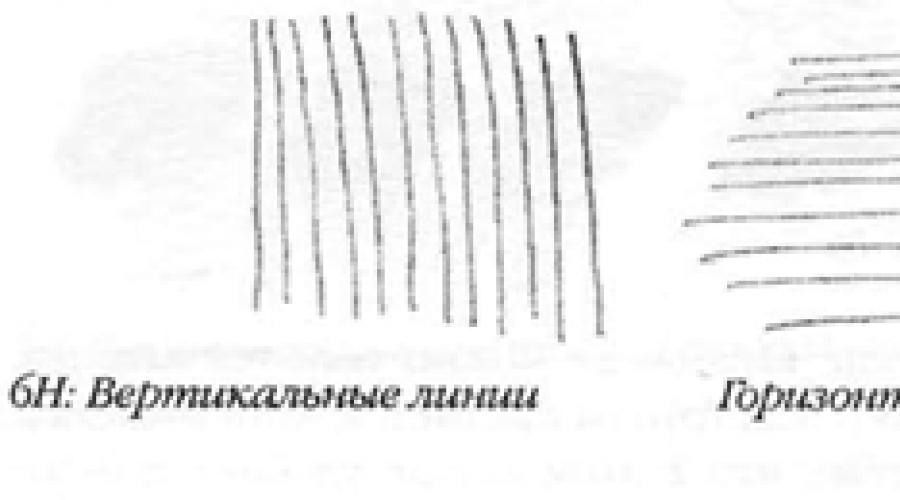
With a hard pencil, you can apply strokes that almost do not differ from each other, except in length. The tone is usually created by cross-hatching. Hard pencils are designated with the letter H. Like soft pencils, they have a gradation of hardness: HB, H, 2H, 3H, 4H, 5H, 6H, 7H, 8H and 9H (the hardest).
Hard pencils are commonly used by designers, architects and professionals who create precise drawings for which thin, neat lines are important, as when creating perspective or other projection systems. Although the strokes applied with a hard pencil differ little from each other, they can be very expressive. The tone, as well as the soft one, can be created with a hard pencil, hatching with cross lines, although the result will be a thinner and more formal drawing.
PROJECTION SYSTEMS FOR FIRM PENCILS
Hard pencils are ideal for sketching. As we already said, such drawings are usually performed by engineers, designers and architects. The finished drawings must be accurate, they must be dimensioned so that performers, for example, craftsmen, following the instructions, can create an object according to the project. Drawings can be made using different projection systems, from a plan on a plane to images in perspective.

STROKES WITH A HARD PENCIL
I do not give examples of strokes applied with 7H - 9H pencils.

SOFT PENCIL
A soft pencil has more possibilities for toning and transferring texture than a hard pencil. Soft pencils are designated with the letter B. The HB pencil is a cross between hard and soft pencil and is the main tool between pencils with extreme properties. The range of soft pencils includes HB, B, 2B, ZV, 4B, 5B, bV, 7B, 8B and 9B (softest) pencils. Soft pencils allow the artist to express their ideas through shading, texture reproduction, shading and even simple lines. The softest pencils can be used to tint a group of objects, although in general I find it more convenient to use a graphite stick. It all depends on which surface you want to apply the tone to. If it is a small drawing, for example on A3 paper, then a soft pencil is probably more suitable. But if you want to overlay a tone on a larger drawing, I would advise you to use a graphite stick.
The only soft pencil that is convenient for making drawings that require high precision - the palm, of course, for a hard pencil - is a pencil with a clamped thin lead.

OTHER TYPES OF PENCILS
In addition to the pencils described above, there are other pencils that provide many more opportunities for experimentation and discovery in the field of drawing. You can find these pencils at any store that sells art supplies.
 |
- A pencil in a curled paper frame - graphite in a curled paper frame, which is folded back to release the lead.
- Rotary pencil - available in many forms, with a variety of mechanisms that open the tip of the graphite.
- A pencil with a clip-on lead - a pencil for sketches with a very soft slushy or thick lead.
- The standard thick black pencil, known for many years as the "Black Beauty".
- Carpenter's Pencil - Used by joiners and builders to measure, write, and sketch new ideas.
- Lead pencil or stick. This pencil is solid graphite about the same thickness as a regular pencil. A thin film covering the tip from the outside turns away to reveal the graphite. A graphite stick is a thicker piece of graphite, like a pastel, wrapped in paper that is removed as needed. This is a versatile pencil.
- A watercolor sketch pencil is a regular pencil, but when dipped in water, it can be used as a watercolor brush.

What is graphite.
Graphite is the substance from which pencil leads are made, but naturally occurring graphite is not placed in a wooden frame. Graphite, mined in different fields, varies in thickness and in varying degrees of hardness / softness. As can be seen from the pictures, graphite is not intended for detailed drawings. It is more suitable for expressive sketches, graphite is convenient to work with a vinyl eraser.
With a lead pencil, you can make quick, heavy, dramatic sketches using energetic lines, large areas of dark tones, or interesting textured strokes. This way of drawing will convey the mood well, but it is completely unsuitable for making drawings. It is better to draw large drawings with graphite: the reasons for this are clear to everyone. Graphite is a versatile product, and before you start working with it, learn more about its properties and characteristics. Since it does not have an outer rim, its sides can be fully utilized. We do not have such an opportunity when we draw with a pencil. You will be pleasantly surprised when you see what you can achieve by drawing with graphite. Personally, if I paint in a free and dynamic manner, I always use graphite. If you also draw with graphite in this manner, you will undoubtedly achieve great success.
DRAWING WITH SOFT PENCILS AND GRAPHITE
Unlike a hard pencil, a soft pencil and graphite can make thicker strokes and create a wide range of tones, from deep blacks to whites. The soft pencil and graphite make it quick and efficient. With a soft, sufficiently sharp pencil, you can convey the contour of the object, as well as its volume.
Drawings made with these tools are more expressive. They are related to our feelings, ideas, impressions and thoughts, for example, it can be sketches in a notebook, as a result of our first impressions of the object. They can be part of our visual observation and recordings. Drawings convey the change in tone during observation, either through creative imagination, or express the surface of the texture. These drawings can also arbitrarily explain or express expression - that is, they themselves can be works of visual art, and not blanks for future work.
The eraser enhances the effect of the soft pencil. Use a soft pencil and eraser to make your drawing more expressive. An eraser, used with a hard pencil, is most often used for correcting mistakes, and as a complement to a soft pencil and charcoal, it is a means of creating an image.
 |
You can achieve different results if you press differently when working with a soft pencil and graphite. Pressing allows you to transform the image, either by changing the tone, or making the strokes more weighty. Take a look at examples of tone gradations and try experimenting in this direction yourself. While changing the pressure on the pencil, try to change the maximum amount of the image using different movements.
What are erasers.
As a rule, we first get acquainted with the eraser when we need to fix a mistake. We want to erase where the mistake was made and continue painting. Since the eraser is associated with correcting errors, we are rather negative about it and its functions. The eraser seems like an inevitable evil, and the more it wears away from constant use, the more often we feel that it does not meet our requirements. It's time to rethink the role of the eraser in our work. If you use your eraser skillfully, it can be the most useful drawing subject. But first you need to give up the idea that mistakes are always bad, because you learn from mistakes.
When sketching, many artists think about the drawing process or decide how the drawing will look. Sketches can be erroneous and need to be corrected along the way. This happened with every artist - even with such great masters as Leonardo da Vinci and Rembrandt. Reconsideration is almost always part of the creative process, and it is visible in many works, especially in sketches, where artists develop their ideas and designs.
The desire to completely erase the errors in the work and start painting again is one of the common mistakes novice artists make. As a result, they make more mistakes or repeat old ones, which creates feelings of dissatisfaction, leading to feelings of failure. When making corrections, do not erase the original lines until you are satisfied with the new drawing and feel that these lines are superfluous. My advice: keep the traces of the correction, do not destroy them completely, as they reflect the process of your thinking and refinement of the idea.
Another positive function of the eraser is to reproduce areas of light in a tone pattern made with graphite, charcoal, or ink. The eraser can be used to add expressiveness to strokes that emphasize texture - a prime example of this approach is the drawings by Frank Auerbach. In them, the "tonking" technique is an example of using an eraser to create a sense of atmosphere.
There are many types of erasers on the market that remove traces of all the substances that the artist works with. Listed below are the types of erasers with an indication of their functions.
Soft eraser ("nag"). Usually used for charcoal and pastel drawings, but it can also be used in pencil drawing. This eraser can be shaped in any shape - this is its main advantage. It helps to develop a positive approach to drawing, because it is intended to bring new things into the drawing, not destroy what was done.
 |
- Vinyl eraser. Usually they are erased with charcoal, pastel and pencil strokes. It can also be used to create certain types of strokes.
- Indian eraser. Used to remove light pencil strokes.
- Ink eraser. It is very difficult to completely remove ink strokes. Erasers for ink and typewriting are available in pencil or round shapes. You can use a combination eraser, one end of which removes the pencil and the other the ink.
- Surface cleaners such as scalpels, razor blades, pumice stones, fine steel wire and sandpaper are used to remove stubborn ink marks in drawings. Obviously, before using these products, you need to make sure that your paper is thick enough so that you can remove the top layer and not rub it into holes.
- Products applied to paper, such as correction fluid, titanium or Chinese whitewash. Wrong strokes are covered with an opaque layer of white. After they dry on the surface, you can work again.
Safety measures for the artist.
When working with materials, do not forget about safety measures. Handle scalpels and razor blades with care. Do not leave them open when not in use. Find out if the fluids you are using are not toxic or flammable. So, applying whitewash is a very convenient and cheap way to remove ink, which is based on water, but whitewash is poisonous, and you need to use them with caution.
Pumice is used to remove hard-to-erase strokes. However, use a pumice stone with care as it can damage the paper. A razor blade (or scalpel) scrapes off any strokes that cannot be removed by other means. They can be used in case of emergency, because by removing unnecessary strokes, you can
Simple pencils for the artist
Anyone who has ever written, drew, or drew with a simple pencil is familiar with graphite.We are used to thinking of simple pencils made of graphite, and we don’t think about what, but in factThe lead of a graphite pencil is made from a mixture of graphite and clay, and is packed in a body, most often of wood. It is toThe amount of clay determines the hardness or softness of the pencil.
Graphite is a mineral that is a form of carbon. Various rocks are mined for it, as well as its artificial counterparts. The raw material for this, for example, can be carbides, which are exposed to high temperatures, or cast iron, which, on the contrary, is gradually cooled to obtain artificial graphite.
The main ruler for dividing pencils by hardness is as follows: "H" -pencils and "B" -pencils."H" pencils are hard, and the higher the number (it is affixed next to the letter designation, for example: 1H or 2H), the lighter the lines. TOan arandash number 6H, for example, would be much easier to draw than a 2H pencil."B" pencils are soft and the higher the number, the darker the lines or strokes it will make. That corresponds to the Russian marking "T" (hard) and "M" (soft).Pencils of softness "B" or "M" - if in our opinion are usually used for drawing.
Below diagramshows the full spectrum of hardness of graphite pencils, accepted in the West, which we also have to deal with constantly."НВ" means in Russian and corresponds to the properties of the marking "TM" - hard-soft - and is the middle of the scale. Marking "F" corresponds to "TM", it is just less common.

Hardness scale of imported pencils
The blackest (and most expensive) graphite is still devoid of the intensity of blackness, in addition, it, like graphite in general, is characterized by luster. A drawing filled with graphite (all the more hard) glitters. Therefore, in some works of art, it is replaced by a drawing, which gives an intense dense blackness and does not have a shine. That is why graphite is suitable exclusively for small, mostly landscape drawings, which are well preserved without (unless too soft graphite was taken for the drawing).
Other forms of artistic graphite
Two other forms of graphite that are commonly used in painting are: woodless pencil and graphite bar(or sticks).

Woodless lead pencil. He is “graphite in varnish”.
Bwood pencil(as you might guess) it is graphite without a wooden case. It is often on sale under the name "graphite in varnish" or "graphite rods" (then they will not be varnished). Basically, the lead is round in shape. Sharpen woodless pencils with an ordinary sharpener.They are made for sketching and painting and are usually on the soft side of the hardness scale, more often in HB, 2B, 4B, 6B and 8B. Again, different manufacturers offer different degrees of hardness. With a woodless pencil, you can draw both very thin and wide strokes, which are made with the beveled side of the writing tip.
Graphite bars (sticks)

Graphite Drawing Bars
Convenient for large images and for quickly covering large areas.They are also available in varying degrees of hardness, and some manufacturers likeCaran d'Ache(pictured above) make them in different sizes.
Simple pencils, differences. What is a pencil? This is a kind of instrument that looks like a rod made of writing material (coal, graphite, dry paints, etc.). This tool is widely used in writing, drawing and sketching. Typically, the stylus is inserted into a comfortable frame. pencils can be colored and "simple". Today we will talk about such "simple" pencils, or rather, about what types of graphite pencils exist. The very first object that remotely resembles a pencil was invented in the 13th century. It was a thin silver wire soldered to the handle. We kept such a "silver pencil" in a special case. To draw with such a pencil required remarkable skill and skill, because it was impossible to erase what was written. In addition to the "silver pencil", there was also a "lead" one - it was used for sketches. Around the 14th century, the "Italian pencil" appeared: a rod made of black clay shale. Later, the rod was made from burnt bone powder mixed with vegetable glue. This pencil gave a clear and color-rich line. By the way, this kind of writing instruments are still used by some artists to achieve a certain effect. Graphite pencils have been known since the 16th century. Their appearance is very interesting: in the Cumberland area, English shepherds found a dark mass in the ground, with which they began to mark sheep. Since the color of the mass was similar to lead, it was mistaken for metal deposits, but later they began to make thin sharp sticks from it, which were used for drawing. The sticks were soft and often broke, and their hands got dirty, so it was necessary to put them in some kind of cover. The rod began to be clamped between wooden sticks or pieces of wood, wrapped in thick paper, tied with twine. As for the graphite pencil, which we are used to seeing today, Nicola Jacques Conte is considered its inventor. Conte became the author of the recipe when graphite was mixed with clay and subjected to high temperature processing - as a result, the core was strong and, in addition, this technology allowed you to control the hardness of the graphite.
Lead hardness Lead hardness is indicated on the pencil in letters and numbers. Manufacturers from different countries (Europe, USA and Russia) have different pencil hardness markings. Hardness designation In Russia, the hardness scale looks like this: M - soft; T - hard; TM - hard-soft; The European scale is somewhat wider (the F marking has no Russian correspondence): B - soft, from blackness (blackness); H - hard, from hardness (hardness); F is the middle tone between HB and H (from the English fine point - thinness) HB - hard-soft (Hardness Blackness - hardness-blackness); In the USA, a scale of numbers is used to indicate the hardness of a pencil: - corresponds to B - soft; - corresponds to HB - hard-soft; ½ - corresponds to F - medium between hard-soft and hard; - corresponds to H - hard; - corresponds to 2H - very hard. Pencil pencil stripes. Depending on the manufacturer, the tone of the line drawn with a pencil of one marking may differ. In Russian and European pencil markings, the number in front of the letter indicates the degree of softness or hardness. For example, 2B is twice as soft as B and 2H is twice as hard as H. Pencils are marketed commercially from 9H (hardest) to 9B (softest) Hard pencils Start from H to 9H. H - hard pencil, hence - thin, light, "dry" lines. With a hard pencil, they draw solid objects with a clear outline (stone, metal). With such a hard pencil, according to the finished drawing, over the shaded or shaded fragments, they draw thin lines, for example, draw strands in the hair. A line drawn with a soft pencil has a slightly loose outline. A soft lead will allow you to reliably draw representatives of the fauna - birds, hares, cats, dogs. If it is necessary to choose between a hard or soft pencil, artists take a pencil with a soft lead. An image drawn with such a pencil can be easily shaded with a piece of thin paper, with a finger or an eraser. If necessary, you can finely sharpen the graphite shaft of a soft pencil and draw a thin line similar to that of a hard pencil. Hatching and Drawing Strokes on paper are drawn with a pencil tilted at an angle of about 45 ° to the plane of the sheet. To make the line more bold, you can rotate the pencil around the axis. Light areas are hatched with a hard pencil. Dark areas are correspondingly soft. Shading with a very soft pencil is inconvenient, since the lead quickly becomes dull and the fineness of the line is lost. The way out is to either sharpen the point very often, or use a harder pencil. When drawing, they gradually move from light to dark areas, since it is much easier to darken a part of the drawing with a pencil than to make a dark place lighter. Please note that the pencil should not be sharpened with a simple sharpener, but with a knife. The lead should be 5-7mm long, which allows you to tilt the pencil and achieve the desired effect. Graphite pencil lead is a fragile material. Despite the protection of the wooden shell, the pencil must be handled with care. When dropped, the lead inside the pencil breaks apart and then crumbles during sharpening, making the pencil unusable. Nuances you should know when working with pencils For shading at the very beginning, you should use a hard pencil. Those. the driest lines are obtained with a hard pencil. The finished drawing is drawn with a soft pencil to give it juiciness and expressiveness. A soft pencil leaves dark lines. The more you tilt the pencil, the wider the track will be. However, with the advent of pencils with a thick lead, this need disappears. If you don't know what the final drawing will look like, it is recommended to start with a hard pencil. With a hard pencil, you can gradually dial the desired tone. At the very beginning, I myself made the following mistake: I took a pencil that was too soft, which made the drawing dark and incomprehensible. Pencil frames Of course, the classic version is a lead in a wooden frame. But now there are plastic, varnished and even paper frames. the lead of such pencils is thick. On the one hand, this is good, but on the other hand, such pencils are easy to break if put in a pocket or dropped unsuccessfully. Although there are special pencil cases for transferring pencils (for example, I have a set of KOH-I-NOOR Progresso black lead pencils - a good, solid package, like a pencil case).
Pencils differ mainly in the type and nature of the writing rod (which determine the writing properties of the pencil and its purpose), as well as in size, cross-sectional shape, color and type of coating of the wooden shell.
In the USSR, since the fifties, pencils were produced in accordance with GOST 6602-51. The quality was good. Today's situation is pretty sad. Let's talk about what happened before.
Pencils

Depending on the writing rod and its properties, the following main groups of pencils are distinguished: a) graphite - the writing rod is made of graphite and clay and impregnated with fats and waxes; when writing, they leave a line of gray-black color of varying intensity, depending mainly on the degree of hardness of the rod; b) colored - the writing rod is made of pigments and dyes, fillers, binders and sometimes fats; c) copying - the writing rod is made of a mixture of water-soluble dyes and a binder with graphite or mineral fillers; when writing, they leave a gray or colored line, difficult to erase with an elastic band.
Stages of production of pencils from glued boards

Production of pencils consists of the following main processes: a) making a writing rod, b) making a wood shell, and c) finishing a finished pencil (coloring, marking, sorting and packing). The composition of the graphite rods includes: graphite, clay and adhesives. Graphite is very grades and leaves a gray or gray-black line on the paper. Clay is mixed into graphite to bond its particles, adhesives are added to a mixture of graphite and clay to give plasticity. The sifted graphite in vibrating mills is crushed to the smallest particles. The clay is soaked in water. Then these components are thoroughly mixed in special mixers, pressed and dried. The dried mass is mixed with adhesives, pressed many times, turning into a homogeneous plastic mass, suitable for forming writing rods. This mass is put into a powerful press, which squeezes out thin elastic threads from the round holes of the matrix. Upon leaving the matrix, the filaments are automatically cut into segments of the required length, which are the writing rods. The cuts are then placed in rotating drums where they are rolled, straightened and dried. Upon completion of drying, they are loaded into crucibles and fired in electric furnaces. As a result of drying and firing, the rods acquire hardness and strength. The cooled rods are sorted by straightness and sent for impregnation. This operation aims to give the rods, after firing, with increased rigidity, softness and elasticity, that is, the properties necessary for writing. For impregnation of graphite rods, salomas, stearin, paraffin and various types of wax are used. For the manufacture of colored and copying rods, other types of raw materials are used, the technological process is partially changed.
For colored rods, water-insoluble dyes and pigments are used as dyes, talc is used as fillers, and pectin glue and starch are used as a binder. The mass, consisting of dyes, fillers and binders, is mixed in mixers, the firing operation drops out. The strength of the colored core is given by the pressing mode and the regulation of the amount of binders introduced into the mass, and this, in turn, depends on the nature and amount of pigments and dyes. For copying rods, water-soluble aniline dyes are used as dyes, mainly methyl violet, which gives a purple line when moistened, methylene blue, which gives a greenish-blue line, brilliant green - bright green, etc.
The strength of the copying rods is regulated by the recipe, the amount of binder and the pressing mode. Finished rods are placed in a wood sheath; the wood should be soft, have low cutting resistance along and across the grain, have a smooth, shiny cut surface and an even uniform tone and color. The best material for the shell is Siberian cedar and linden wood. Wooden planks are treated with ammonia vapor (to remove resinous substances), soaked in paraffin and painted over. Then, on a special machine, “paths” are made on the planks, in which the rods are laid, the planks are glued and divided into separate pencils, at the same time giving them a hexagonal or round shape. After that, the pencils are sanded, primed and painted. The painting is done with fast drying nitrocellulose paints and varnishes with a pure tone and bright color. After multiple coating of the casing with these varnishes, a durable varnish film forms on it, giving the finished pencil a glossy, shiny surface and a beautiful appearance.

Pencil classification
The following pencil groups and types are differentiated depending on the starting materials of the pen and the purpose.
1. Graphite: School, Stationery, Drawing, Drawing;
2. Colored: School, Stationery, Drawing, Drawing;
3. Copier: Stationery
In addition, pencils differ in overall dimensions, in the hardness of the core, in the finish of the shell. Dimensional indicators include: cross-sectional shape, length and thickness of the pencil. In cross-sectional shape, pencils are round, faceted and oval. Some pencil groups or types have only one cross-sectional shape assigned; for others, different are allowed. So, drawing pencils are produced only faceted - hexagonal, copying pencils - only round; stationery can have any of the indicated shapes, as well as three-, four-, octagonal or oval cross-sectional shapes. The pencils are 178, 160, 140 and 113 mm long (with a tolerance of ± 2 mm for these dimensions). The main and most often used of these sizes is 178 mm, it is required for graphite pencils - school, drawing and drawing; for color - drawing and drawing; for colored stationery pencils, a length of 220 mm is also allowed. The thickness of a pencil is determined by its diameter, and for faceted pencils, the diameter is measured along the inscribed circle; it ranges from 4.1 to 11 mm, the most common thickness being 7.9 and 7.1 mm.
By the degree of hardness writing rod pencils are divided into 15 groups, denoted by letters and digital indices in sequential order: 6M, 5M, 4M, ZM, 2M, M, TM, ST, T, 2T, ZT, 4T, 5T, 6T, 7T. The letter "M" denotes the softness of the writing rod, the letter "T" - its hardness; the larger the digital index, the stronger this property is for a given writing rod. On school lead pencils, the degree of hardness is indicated by the numbers No. 1 (soft), No. 2 (medium) and No. 3 (hard). On copy pencils - in words: soft, medium hard, hard.
Abroad, the degree of hardness is indicated by the Latin letters "B" (soft) and "H" (hard).
School graphite pencils were produced with medium degrees of hardness, drawing pencils - of all existing degrees of hardness, colored pencils of all types - usually soft.
Graphite drawing pencils "Constructor"

The color of the wood shell coating is also different for different pencils; the shell of colored pencils, as a rule, was painted according to the color of the writing rod; for the shell of other pencils, each title was usually assigned one or more constant colors. The color of the shell was of several types: one-color or with a marble-like, decorative, with ribs or with edges painted in contrasting colors or covered with metal foil, etc. Some types of pencils were produced with a decorative head, which was painted in colors different from the color of the shell , with a plastic or metal head, etc. There were also produced pencils with plastic or metal tips, with an elastic band (only graphite), with a sharpened rod, etc.
Depending on these indicators (properties of the writing rod, cross-sectional shape, overall dimensions, type of finish and design), different names were assigned to each type of pencil and sets.
Graphite drawing pencils "Polytechnic"

Assortment of pencils
Pencils are divided into three main groups: graphite, color, copy; in addition, there is a special group of special pencils.
Graphite pencils by purpose are divided into school, stationery, drawing and drawing.
School pencils - for school writing and drawing; produced in three degrees of hardness - soft, medium and hard, - designated respectively by numbers: № 1, № 2, № 3.
Pencil # 1 - soft - gave a line of thick black and was used for school drawing.
Pencil # 2 - medium hard - gave a clear black line; used for writing and drawing.
Pencil # 3 - hard - gave a faint line of grayish-black color: intended for drawing and basic sketching in school.
The school included pencils that had a metal nipple in which a rubber band was fixed for erasing notes made in pencil.
Stationery pencils - for writing; produced mainly soft and medium hardness.
Drawing pencils - for graphic work; were produced according to the degree of hardness of the writing rod from 6M to 7T. Hardness also determined the intended purpose of the pencils. So, 6M, 5M and 4M are very soft; ZM and 2M - soft; M, TM, ST, T - medium hardness; ZT and 4T are very hard; 5T, 6T and 7T are very hard for special graphic work.
Drawing pencils - for drawing, shading sketches and other graphic works: available only soft, of various degrees of hardness.
Assortment of lead pencils

Colored pencils by purpose are divided into school, stationery, drawing, drawing.
School pencils - for primary children's drawing and drawing works of primary schoolchildren; produced in a round shape, in sets of 6-12 colors.
Stationery pencils - for signature, proofreading, etc., were produced in 5 colors, sometimes two-color - for example, red-blue, mainly hexagonal, except for the "Svetlana" pencils, which had a round shape.
Drafting pencils - for drafting and topographic work; produced mainly in sets of 6 or 10 colors; hexagonal shape; coating color - according to the color of the rod.
Drawing pencils - for graphic work; were produced in several types, differed from the school ones in length and the number of colors in sets, from 12 to 48, mostly round in shape, except for drawing numbers 1 and 2, which had a hexagonal shape. All kits had 6 primary colors, additional shades of these colors and usually white pencils.
All pencils, produced in sets, were packed in cardboard art-designed boxes with multicolor labels.
Assortment of colored pencils

Copying pencils were produced in two types: graphite, that is, containing graphite as a filler, and colored, the writing rod of which contained talc instead of graphite. Copying pencils were made in three hardness grades: soft, medium hard and hard. Copy pencils were produced, as a rule, in a round shape.
Assortment of copy pencils

Special Pencils - Pencils with the special properties of a stylus or special purpose; made graphite and colored. The group of special graphite pencils included "Joiner", "Retouch" and portfolio pencils (for notebooks).
Pencil "Joiner" intended for marks on a tree when performing carpentry and joinery work. It had an oval shell and sometimes a rectangular section of the writing rod.
Pencil "Retouch"- for retouching photos, shading, applying shadows. The writing rod contained finely ground birch charcoal, as a result of which it gave a bold line of a deep black color.
Four numbers were produced, differing in hardness: No. 1 - very soft, No. 2 - soft, No. 3 - medium hardness, No. 4 - hard.
Special colored pencils were "Steklograph" and "Traffic lights".
Pencil "Steklograph" had a soft shaft, giving a bold and thick line; it was used for marks on glass, metal, porcelain, celluloid, for laboratory studies, etc. It was produced in 6 colors: red, blue, green, yellow, brown and black.
Pencil "Traffic light" was a type of colored pencils, had a longitudinally-compound rod, consisting of two or three colors, which made it possible to get a line of several colors when writing with one pencil. Pencils were designated by numbers corresponding to the number of colors with which the rod wrote.
Names and main indicators of special pencils

Pencil quality
The quality of the pencils was determined by the compliance of the search rod, shell, finish and packaging with the requirements of the standard. The most important indicator of the quality of pencils were: for graphite - breaking strength, hardness, intensity of the line and sliding; for colored - the same indicators and (color compliance with the approved standards; for copying - the same and copying ability of the rod. All these indicators were checked with special devices and in laboratory conditions. Practically, to determine the quality of pencils, the following requirements should be followed. be glued into the wooden shell firmly and as accurately as possible in its center; the noncentricity of the rod was determined by the smallest, i.e., the thinnest part of the shell, the dimensions of which were established by the standard for pencils of the 1st and 2nd grades; the writing rod should not come out freely from the shell when sharpening a pencil or when pressing it from the end; should have been whole and uniform along its entire length, should not contain foreign impurities and inclusions scratching the paper when writing, should not have any obvious or hidden cracks, should not should have crumbled when sharpening and writing. Pressing on the sharpened tip of the rod, the latter should not have chipped, i.e., arbitrary breaking off or chipping of the rod particles. The cross-sectional area of the rod at the ends of the pencil had to be flat, smooth, without damage or chips. For colored rods, a line of the same color and intensity was required when writing along the entire length of the rod.
The casing of the pencils was made of good quality wood, without knots, cracks and other defects; had to have low cutting resistance, that is, it should be easy and soft to repair with a sharply sharpened knife, not to break during grinding and have a smooth cut surface. The ends of the pencils had to be cut straight, smooth and strictly perpendicular to the pencil axis. The pencil should be straight and even along its entire length, without deformation. The surface had to be smooth, shiny, without scratches, dents, cracks and varnish deposits. The lacquer coating should not crack, peel off and stick when wet.
According to defects in appearance, pencils were subdivided into two grades: 1st and 2nd; moreover, the writing properties for pencils of both grades had to be the same. The 2nd grade included pencils in which the deflection arrow along the length of no more than 0.8 mm, the chip of wood or varnish film from the end of the pencil no more than 1.5 mm, the chip of the rod at the ends of no more than half of the cross-sectional area of the rod - to the depth not more than 1.0 mm, noncentricity of the rod not more than 0.33 D — d (D is the diameter of the pencil shell along the inscribed circle, d is the diameter of the rod in mm), as well as scratches, dents, roughness and sagging (width and depth not more than 0.4 mm) no more than 3 over the entire surface of the pencil, with a total length of up to 6 mm and a width of up to 2 mm.
Pencils were marked with bronze or aluminum foil on one or more edges. The marking had to contain the name of the manufacturer, the name of the pencils, the degree of hardness (usually by letter designations) and the year of manufacture (usually with the last two digits of the corresponding year (for example, "55" means the release of 1955). On copying pencils, the marking contained the abbreviated word "Copier" In addition, grade 2 pencils had to be marked “2 s.” The marking had to adhere firmly to the surface of the pencil, be clear, clear, readable, all lines and signs had to be solid and not merge.
Pencils: Ruslan, Rogday, Ratmir (Krasin factory)

Pencils were packed in cardboard boxes, mainly 50 and 100 pieces of the same name and grade. Colored pencils for school and drawing were packed in sets of different colors of 6, 12, 18, 24, 36 and 48 colors in one set. Graphite drawing pencils, colored drawing pencils and some other types of pencils were also produced in sets of different contents. Boxes with pencils of 50 and 100 pieces and sets of all types were decorated with a sticker of a multicolor art label. Boxes with sets and pencils of 10 and 25 were put in cardboard cases or packed in packs of thick wrapping paper and tied with twine or braid. Boxes with pencils of 50 and 100 pieces were tied with twine or braid, or pasted over with a paper parcel. Boxes with sets of colored pencils were pasted over with multicolor labels, usually with art reproductions.
Pencils "Cosmetics" (Slavic State Pencil Factory MMP Ukrainian SSR)

Graphite pencils "Painting", "Youth", "Color"

Set of colored pencils "Youth" - art. 139 out of 6 pencils. The price is 77 kopecks.
Set of colored pencils "Colored" - art. 127 and 128 from 6 and 12 pencils. The price of one pencil is respectively 8 kopecks and 17 kopecks.
A set of colored pencils "Painting" - art. 135 out of 18 pencils. The price is 80 kopecks.
Colored graphite pencils "Painting", "Art"

A set of colored pencils "Painting" - art. 133 out of 6 pencils. The price is 23 kopecks.
A set of colored pencils "Art" - art. 113 out of 18 pencils. The price is 69 kopecks.
A set of colored pencils "Art" - art. 116 out of 24 pencils. The price is 1 ruble 20 kopecks.
The quality depends on the correct selection of pencil hardness.
With hard pencils with a sharpened and dry point, you can draw grayish lines. Such pencils usually bear the letter H (from the English hard - "hard"). They are good for high-fidelity images such as line drawings or drawings. Hard leads, unlike soft leads, give fine lines and do not leave excessive marks on the paper.
Soft pencils have an oil-based lead. By drawing with such a pencil and lightly pressing on the lead, you can get more dark and thick lines... They put the letter B (from the English bold - "bold"). In artistic drawing, the use of soft pencils allows you to give more expressiveness and expressiveness to the artist's work.
- A well-sharpened pencil lead marked 6B allows you to make a good sketch. The base of the sketch is applied with a soft lead. To get faint lines, tilt the pencil.
- As you create your picture, you need to gradually overlay new strokes on the previous ones to make the shadows deeper and broaden the midtones. Highlighted areas on white paper remain unpainted, that is, they do not need to be touched.
