How to draw a snail with a pencil. How to draw a snail - we learn to draw in different techniques Step-by-step drawing of a snail for children
- kraft paper;
- simple pencil;
- eraser;
- black pen;
- colored pencils (light green, orange, green, black, brown, beige, white).
How to draw a snail with a pencil
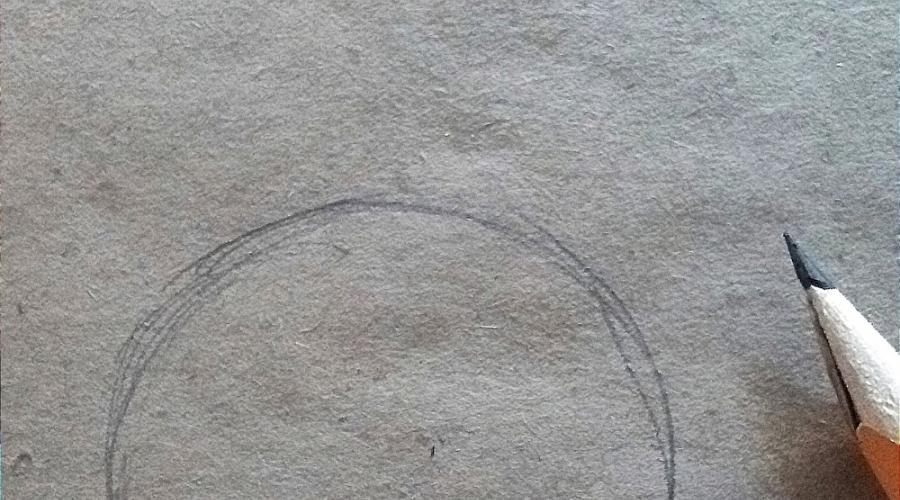
We put a point in the middle of the sheet. From it we count 2 cm to the left, right, down and up. We put serifs there. Draw a circle along these points.

The circle is the basis for the snail house. You need to draw a spiral. Divide the circle in half by drawing a horizontal line in the middle. Note that the spiral will be shifted to the left. Let's start drawing, starting with the larger circle, gradually shrinking it and moving from the middle to the left.

Add the snail body under the sink. The head is located to the right of the shell. It has a rounded shape. The back of the body is slightly pointed.

Let's draw two large eyes above the snail's head. Add large pupils, which are very close to the edge of the eye. And don't forget to leave some glare.

We connect the eyes to the head. We draw two small tendrils that are rounded at the end. The snail's small mouth is slightly open.

We paint the surface of the snail's body with small spots. We will use them to show small freckles. Draw stripes along the shell to help show its relief.

Draw the mouth and pupils of the snail with a black pen. Let's just circle the rest of the body and shell.
 .
.
The snail's eyes will be beige. Draw a little yellow on the surface of the shell. You need to make freckles in the same color.

Add a warm shade to the snail shell using orange color. We will show the shadows using a brown pencil. They need to draw areas around the curves of the shell.

Draw the rest of the body with light green color. The sheen of this color will be on the back of the bottom of the sink. Apply dark green to the body of the mollusk, near the shell. This way you can show the falling shadow. We apply black strokes on the sink, adding contrast to it.
Consider how to draw a snail with a pencil step by step. We all know this sluggish gastropod inhabitant of the Earth, living in gardens, meadows, aquariums and even on a gourmet plate. The snail crawls about 1.5 mm per second. You can't blame her for haste. So much the better for the artist: you can catch all the nuances of nature for the drawing.
 |
|
| A snail is made up of two main elements: a mollusc and a shell. With a continuous light line we outline the silhouette of both the snail itself and its house, designate the horns. | Let's draw the horns and eyes on the extended antennas more carefully. |
 |
 |
| Let us show that the body of a snail is a complex muscular instrument that has many folds. The body itself is wrinkled due to the constant need to stretch and contract. Let's add a geometric pattern to the snail shell. | Draw a circle around our snail with a well-sharpened soft pencil. If this drawing will be used as a basis for painting techniques, it can be left as it is. But in the technique of a simple pencil, there is always a need to work out the shape a little. |
 Let's shade the back and the darkest parts of the shell. Let's draw the folds on the body in more detail, first creating a geometric mesh for this. Finish the snail by drawing

The snail has a simple structure, and therefore draw a snail pretty simple. It is very important to make the correct dimensions for the outline of the snail's "house" in the first step. Further, by adding new details and gradually refining the shapes, you can easily cope with the snail drawing. The body and shell of the snail has an almost uniform color, so you can paint them with a simple soft pencil.
1. The first contours of the snail

In the first step, we only need to draw two initial paths for the snail. Draw an oval, later we will turn it into a snail shell, and draw a shape that looks like a triangle. This outline will become the neck and torso. Since these are only the initial outlines of the snail, do not make them bright, and only lightly press on the pencil.
2. Draw a line for the carapace and head

Divide the previous oval with an oblique line. With this line we will separate the torso from the shell. On the edge of the second path, for the neck, draw a circle with "antennas". These two "antennae" serve as the eyes of the snail.
3. Correction of the original contours

The snail's body is very soft and delicate, therefore it does not have clear, straight lines. Slightly correct the original outline and draw wavy outlines instead of straight lines. Please note that the top line also needs to be changed, more precisely, draw another next to it. On the shell, make a pattern in the form of three circles. The snails have not only the upper "antennae" but also the lower ones, so do not forget to draw them too.
4. Drawing of a snail in detail

First, remove the original contours of the neck line from the drawing. Then continue to draw the entire bottom line of the snail's body and draw a small tail. Duplicate the bottom outline of the torso shape with a parallel line. It will help you draw the edges of the "sole" of the snail correctly. Add a line along the edge of the shell in the same way. Also draw two contours of the muscles holding the carapace. Next to the circles for the pattern, add some curls.
5. How to draw a twisted carapace pattern

Make some bumps on the snail's body. To do this, draw small circles with quick movements. There is a kind of twisted pattern on the snail's shell, it is formed due to the reliefs of the shell. Copy the pattern from my drawing. On this snail drawing finished. You can start coloring the drawing with a simple pencil.
6. How to make shadows

To prevent the snail's shell from merging with the body in the drawing, make the shadows on the shell darker than on the body. To do this, take the softest simple pencil. In addition, the carapace needs to be drawn with white "veins". They will create the relief of the surface of the snail shell. To do this, you will need pencils of different softness. Imagine from which side the sun is shining on the snail, and accordingly, make shadows. In my drawing, the sun is shining from the right side, so the shadow is under the shell.
Can you draw a snail crawling on a leaf of grapes, snails love grape leaves, and around it, in addition, draw another surrounding landscape.
The ladybug, unlike the snail, must be painted with colored pencils or paints. In the black and white drawing, the colorfulness of its bright and variegated color is lost.
The snake has almost no skeleton and is very plastic, this must be depicted in the drawing. A snake, like a snail, is easy enough to draw, since they have few complex details.
Snails are one of the most interestingly arranged insects. At the same time, absolutely everyone can understand how to draw a snail, because, in fact, there is absolutely nothing complicated about it. In order to clearly explain how to draw a snail to a child, it is worth showing him this insect itself or the photographs in which it is captured. This will help the kid remember the structural features of the snail.
Before you draw a snail with a pencil in stages, you need to prepare:
one). Black handle;
2). Pencil;
3). Eraser;
4). Multi-colored pencils;
five). A piece of paper.
After all those stationery, which are listed a little above, are prepared, you can proceed to figuring out how to draw a snail:
1. Sketch out the body of the snail and the outlines of its house;

2. Draw the body of the insect. To draw a snail with a pencil, you definitely need to know the features of its structure, otherwise the drawing will turn out to be unrealistic. For example, it is imperative to depict a pair of antennae, as well as a couple of antennae. The edges of the snail's body should be slightly uneven;

3. Now draw the snail's house, dividing it into separate sections;

4. Draw the surface on which the insect crawls;

5. Circle the image with a pen. Clarify some details, such as the cells on her body and the stripes on the house;

6. After letting the drawing dry a little, erase the preliminary sketch with an eraser;

7. Of course, you can draw a snail in stages using the most ordinary pencil or pen. But the drawing will look more complete if it is colored anyway. For this purpose, it is not at all necessary to use colored pencils, because almost any paint will work well. For example, if you use watercolor for coloring, the drawing will turn out to be very delicate and at the same time quite realistic. Paint over the snail's body completely with a light brown pencil. Then shade it a little with a reddish brown tint. Then in black tone draw cells on the body of the insect;

8. Shade the space under the snail with a dark blue tint. And then paint over the surface on which this insect is crawling with a light green pencil;

9. Color the snail's house. To do this, use colored pencils in a variety of shades, ranging from brown and gray colors to greens, blues and purples.

Now the snail drawing is completely ready! Having learned to draw this insect, you can teach this to your child too!

Snail joke! Two snails are crawling along the road, followed by an asphalt roller. One snail says to the other: - Now the skating rink will run over us. - Nope. We will make it in time. Will not move. - No, he will move. - Do not oo-oo-oo ... - Well, I told you that ooo-oo ... ***** The famous hero of the animated series Spongebob has a pet. This is Geri's snail. This is the cutest snail in the world that communicates with everything by meowing. Someone even thinks that Spongebob snail smarter than its owner, or even the smartest animal in Bikini Bottom.
Let's find out together, with a pencil step by step.
It's very simple, just a few simple steps. Let's start drawing from the snail's house. Make an oval shape as shown in Figure 1.  Next, draw Gehry's body. You can still look on the Internet to find out how they really look.
  Step three. We draw eyes. Gehry has them round, try to make them even. You can use a coin or other object that fits the shape.
  And finally, let's add some details to make it look like in the picture. That's all. The drawing will look like this:
 And here's how it turned out for me:
  Here's how Nastya did it:
  We now know. Write what other drawing lessons you will be interested in! We will definitely prepare specially for you! Well, see the next lesson: