How to draw plump lips with a pencil step by step. Portrait
Lips are difficult to depict on paper, just like eyes or noses, because they are too individual, too dependent on the features of the face and your drawing technique, too unusual. If you read this tutorial to the end, you will learn how you can easily draw almost any lip.

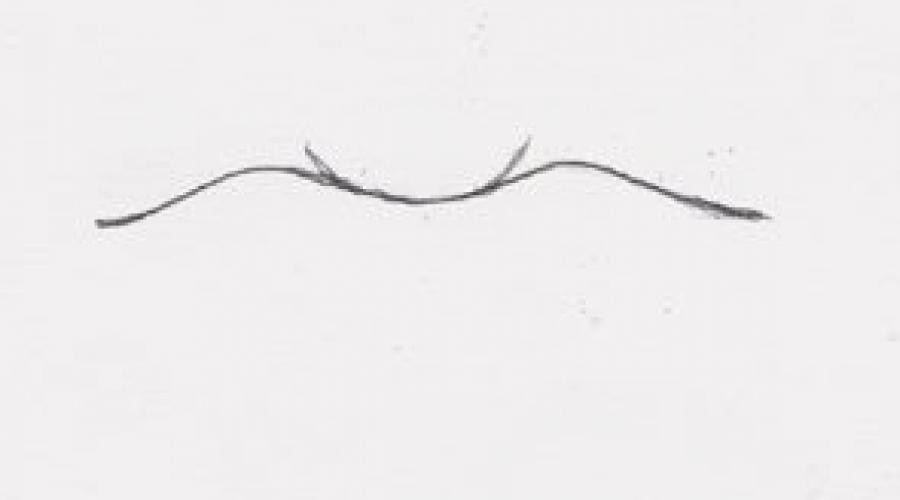
We start drawing with a sketch. Study carefully and sketch on the paper the line that separates the lips. The line will almost always bend up and down. Like any sketch, this line will not be accurate, but a pencil sketch can always be corrected. Also sketch out the outline of the cupid's tubercle - the middle, protruding part of the upper lip. Since it forms the vertices of the upper lip, we just need it.

We continue to sketch, outlining the contours of the lips. We draw characteristic dimples, similar to the middle line. All are concave. The base on which we will build our drawing is ready.

Let's finish sketching. Connect the upper lines to the ends of the lips, and do the same with the lower ones. Remember, they will vary depending on the shape of the lips.

Look at the side view of the lips, which is shown in the figure, remember the shape and imagine how a shadow would fall on such lips. The lower lip will be the brightest and most illuminated, the upper lip will be in the shadow, just as the sharp corners of the lower lip will be in the shadow. The shadows on the Cupid's tubercle will be located in a special way, as on the most protruding part.

Let's move on to the next step. We will draw what is around the lips and in the lower part of the face. A noticeable space between the lip and chin will be in shadow, there is also an unusual area above the upper lip that requires elaboration. These are two bulges connecting the top of the lip to the nose, with a concavity between them. It is also worth noting the mimic wrinkles on the lips.

All that remains is to bring our drawing to the end, removing all unnecessary lines, shading the line connecting the upper and lower lips and processing the shadows again. After practice, you will be able to paint the lips as they really look.

Finally, we will teach you how to draw teeth. Forget about the fact that teeth should be white, this is a big mistake of young artists. If you want to emphasize their brightness, it is better to paint highlights on them. The front teeth will be the lightest, the subsequent ones will be darker and darker. The gums should be made slightly darker than the lips.
Video lessons

If you decide to draw a person's face, it is important, first of all, to accurately and correctly draw the person's eyes, since the eyes convey in the drawing the mood, character, and emotions of a person. It is important to accurately draw any features to achieve a likeness in a portrait, but the eyes and lips are the most important elements in drawing a person's face. Incorrectly drawn lips can distort the whole drawing, give facial expression, mood, emotions, etc. that are not characteristic of this person.
In this lesson, you will learn how to learn paint lips person using a step by step method. The lips are drawn with a simple pencil.
1. Draw lips using simple paths

To draw beautiful lips, you first need to make a simple markup, in the form of three parallel lines. Do exactly the same as in my drawing, just keep in mind that the farther the small lines are from the main line, the thicker the lips in the drawing will be. In this figure, the distance between the upper and lower line is 4cm, the length of the central line is 13cm, the length of the short lines is 3cm.
2. Lips regain their original shape

Using the step-by-step drawing method, you can even draw very beautiful lips without being able to draw. You will see this at the end of this lesson. In the meantime, let's continue the drawing and connect the short lines, forming the corners of the lips. See, we can already say that you could paint lips.
3. Lips get real shape

It would be too easy to draw if all the lines in the portrait could be drawn with a ruler. You will have to use your imagination a little and draw the "real" shape of the lips, divide the upper lip with a "heart" into two parts. You should decrease the upper contour, and increase the lower one.
4. How to draw the dividing line of the lips

First, remove the old markings with an eraser, and look the lips almost like "real". But you still need to draw a dividing line between the lips. To do this, almost repeat the contour of the upper one to the main dividing line, slightly stretching its central part - "heart". It is advisable to do this exactly as in my drawing. Take your time to remove the scribing line from the drawing. It will not hurt to paint the lips. Just shade the fate resulting from the intersection of the lines with a soft simple pencil.
5. The lip drawing is almost complete

To lip drawing was realistic, you need to make them three-dimensional. Volume is achieved with eyeshadow, so apply a light shadow around the edges of the lips and where they join. Perhaps you will paint the lips with colored pencils, then this can already be done at this stage. If you decide to draw lips with a simple pencil, then you need to follow one more step.
6. How to draw human lips. Shadows

A person's lips have "wrinkles" or folds that stretch when they smile. In order to accurately and beautifully draw lips, draw these "little things" too. After that, apply the shadows with a soft, simple pencil and your drawing is now completely finished. Now I hope you will agree with me that drawing a person's lips in stages is quite simple.
When drawing a person, you should see the whole future image of him from the assumed lines and you just need to draw them on paper. In the visual arts, the most important thing is not the accuracy of the proportions and lines of the drawing, but the image of the main, the most important. Very often, for this it is enough to accurately draw eyes and lips, which will convey the mood and character of a person.
Drawings of the face, human eyes, portraits are the most difficult type of fine art. Learning to draw a portrait of a person, a person's eyes, even with a simple pencil, requires not only learning time, but also talent. The complexity of drawing a portrait of a person lies in the ability to convey the emotional state of a person, his facial expressions, the depth of his gaze, etc.
The eyes in the anime drawing are the basis of this style. All pictures of girls drawn in anime style are distinguished by huge eyes - black, blue, green. But they must be huge and expressive. Lips are drawn in this style conditionally, without drawing details.
When drawing a face, the eyes should be given the most attention. It is also important to draw the lips correctly, as they reflect the emotional state and character of a person. In this lesson, you can learn how to draw eyes.
Each person's nose has unique characteristics, so it is impossible to give precise advice on how to draw the nose of a girl, child or man.
Drawing a hand is very convenient, since you draw with one hand, and you can sketch with the other.
The complexity of artistic work with the profile of the lips, as the most mimically active part of the face, is due to several factors: a wide variety of forms of this part of the face, the choice of the appropriate mimic position of the lips in the absence of the opportunity to fix them statically, the difficulty of applying a tone and micro-component pattern to the surface of the lips due to their pronounced physical relief.
To depict lips, you also need to prepare a pencil with a hardness H - for applying the contour, 2B - for imposing halftones, and a hardness higher than that - to indicate edges and sharp shadows.
Choosing the shape of the lips and lip groove
It should be remembered that the model will be able to "keep" the lips motionless only in a state of complete calmness. If it is necessary to depict a smile or some other mimicry on the lips, the artist is required to remember this state very clearly in order to clearly reproduce it during further drawing. To do this, you can prepare yourself an auxiliary lipo-facial sketch before drawing the lips step by step with a pencil. The sketch consists of eight straight lines that follow the outline of the lips.
Another prerequisite for a successful portrait or copying is choosing the right lighting and applying it to the preliminary sketch. An example is shown in the image below.
How do I paint the lips and accurately reproduce the highlights on their wet outer shell? To do this, use pencils with a hardness of 4B and an eraser.
The role of the muscular frame and the labial groove in the construction of the contour and plane of the lips
The lips, together with the groove, form the most mobile component of the human face. The concentration of the muscle frame around them implies the presence of specific folds and, therefore, individual tones and semitones that form unique portrait qualities.

The circular muscle of the mouth, which creates their elevation, completely surrounds the lips. The pits on either side of them are created by the large zygomatic muscles, the muscles of the lowering of the mouth, the muscles of laughter. The depression under the lip is formed by the muscle of the lowering of the mouth and the muscle of the lowering of the lower lip.
So how to draw lips in stages?
Specificity of the image of mimic lip wrinkles
Wrinkles as deformations of the skin due to its regular movement are formed in childhood. If only the deepest and most obvious wrinkles are depicted on the groove and the skin around the lips, being drawn with a full-fledged microdeep with penumbra, then directly on the lips, drawing wrinkles according to their planar and dimensional features will give the lips a lively expression, a healthy, realistic look and bring the artist closer to understanding how to draw beautiful lips.
It should be remembered that it is necessary to depict such irregularities on rounded planes without cutting them with lines, but creating a contour of an additional layer, from which the folds are then carefully fashioned.

Contouring the lips
How to draw lips, "tied" by their position to the face? To do this, you need to build several additional planes in the figure.
Asking the question of how to draw lips with a pencil, and starting drawing coordination lines on paper, you must first of all remember the required angle and turn of the face. To do this, first, the axial line of the face is drawn, according to which the semiaxis of the lip tilt is drawn next.
The figure below shows how the two lines delineating the borders of the labial groove form their maximum elevation above the line of the mouth. These lines, following through the lips, descend to the lower edge of the labial halo and are attached to the chin along the facial muscles. If facial features are required, these vertical blocks are separated by one or more horizontal edges. It is necessary to draw similar lines, dividing the rest of the lips in half and bringing them to the muscles of the chin, indicated in the figure by the cupped eminence. Following are the lines that delimit the corners of the lips.
Now, according to the drawn facial structural grid, the lip-facial sketch is transferred to it.

Overlaying tone on the labial planes
First of all, it is necessary to highlight with a pencil - 4B and above - all the edges extreme to the viewer: the connection of the upper corner of the lip with the edge of the groove, the front and middle circles of the lower lip and the border of the upper lip in the foreground.
The overlay of tone is carried out strictly with the definition of the angle of incidence of illumination. It is necessary to remember about the culture of the stroke, the inclination of strokes in 85% of the tone should be directed in one direction, preferably parallel to the lighting. First, a shadow is placed on vertical planes: nasolabial folds, folds of the corners of the mouth, a deep vertical labial groove and two faces of the labial groove. A shadow from the nose is superimposed.
With a pencil of medium softness from 2B to 4B, the upper lip is shaded to the center in the foreground - a tone ripple is made to the light with the tone fading to the background. The lower edge of the lower lip is highlighted in tone at the point of its connection with the muscles leading to the chin. With semicircular strokes to the desired plane, a tone is applied to the lip lapel, also making the far corner pale. The front protruding plane of the lips is emphasized with a soft pencil. The semitone is applied to the muscle folds.
The eraser is used to select and wipe shiny surfaces on which the light falls. The planes of the lips closest to the viewer are emphasized, creating a contrast with the darkened edges.

Elaboration of small details and various decorative attributes for lips
Together with the task of how to draw lips, the question of their decoration and drawing is determined.
In general, wrinkles are applied to the lips as the last resort. If the portrait relies on a mustache or any other head of hair that is directly related to the lips, in the recommendation on how to draw lips step by step with a pencil, the stage of applying shadows is skipped - they are added with several strokes on free planes. If it is required to draw a piercing on the lips that passes directly through the upper or lower lapel, as well as teeth overhanging the lapel, a recess is drawn under them according to the size of the required accessory, which is highlighted with several strokes of H hardness.
In the lessons on how to draw lips with a pencil, they often write that it is difficult to draw them, as well as any part of the face. I don’t think so, but on the contrary, I find lip painting quite easy. The main thing is to do it correctly and remember about the peculiarities of the structure of the human lips. So, sharply sharpen the pencils, look for the photo you like and start! I will try to convince you that drawing lips is not at all difficult.
How to draw lips with a pencil: the first step
Sketching with a pencil marking V... Pencil can be 2B and 4B- this is not very important, since almost all marking B pencils are suitable for sketching.

The sketch turned out to be quite simple, consisting of only a few lines. There should be nothing superfluous in it. In general, the first stages of drawing in the lessons and how to draw lips are almost identical to each other. The sketch is done first, and then the shading.
How to draw lips with a simple pencil: steps two and three
At the second stage, I do a light shading on the sketch and wipe the contours of the lips with an eraser, because it is almost impossible to shade and not go beyond the contours. Do not forget to wipe the sketch a little and outline the lips in more detail.

Of course, you need to leave the light areas of the lips without shading.
I start drawing the lips with the pencils of the group H... At the third stage, even after a slight drawing, the volume of the lips begins to be seen. So I am doing everything right. I also draw with a darker pencil the corners of the mouth and the line between the upper and lower lip.

How to draw lips with a simple pencil: the fourth step
At the fourth stage of the lesson on how to draw lips with a simple pencil, I already draw the lips in detail, leaving the light areas. It is important to draw with semicircular strokes - these are the features of the structure of the lips, which I mentioned above.

Also, in the fourth step, I paint shadows around the lips. More attention should be paid to the shadow under the lower lip - this will give the lips the desired volume. Do not forget about the shadow above the upper lip, but it should be lighter than the shadow under the lower lip.
How to draw lips with a simple pencil: the last fifth step
The final, fifth stage, I finish the drawing. In principle, after four stages, the lips look pretty good anyway - they have volume, both the lips themselves and the corners of the mouth are well drawn, but still, I would have worked on them a little more. Need to be put in order
Let's get down to the small details. Let it be the mouth. Hence, at this point, you should be asking: but how do you draw lips? And I, with a very clever air of a sage, will answer: take your time, because there are two ways to depict a mouth on paper. But since I am not very aware of your successes (namely, I do not know which one will be more convenient for you), then we will now consider both.
- Circular muscle of the lips;
- The starter responsible for the movements of the lower lip;
- A trigger that is responsible for the movement of the corners of the lips;
- Square muscle of the lower lip;
- Upper lip tubercle;
- Filter or otherwise called a groove;
- Corners of the lips;
- The lifter responsible for the movements of the upper lip;
- Big muscle of the cheekbone;
- The so-called muscles of laughter.
Let's start drawing
With the muscles sorted out, now I will present you the first of the methods. It consists in depict lips using planes:

When we paint the lips in this way, we can also hone our ability to distribute chiaroscuro and observe proportional relationships.
And now take two is the second way, in which we work with constructive lines... First, lightly mark the place for the lips with a pencil, taking into account all sorts of contractions. You can outline the lips as a kind of oval, and only then give them certain features. After finally finding the line of the mouth itself, you need to look for the line of symmetry on them. And about the important little things: do not forget that the shape of the lips will certainly depend on the bite of the teeth. Well, for example, the shape of the lips with a normal bite will look something like this:

The upper lip, compared to the lower lip, protrudes slightly, and its tubercle is slightly inclined downward, towards the oral slit, and, as it were, superimposed on the lower lip with its middle, goes deep into the slit. The middle of the lips (mouth gap) is on the center centerline.

When drawing lips in a three-quarter turn, it is important to keep in mind that half of the lips that is in the distance, in the reduction of perspective.
As for drawing the lower lip, this also has its own peculiarity. Since there are some kind of square paired muscles, you need to start building lips with them in mind. They are usually outlined by ovals, and you need to remember about the perspective. These ovals should be symmetrical to each other.
Step by step drawing
Remember also about the plasticity of the shape of the corners of the lips, because as the lips approach them, they slowly become deeper.
Again advice: if for some reason you cannot paint lips in three-quarters or for some reason it does not work out for you, then try to practice first with these blueprints:
 Their essence is simple, just choose an angle of view and look for a shape using vanishing points.
Result

Click to enlarge