Word top alignment. Word text alignment
Read also
When you type text in Microsoft Word, it is left-aligned. But quite often it is required to shift it to the other side.
For example, it is customary to shift the heading to the center of the page, and to print the head of a document, you often need to shift the text to the right. This procedure is called alignment.
Is how the text is positioned on the page. It can be centered, left and right aligned, widthwise. To do this, Word has special buttons at the top: ![]()
We will talk about them a little later. In the meantime, a few words about how you do not need to align text.
Wrong text alignment
Many people unknowingly align text incorrectly - using the spacebar on the keyboard or the Tab key.
This offset is considered an error, since the distance from the left margin is made on the "eye". Because of this, it is often more than necessary. And if you align the text to the right in this way, then there will be a lot of problems when editing it. And the method itself is very inconvenient - you have to press the spacebar or Tab button on the keyboard many times.
What is the threat? For example, lose your business reputation. After all, you can very quickly check the design of the text. To do this, just click on this button at the top of the Microsoft Word program:
Dots and incomprehensible icons will appear in the text. Spaces are shown here by dots. And if you incorrectly align the text, with such a check it will immediately be seen by the many dots in front of it.
To return everything back - to remove dots and incomprehensible icons - press the button again
Incidentally, a document with incorrect alignment may not be accepted by some organizations.
How to align text
Now let's learn how to correctly align the text. By the way, this can be done after the text is printed. I recommend doing just that - it's both easier and faster.
There are four buttons to offset text in Word. They are located at the top.
- this button aligns the text to the left
- this one aligns to the center
- right edge
- in width (makes the text even on both sides)
Now let's try to offset the text correctly. Start by typing a few words in Word. Then select them. To do this, place the cursor (arrow or stick) at the very beginning or at the very end of the text. Then press the left mouse button and, without releasing it, drag to the other end. When the text is filled with a different color (usually black or blue), it will indicate that it is selected.

After selection, click on the button that aligns the text in the center. The words you typed should move to the middle of the page.
It may seem to you that this is the wrong center. In fact, everything is correct. After all, the margin (indent) on the left side is larger than on the right.
Try right-aligning the text the same way.
As for the "Fit to Width" button. If you have a little text (a couple of words), then you will not see any differences from the "Left Align" button - the words will also shift to the left. But if you have several paragraphs, then the text will be aligned on both sides of the sheet - both on the left and on the right. That is, it will be even on both sides.
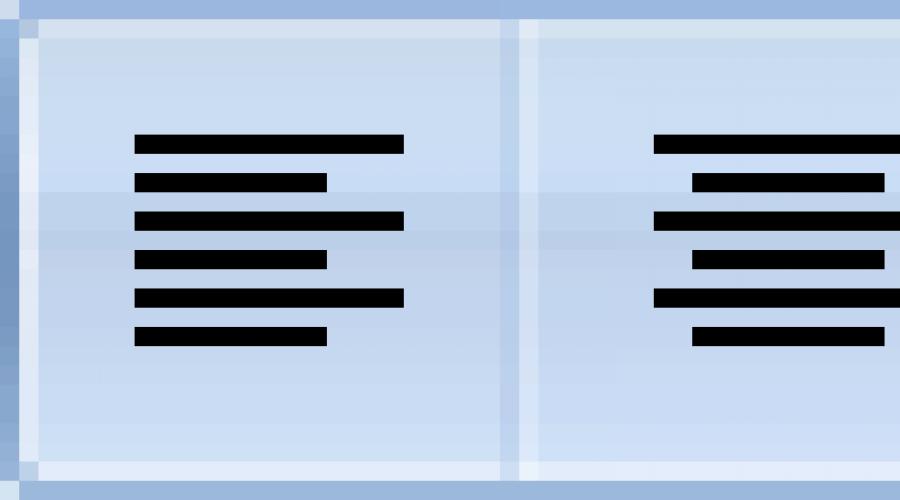
An example of left-aligned text:

The same text, only justified:

By the way, according to the rules of paperwork, the main text should be aligned exactly in width.
How to align text in Word on both edges, several ways.
Word is the most popular editor. It provides users with a huge number of options, making their work easier and easier. To use them, study the program well, learn all its secrets.
Do you want to know how to earn money consistently on the Internet from 500 rubles a day?
Download my free book
=>>
When working with text, special attention is paid to its location. Most often, the editor is automatically set to left alignment. You can change the position of the text using the special buttons.
Some users, unknowingly, try to make the placement of the text even by using spaces. This method is not convenient and takes a lot of time. Moreover, it is practically impossible to correctly align the text "by eye". If you are writing a thesis where design plays an important role, it may simply not be accepted.
How to align text in Word on both edges, exactly
Use justified alignment to keep the text even on both edges.
Home tab
You can align text on both edges using the editor's main menu. There are several buttons in the "Paragraph" section. To make the text evenly located at the same time from the left and right edges, select it and click the "fit" button. The text will be aligned by creating additional spacing.

Context menu
You can also make the text flat on both sides in another way. After selecting the text, use the right mouse button, click, and in the context menu that appears, click "Paragraph". A window will appear where you need to select the "fit" alignment.
Keys
There are special keyboard shortcuts that allow you to arrange the text the way you want. To make the text even on both sides, select the text, press the "CNTR + J" key at the same time. If the keys did not work, then your settings have been changed.
Extra options
One click of the dedicated buttons may not be enough to correctly align the text. You may need to hyphenate words and perform additional checks.
Hyphenation
There are times when, when aligning, the spacing between words increases so much that the text looks ridiculous. Prevent this by creating hyphenation.
Open the "Page Layout" section, click on "Hyphenation" and select "Auto".

Checking the correctness of the design
You can check at any time whether your work is formatted correctly and correct it. In the "Home" tab, click the button. You will see extra spaces due to the appearance of a large number of dots.
How to align text in Word on the edges, total
It is quite easy to align text in Word on both edges. Study the editor and you will make your job easier. I wish you success in acquiring new knowledge!
P.S. I am attaching a screenshot of my earnings in affiliate programs. And I remind you that everyone, even a beginner, can make money this way! The main thing is to do it correctly, which means to learn from those who are already earning money, that is, from the professionals of the Internet business.
Collect a list of verified Affiliate Programs 2017 that pay money!
Download the checklist and valuable bonuses for free
=>>


Hello everyone again! Today I will tell you about how to make the text fit to the width, because this question is asked in our support quite often. We will analyze with you two options for solving the problem at once, how to make the text fit to the width in Word and how to set the text to the full width of the page on the WordPress website.
In fact, there are no difficulties in this issue, but if we are already faced with this issue, then let's solve it quickly and simply.
How to make text fit to width in Word (Word)
In order to cope with this problem in Word, you need to type text, select it and click on a special character in the program. By default, the text will initially be left-aligned, see screenshot.

To make the text appear across the entire width of the page, click on the "Align to Width" symbol or the keyboard shortcut Ctrl + J. See screenshot below.

That's all, as you can see, everything is very simple and can be solved with one button. Also, using these buttons, you can not only align the text in width, but also in the center or right and left, depending on your tasks. You can also immediately place the cursor in front of the start of typing and immediately click on the desired command.
Versions of Word may be different and the interface may be slightly different, but these buttons in any version look exactly as in the screenshot, so you can figure it out without any problems.
How to Justify Text in Wordpress
Let's go ahead and find out how we can justify text in the latest versions of WordPress. Most likely you have already noticed that the new versions do not have this button and not every user can set the text to the width. In fact, everything is very simple. The developers decided to simplify everything and made fewer teams. It turns out that in order for the text to be aligned across the entire width of the page, it is enough to make the commands inactive.
That is, if you have all three buttons in the editor inactive, then the text will be displayed across the entire width. See screenshots.
If any button is pressed, then the command will be executed (left, right or center)

If all commands are inactive, then across the entire width. In order to switch between commands, you just need to click on these buttons. If the button is pressed, then click on it again and the button will become inactive. Do not forget to select the desired piece of text before pressing the buttons.

Attention! This option may not work, because I only succeeded on 2 out of 3 blogs. Most likely depends on the template. But there is one more option that is guaranteed to work. Highlight the desired text and press the keyboard shortcut Shift + Alt + J and voila, your text will be aligned to the full width of the blog page.
In such a simple way, you can align the text on the blog the way you need it. I hope this article helped you, was useful and helped you solve your little problem. If the article was useful to you, write it down in the comments. If you have any questions, also write in the comments and I will try to answer you.
Discussion: 4 comments
Thank you, Eugene!
And then I was looking for this key in WordPress, but I never found it!
To answer
Hello my dear readers! I continue to reveal to you the secrets of working with Word and today I will tell you about how to align text in Word. When you learn how to do this, you will be pleasantly surprised at how easy it is. Once upon a time I also did not know how to do this, but now it is not difficult for me.
When working with printed documents, the first thing that catches the eye is the visual presentation of the text, i.e. the way it looks. Therefore, the considered topic, I think, will be most useful for schoolchildren, students, office workers, and indeed everyone who has to work with Word.
In this article, you will learn the basics of paragraph formatting in Word and gain knowledge on how to align edges or remove alignment if you are not satisfied with the changes you make.
Adjusting paragraph parameters
For an organic arrangement of text on the sheet, first select the text for formatting and right-click. Select "Paragraph" from the list that appears.
If you do all the steps correctly, a window will appear on the monitor screen, as in the screenshot:

The position of the text on the page is changed on the "Indents and Spacing" tab in a special field. You also have the option to change the indentation.
Note! A negative value of the indentation indicators indicates that the text is leaving the page margins, while a positive number limits the placement of the text.
Using the buttons on the Quick Access Toolbar
In order not to call the "Paragraph" window every time, it is more convenient to use the quick access panel. You just need to go to the "Home" tab and find the buttons. Let's figure out together what these buttons do:

Initially, the text is pressed to the left edge, and in order for you to align the text to the width of the page, you just need to click on the corresponding button.
Hotkeys
Of course, using the buttons on the panel is convenient, but it is much faster to use special keyboard shortcuts to format text without taking your hands off the keyboard. To do this, place the mouse cursor on the paragraph for which you want to change the display parameters, or select the desired piece of text. To change the orientation of the text, press one of the key combinations:
- Pressing Ctrl together with the L key will align the text to the left;
- With a similar combination with the E key, the text will be centered;
- The R key in combination with Ctrl will move the paragraph to the right margin;
- The text will be evenly distributed in the line if you press the J key together with Ctrl.
Cancel alignment
The actions taken to format the paragraphs are removed using the button in the form of moving counterclockwise (see the figure below). Anyway, all recent actions are canceled with this key.

This button also has hotkeys that many people know. What if you don’t know? It's time to find out! CTRL + Z
Also, you can undo any alignment in the text:
- By clicking the same button on the Quick Action Bar that was clicked. For example, if you did right alignment, then click on it again - this will remove the previous alignment.
- Select a new alignment - the old one will be canceled by itself.
Here are some simple tips for aligning text. Unsubscribe in the comments which of the proposed methods you liked more. If I helped you, then do not forget to share the page on social networks.
Working with a text document in Microsoft Office Word puts forward certain requirements for text formatting. One of the formatting options is alignment, which can be either vertical or horizontal.
Horizontal text alignment determines the position on the sheet of the left and right edges of paragraphs relative to the left and right borders. Vertical text alignment determines the position between the bottom and top of the sheet in the document. Certain alignment parameters are set in Word by default, but they can also be changed manually. How to do this will be discussed below.
Horizontal text alignment in MS Word can be done in four different styles:
- left-aligned;
- right edge;
- in the center;
- across the width of the sheet.
To set the text content of your document to one of the available alignment styles, follow these steps:
1. Select a piece of text or all of the text in the document for which you want to change the horizontal alignment.

2. On the control panel in the tab "Home" in a group "Paragraph" click on the button corresponding to the type of alignment you need.

3. The location of the text on the sheet will change.

Our example shows how you can justify text in Word. This, by the way, is the standard in paperwork. However, it is worth noting that sometimes this alignment results in large spaces between words in the last lines of paragraphs. You can read about how to get rid of them in our article presented at the link below.
Vertical alignment of text in a document
You can vertically align text using the vertical ruler. You can read about how to enable and use it in the article at the link below.
However, vertical alignment is possible not only for regular text, but also for labels located inside the text box. On our site you can find an article on how to work with such objects, but here we will only talk about how to align the label vertically: at the top or bottom, as well as in the center.
1. Click on the upper border of the label to activate the mode of working with it.
2. Go to the appeared tab "Format" and click on the button "Change the alignment of the text of the label", located in the group "Inscriptions".
3. Select the appropriate option for aligning the label.
That's all, now you know how to align text in MS Word, which means you can at least make it more readable and pleasing to the eye. We wish you high productivity in your work and training, as well as positive results in mastering such a wonderful program as Microsoft Word.