Victoria checking the hard drive how to use. How to test and fix a hard drive using the free Victoria software
Read also
A hard disk is a complex physical device designed for recording and storing information. The surface of the disc is divided into tracks. The vertical stack of these tracks forms a cylinder. The track is split into smaller sections called sectors. Each sector is labeled. Their number depends on the interface that is used to communicate with the disk.
The hard drive is vulnerable. The reasons for the failure can be a malfunction of the device software, failure of the controller, power failures, disruption of physical contact with the interface, sticking of the magnetic head, etc. The main defects of disks are sectors with a damaged magnetic coating. Information cannot be stored on these sites.
The bad sectors are called bad or bad sectors. The bad sectors located on the zero track are especially dangerous, because this is the boot area.
To determine the presence of bad sectors and the possibility of their recovery, Belarusian programmer Sergei Kazansky has developed the Victoria utility. The latest release of the program is 26.06.2013. The license type is Freeware, which makes it especially popular.
Appointment
Victoria program allows you to perform low-level testing of a hard drive with a parallel connection interface - IDE (ATA - Advanced Technology Attachment) and SATA interfaces - a serial connection interface. The output is detailed information about the physical state of the drive, its performance, errors.
The Victoria program performs a deep analysis of the state of the HDD with the possibility of recovering bad sectors. This tool can be used both by professionals of the service center and by ordinary users to assess the performance of a drive, the ability to correct errors, and analyze all the physical characteristics of a hard drive.
Video: Victoria HDD scan
Key features
- comprehensive information about the technical characteristics of the hard drive;
- analytics of HDD self-monitoring parameters;
- testing of many technical parameters;
- the ability to change the volume of the disk due to bad clusters;
- surface plotting;
- elimination of used bad clusters - replacing them with backup ones;
- HDD performance analysis;
- determining the speed of access to clusters;
- cleaning the disk from information without the possibility of recovery;
- protection of the device by setting a password;
- the ability to copy any sectors to a file;
- context help system;
- other useful features.
Installation and launch
There are:
- boot versions of the program. In this case, you need to create either a boot floppy disk or a boot disk. The floppy disk creation tool is the makedisk.bat file. To create a bootable CD, you need to unpack the program file and burn its ISO image to a disc;
- not a bootable version. The program is unpacked directly to your hard drive.
In the first case, after downloading from the devices, you can start working with the program.
In the second, in order to obtain a complete picture of the state of the hard drive, a number of conditions must be met:
- disable the controller channel of the tested disk;
- quit all running programs;
- run Victoriyu only on a warmed up disk.
Starting from the operating system is performed by the vcr446f.exe application.

After launching a window in front of the user with a clear English-language interface.
HDD recovery using Victoria
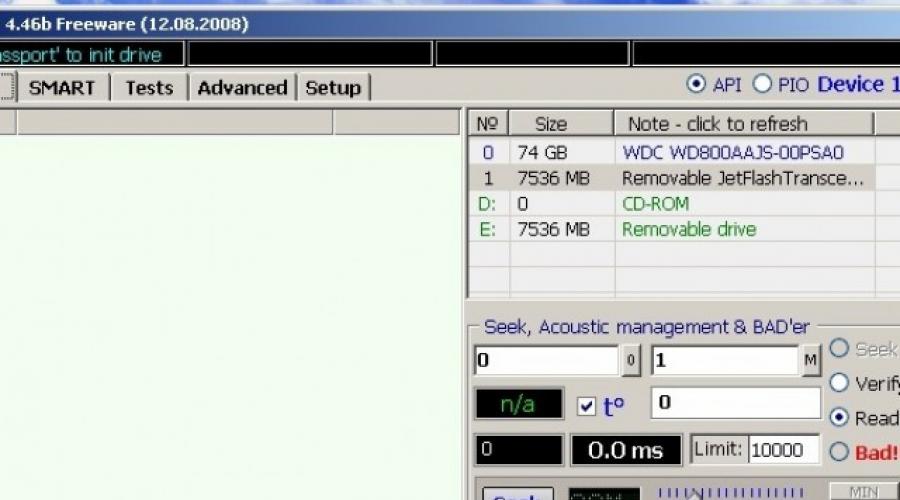
The first tab is Standart, which provides information about the passport of the hard disk or the drive that we want to test. (The selection is carried out in the upper right window of the section).

Photo: Hard Drive Passport Information
The second tab is Smart.

Photo: tab for checking disk self-test parameters
Here, such parameters of the HDD self-test system are checked as:

On the right in the window, we press the GetSMART button and get an estimate of the health (Health) of the hard drive as a whole (next to the GetSMART button) and by parameters.
The third tab is Tests. The main partition that allows you to quickly detect and repair disk sectors.

The hard drive is split into many clusters of the same size. The Victoria program addresses each cluster in the process of testing. The duration of the call is analyzed. The longer the waiting time, the more likely a physical defect in this area is.
There are many reasons for defects:

In this section, the test start modes are important, which can be selected in the lower right window. These are the modes:
- Ignore - allows you to run the test in information mode, without making adjustments;
- Erase - the mode with cleaning the hard drive (used carefully and rarely);
- Remap - check with simultaneous replacement of bad sectors with working ones. Can be used after checking in ignore mode if bad clusters are found;
- Restore - restoration. It is used in the case when the remaining sectors not reassigned after checking in remap mode.
To start the test, press the "START" button. The checked sectors are graphically displayed in the left window and are color-coded. In the windows on the right, you can see the percentage of the tested device volume, the number of tested clusters.

Bad sectors on the HDD are hidden by replacing them from the spare area of the hard drive. Are reassigned so that they are no longer readable. The utility allows you to restore only a hard drive that has no physical damage in detail. If there is wear and tear, or an obvious breakdown, then, of course, you cannot fix it programmatically.
Testing by the utility is considered low-level, but has high performance. So the test of a 232 GB device takes about 60 minutes.
After the testing procedure, error correction or recovery, you need to restart the computer and re-check. Its result should improve.

If, as a result of testing, there are too many bad clusters and they are located at the beginning of the hard drive, then it is not recommended to use such a disk. Viktoria contains a useful function in this case, which allows you to halve the volume of the hard drive due to bad sectors. After this procedure, the HDD can be used as a second disk, or an external drive. It is not suitable for installing an operating system.
Video: Diagnostics and repair of HDD
Symbols
During testing, rectangles of different colors can be observed in the window.
They visually display a picture of the state of the disk:
- the sector marked in white is considered normal. The response from him comes within 5 ms;
- light gray. Response within 20 ms;
- Gray. The answer comes within 50 ms;
- green. Response within 200 ms;
- Orange. Response within 600 ms;
- Red. Sectors that will no longer work;
- blue. "Deadly" sectors. Cannot be restored.

All these designations are in the test section, in the lower middle window. Next to them are numbers indicating the response time from the cluster to the program. Gray and white sectors are not damaged. Green is also a worker, but already striving for the bad.
Orange - bad sector, which can be restored either by low-level formatting, or by S. Kazansky's utility.
In order to be able to use the functions of restoring these sectors, check the boxes opposite the designations in the check boxes.
For the full operation of the computer, it is recommended to periodically test the devices that make it up. The main device is the hard disk. It usually hosts the operating system. The comfort of the user's work at the computer depends on the operability of the disk, its performance. Execution of production tasks.
A high-quality, high-speed HDD testing program is necessary for both a specialist in technical support and an ordinary user. The functions of full-fledged and, what is important, fast low-level testing are performed by the program of Sergey Kazansky Victoria.
Most modern computers run Windows, so it is recommended to use version 4.46. It can be found on the manufacturer's website. The last release of the program is June 2013. It is compatible with Windows 7, does not load the registry, and can be launched from any media. Easy to use.

Victoria serves as an assistant in various situations. For example, when buying a used drive to assess its technical condition, when the operating system slows down, to restore important information. In other matters, and for the removal of irrevocably classified information.
The program is a complete solution that combines the capabilities of several diagnostic utilities for the hard drive and useful functions. It is one of the most widely used programs for recovering bad HDD sectors.
Recover your hard drive using special programs. They allow you to test the hard drive, as well as fix minor malfunctions. Often, this is enough to continue fruitful work. From the article you will learn about one of them called Victoria.
What is the utility capable of?
Victoria HDD test is completely free. Also, the program has many functions and is designed not only for professionals, but also for inexperienced users. So, now you will learn how to check the hard drive with the Victoria program.
Modes
In its work, the utility can use standard Windows toolkit (API) or work in standalone mode through ports. Offline mode provides more reliable data, features additional recovery tools, and allows you to test not only internal, but also external drives.
What is the use of the utility?
The Victoria program allows you to:
- speed up your computer;
- ensure the stability of both programs and the operating system itself.
This is allowed by its such capabilities:
- repair of faulty sections of the hard disk;
- replacement of damaged sectors with spare;
- wiping out broken sectors.
Do I have to use Victoria?
Experienced users will note that it is possible to correct the bad sectors of the drive by replacing them with backup ones using the means of the OS itself (operating system). Correct, but for this you need to check the hard disk volume. However, this method has some drawbacks, for example, work with the active partition occurs exclusively in DOS mode, there is no detailed information, there is no possibility of choosing a method for treating the malfunction. Therefore, it is better to perform hard drive recovery using victoria hdd, which is devoid of these shortcomings.
Working with the program
If you decide to use the program in question, it is best to look for the most recent version. After all, it has already fixed the errors that were in the previous ones. You do not need to install the utility. It is distributed in archive form. Unpack the resulting archive and go inside. There you will find only one executable file vcr447.exe. To make it easier to use, make it a shortcut on the screen.
If your PC is running Windows 7 or higher, then you need to run the file only as an administrator. After right-clicking on the shortcut, select the entry "Run as administrator" from the context menu and click on it.

Before opening the Victoria program window, several pop-up windows will appear in front of you in turn:
- Unknown error.
- Invalid handle.
- PortTalk driver not installed.

This is warned by specialists that there is no driver for working with ports in the system yet. Click OK and that's it.
Getting Started
The graphical interface of the utility opens on the Standart tab. In the right part of it, indicate the disk to be checked. Even if he is the only one, you still need to point to him. Then his data will appear on the left.

Important! It is strictly forbidden to enter any passwords. This option is for specialists only. Next, go to the Smart tab and on the right side click on Get Smart. The table will display the 242 parameters of your hard disk.

The system removes this data from the disk immediately after installing it on the PC, and Victoria takes it from the system. You can look at them, but pay the most attention to the fifth item, the Health column. It contains the information for which you launched the utility. What does the color of these circles mean?
- green - HDD sectors feel great;
- yellow - there are problems;
- red - parameter values are invalid.
The Raw column displays how many bad sectors of the disk were detected.
Test tab
Move to the Test tab. The scanning process is based on measuring the length of time elapsed from sending a request to returning a response from each sector of the drive. When scanning a disk, the utility evaluates the scanned sectors and sorts them by color and state (to the left of the colors of the sectors, the maximum allowable response time is indicated in milliseconds):
- three gray - fine;
- green - not bad;
- orange - satisfactory;
- blue or red is bad.

The actions according to the selected modes will be applied to the sectors of the HDD that you mark.
Modes of operation
The utility has four modes of operation:
- Ignore - check without trying to cure bad sectors;
- Remap - replace bad sectors with spare ones;
- Restore - an attempt to restore damaged sectors programmatically;
- Erase - deleting bad blocks from disk memory using low-level formatting. You can't just try the mode, since there is a possibility of damage to areas that may still work in the future. The first three will be enough.

What are the reserve sectors?
The operating system separates a spare area on the hard disk. Most often, it is the slowest of all and is located closer to the center of the HDD. Its size is approximately equal to 10% of the total volume. When bad sectors appear, the OS moves data from them to this spare area. True, she does not do this herself, but during the launch of disk checks for errors using Windows tools or using external programs.
Diagnostics
If you have already selected the mode and marked the sectors for treatment, then click Start.

Attention! If after pressing Start the diagnostics did not start, then, most likely, you did not mark your drive with the mouse on the Standart tab. You need to go back, do it and run the check again.
The testing process can be observed on the screen. In earlier versions of Victoria, the sectors being tested were displayed as a grid.

However, such a graphical display put a significant load on the processor with large volumes of hard drives. As a result, in the latest version 4.47, the developers have replaced the grid with a graph that appears within a few minutes after the start of the scan.

Rendering is disabled if you uncheck the Grid checkbox.
Meaning of buttons
After starting the test, the name of the Start button changes to Stop, which allows you to stop the process by pressing it.

If you press the Pause button, it will change its name to Continue, scanning will pause. Click on it, and everything will continue from the same place where it left off.
Attention! Exit all programs that may access the hard disk being scanned. If they are not removed from memory, the readings will lose accuracy, and the number of orange sectors will increase significantly. This will happen due to the fact that some of them will use open source programs.
Will the life of a hard drive last thanks to Victoria?
You can programmatically cure up to 10% of bad sectors, as well as restore the operation of any of the sectors on the active volume if this is the result of system failures. Victoria does not fix physical damage.
However, if the bad sectors are restored, and the remaining ones are moved to the spare area, then the disk will still serve. True, it is better not to use it to install the system, but only as an additional one.
At one stage or another of its functioning, it may be necessary to diagnose it to assess performance, power, and identify possible problems.
For this, various programs and software are released that can collect and display basic data about the device.
The most popular such software in Russia is Victoria hdd. We will tell you how to use this software, and what advantages does it have?
basic information
The program is designed to diagnose the hard drive, but it can also work with any other storage devices, etc.
It has gained significant popularity in Russia due to the fact that it is distributed free of charge and officially.
It collects all the information available to such programs, and, according to user reviews, can even compete with paid counterparts.
What are the main features of this program:
- During its work, it interacts directly with the Windows operating system. Thanks to this, the maximum diagnostic accuracy is achieved with a minimum load on the device's hardware resources;
- Displays the maximum possible information about the hard disk;
- Capable of collecting and displaying SMART data. Even if there is no protection against this on the hard disk (a function that is not available for all even paid programs);
- Conducts a detailed scans of the hard disk surface. During which it identifies and displays bad sectors Bad;
- Recovering bad sectors if possible;
- If it is impossible to recover bad sectors, it reassigns them;
- Able to perform a complete cleaning of the entire hard drive by pressing one button.
A significant drawback of this convenient multi-functional utility is that it is not cross-platform.
Download
This software is freely distributed on the Internet, as mentioned above.
To download it, follow the algorithm:

- The link is direct and your browser will immediately ask you what to do with the downloaded file;
- Select Save;
- Wait for the download to finish;
- Open the Downloads folder (this is where the installed program was downloaded by default, if you did not choose another on your PC);
- Find the archive with the program there and unzip it;
- The program is mobile and does not require installation (this is also its big plus), so you can immediately run it from the folder into which you unpacked.
Due to the fact that the software does not require installation, it is convenient for those who periodically work with different computers.
In this case, you can simply copy the program to a USB flash drive and carry it with you.
When connected, you can run it directly from the memory card - you don't even need to copy it to the computer whose hard drive you want to diagnose.
Important! For the program to work most correctly, run it as Administrator... If you don't, it will still work, but some features may not be available and some results may not be accurate.

Working with the program
Before starting to work with the program, restart your computer and enter the operating system as Administrator.
Now find on the desktop or in the unpacking folder the shortcut for launching the program, right-click on it and select Run as administrator.
Initial settings
After launch, the standard program window will open.
On the right side of it, find the field that lists all hard drives and other media connected to this computer and to which the utility has access.
Determine what kind of media you want to analyze and click on its name in this field with the left mouse button.

You can check if this is really the drive you want.
After clicking on the name in the main dialog box of the program (on the left), all technical information about the device will be displayed.
The data is displayed in the following order:
- The full name of your device, its model, and in the same line - the serial number;
- The amount of memory on your device;
- The list of interfaces with which the hard drive works (it is the same for an average device, but may differ for the oldest models);
- The presence or absence of password protection on the media;
- The approximate time you will need to complete.

The information determined by the program is correct and as accurate as possible, regardless of the mode in which the software is running.
Working with SMART information
The system technical information SMART is available on all disks, but not all disks can access it.
This does not depend on the type of program you are using, and so on.
If the hard disk has access to such information, then you can view it using the Victoria HDD.
- Select the disk, information about which you want to view in the manner described in the previous part of the material;
- After the main technical information is displayed in the left window of the program, go to the SMART tab. The buttons for switching between tabs are located in the upper part of the window, above the field in which the main technical information of the disc is displayed, before that you were in the tab Standard);
- After that, the window will be updated- on the right side of it, find the blue Get Smart button and click on it;

- Wait until the process of accessing disk memory, scanning and processing information occurs;
- If such information is available, then, as soon as the scanning process is completed, it will be displayed in the field of the left window.
Interpreting the results is easy enough, even if you don't understand the metrics displayed. The system will summarize on its own. A green button will appear next to the Get Smart button with the inscription GOOD if the disk's performance is good, and a red one with the inscription BAD if it is bad.
What are the items in the SMART information section that have the maximum value for the user? To assess the health of the hard drive, you need to take into account the following indicators from the list:
- Reallocated sector count is the number of bad sectors on the hard disk surface. Their number up to 10 is technically explainable and should not cause significant unrest. But if the indicator exceeds 10, then you should start transferring information from this hard disk, since it can break down to an irreparable state;
- HAD Temperature- the average operating temperature of your hard disk, which should not exceed 40 degrees Celsius. If the indicator is higher, then the rate of disc wear increases many times. Installing an additional cooler, replacing thermal paste, removing the protective casing from the system unit, using a laptop stand and more will help to cool the disk;
- Seek error rate- the number of errors during the operation of the hard disk heads. Normally, with a properly functioning disk, this indicator is zero. If it is larger, it may be a sign of external overheating of the hard drive and the presence of significant vibrations during its operation.
A basic analysis of these characteristics allows us to draw a conclusion about the health of the hard drive, its main characteristics and possible reasons for future failure.
Disk surface scan
Such a scan is necessary to determine the presence of bad bad sectors, restore them or reassign them.
To start the scan process, run the program and select the disk that you will scan using the method described in the previous sections.
After that go to the Tests tab and proceed according to the algorithm:
- In the large gray field that appears in place of the left information window, the process will be displayed graphically;
- To the left there are sectors distributed by response time, their number and color, which they will be displayed on the diagram in the field, are indicated;

- After the end of testing, a rather complex multicolor scheme will appear on the screen, reflecting the state of the hard disk surface, established during scanning;
- Start the scan by clicking the Start button to the right of the gray field - in this case, the system scan will start with the default settings.
However, you can customize the scan and more subtle. To do this, use one of the four options listed in the lower right corner of the program window.
Place the marker in the checkbox next to the option you need, and only then click the Start button.
What do these options mean?

- Ignore- diagnostics will be fast, but the program will simply ignore all bad sectors, analyzing them. This option is good for quickly assessing the overall health of the disk and its surface;
- Erase- in this mode, the program will find and erase all BAD-blocks, along with the data stored on them. Therefore, before starting such a scan, important data from the hard drive must be saved. In addition, in this mode, SoiftBAD sectors will be restored, the failures of which have arisen due to problems with the functioning of the OS, and are not too serious;
- Remap- a mode in which the found damaged blocks will be automatically replaced with healthy sectors. It is best to select this function only after you have completed the scan. in Ignore mode... Because there is a possibility that the program will replace the SoftBADs, which can be restored less "traumatically" in the previous mode;
- Restore- the function of "hard" complete replacement of bad sectors. It is convenient and works well, but it is only available to users of the paid full version of the program.
In general, the program quite efficiently restores sectors on a disk or replaces them. Most users do not need the paid version of this software to keep their hard drive functioning properly.
Interpretation
How to interpret the obtained result?
In the list on the right, where the blocks are marked with different colors, look at the first three lines - these are normal values for the hard disk surface.
Stably operating devices contain sectors with just such a response time, there can be many of them.
Green sectors are also acceptable, since their response time is long, though. But it does not interfere with the normal functioning of the device. However, if there are a lot of such sectors, then the response speed will noticeably decrease, especially under significant loads. The read and write performance of the hard drive will also be significantly reduced.

The presence of a large number of green sectors is acceptable, which is natural for old hard drives (both old years of production and those that have undergone significant wear and tear).
And also for those that operate smoothly, even if not for too long.
The red, orange and blue sectors represent the problem. They shouldn't be on a properly functioning hard drive.
They are the ones that cause crashes, system errors, freezing and braking.
Good day to all! Today we will continue the topic devoted to the treatment of the hard drive of a computer (or laptop). Unfortunately, these sensitive devices start to let us down over time. One of the already described how using the standard tools of the Windows 10 operating system, you can try to fix errors on the disk.
When the system does not start, you need to use other software tools specially developed for this purpose. This matter is not as difficult as it might seem. I think that in order to save information (and just to speed up the computer), you can make some effort. If you succeed, you will spend only an hour and a half, and in return save yourself from unnecessary trouble and unnecessary expenses. Do you think it is worth it?
The Victoria program was developed by Sergei Kazansky, I don’t know the exact date. I tried it for the first time probably in 2007, and I think it is still one of the most popular and best. One of the disks started knocking at me then. The same thing can happen to you - the disc can knock during operation, at approximately equal intervals.
At the same time, the work of the computer is greatly slowed down. I cured him, and I didn't have to throw out that disc afterwards. By the way, I threw it out quite recently. He honestly worked his way to the end. So, this useful program helped me out and still helps me out.
How to work in the Victoria program? Testing and checking the hard drive in various modes
The program can be used by downloading it from DOS (for example, version 3.5) Version 3.5 was released a long time ago, but it is quite functional. Its only drawback is that it is not updated. Hard drives with very large capacities are now available compared to version 3.5 and sometimes it takes quite a long time to test and verify. If you have time, then use this particular version to fix bugs. How to make a disk image and run the program - read.
You can use the program by downloading it using one of the so-called rescue disks, which must include it. Although the Author has not updated the program for a long time, enthusiasts do it.
Modes of scanning and restoring hard drives in Victoria 3.5
The work of the program is based on the principle of hiding bad sectors. When it finds bad sectors, the program marks them as bad and calls to these sectors no longer occur, the system does not see them. After treatment, if there is no surface degradation, the disc can work for a long time. In this case, the information on the disk is not destroyed.

The program can read disks in several modes and provides the ability to diagnose and restore performance, depending on the degree of the device killed. If you need to assess the condition of the disk, restore its operability to transfer data to a new disk - this program will help you.
Modes of operation of the program Victoria
The program works in two modes. First mode Is testing. For surface testing only. No operations are performed with the information stored on the hard drive. Second mode of operation Is testing and bug fixing. In this mode, it is possible to save all the information available on the disk. You can delete information - depending on the degree of damage to the disk and the task at hand - to save information or try to cure only the disk.
Scanning modes in Victoria 3.5
After starting the scan, we see a window with settings. The modes of reading and operations with bad blocks (BB) are set immediately before starting. Let's go over the most important ones:

The default is “ Linear reading". Fastest, fastest scanning mode. Starts from the first sector to the last. Parameter " Ignore Bad Blocks"Means that bad sectors will remain unchanged. Check only.

"Random read" happens according to a different algorithm. Using a random number generator, the program grabs a random sector on the disk and checks it. In this mode, the check is slower. If enabled Ignore Bad Block, then the damaged sectors are only revealed.

Butterfly reading, interesting algorithm. Works on the principle of butterfly wings. Sectors are scanned starting "from the edges" from the beginning of the disk and from the end of the disk. Testing ends when it comes to the middle. Not a quick process, it took me about a day to check. Emulates disk operation under load. Allows you to evaluate the speed of the disk.

PIO - Read, this is the mode of accessing the disk using the processor. A reliable but outdated mode today, however, it is still supported by many devices.

PIO-Read to File allows you to write some data on disk to a file. For example, you can set a specific address and write information from the disk to a file. Then you can write back the information using the same coordinates. The size of the file to be written can be limited by the file system type

The write (erase) mode is similar to low-level disk formatting. Irreversibly destroys all data on the disk. Helps to repair some types of damage when Remap did not help. You can try using this mode when trying to save a disk. I managed to extend the life of the disc for some time a couple of times.

The file recording mode is intended for recording information on the disk that was previously saved to a file.

The flaw detector is a purely diagnostic tool. Allows you to see the real number of defects on the disk, to distinguish them from disk "glitches", Defects does not fix.

The program fixes errors by reassigning bad sectors. This is done in two modes - classic ...

... and alternative mode, if the classic method does not help.

Bad sectors data recovery mode. This feature is disabled in the free version.

The mode of erasing information from bad blocks (from all 256 sectors at once). As planned, it removes information from bad blocks and fills them in with zeros. Sometimes it helps to reduce the number of bad sectors. Can be used to assess the degree of surface damage. Destroys data on disk.
Video on how to use the Victoria 3.5 program
Depending on the situation, you can first check and cure the surface, then copy the necessary data by cloning the disk or in other ways. And then erase (low-level formatting), so that if it turns out to be possible to use the old disk for their own needs. Watch the video how the program works.
Victoria's program does not work with the file system, does not fix its errors. It works with the surface and can be quite useful if your Windows stops loading. That's all, it remains to wish you and your hard drives good health.
Victoria is a PC program aimed at a wide range of users. It is used to recover information from hard drives with SATA and IDE interfaces for testing them. The program allows you to deeply, from all sides and quickly assess the condition of your hard drive.
Key features
- - shows complete technical information about the hard drive
- - manipulations with the level of sound noise
- - restoration and change of the physical volume of the drive
- - you can view s.m.a.r.t. installations, instant assessment of the state by the status register and pseudographic scales.
- -complete and estimated modes of plotting the surface
- - is able to determine the SATA / ATA controllers available in the system, as well as additional
- - the method of redistributing sectors from the reserve hides surface defects
- -measuring and monitoring the performance of the hard drive
- -tests the interface and buffer memory, during the reception and transmission of information, for the presence of bugs and data corruption
- - it is possible to start and stop the drive spindle motor
- - cleaning the entire hard drive or part of it
- -Allows you to adjust the reading speed by graphical methods
- - allows you to measure the random, linear, non-linear speed of reading from the disk.
- - it is possible to measure the frequency of rotation of the shaft
- - copying data by sectors of the hard disk
- - indication of operating modes of the hard drive, visualization of error codes through indicator lamps
victoria how to use?
Download the program from the link. We unpack and copy the disk image with the .iso extension to the disk. It is important not only to write this file to disk, but to write exactly the image.
Next, you need to run the program. This is done using the BIOS. We insert our disk and turn off the computer. To get into this BIOS, when you turn on the computer, press DEL or F2 on the keyboard. When you get to the blue BIOS menu, do the following.
We select "Advanced Features", in it "Boot sequence" and you need to select boot from CD / DVD. Then you need to save everything and exit by clicking "Save and exit setup". If your BIOS menu does not have such items, then look for something similar with the word boot.
If everything is done correctly, you will automatically leave BIOS and Victoria will start

Victoria launch and data recovery
When you start the program for the first time, you will need to press "P" on the keyboard to select the drive you want. In all menus, the item you need is selected with the "down" and "up" keys. When you move the cursor, an indication will be visible, which means the hard disk is ready.

Drives working normally have two LEDs DRDY and DRSC on, INX may be on.
The AMNF indicator can be lit in the error register. The rest should be inactive.
Now we select the item we need with the enter button and the program looks for external controllers and hard drives on them. After that, all serviceable and actually present HDDs in the "master" position will be determined. The rest of the drives will not be seen. Then, after finding additional ports on the screen, information will appear in the form of a table.
It contains the name of the controller developer (Vendor code), the name of the controller itself (ID Code), class (EXT, INT, RAID), port address (if not found, then a dash), HDD name (only if it is working properly In the plate, everything will be numbered in order and you will need to select the one you want.
It is also possible that Victoria will not find drives on all Promise controllers. And therefore, click on F2, thereby opening the passport of our drive. The passport itself contains data on the characteristics of the HDD and describes its parameters. When analyzing the disk, the program takes into account the data in the passport.

Testing the hard drive
Victoria has a good hard drive surface scanner. It allows you to diagnose the hard drive for the presence of failures, interface errors and floating defects. The program can test most drives at maximum speed. And it does not depend on the type of interface cable and controller.
Unlike other utilities of this type, exclusive algorithms are used here. They include timer adjustment depending on the speed of the hard drive. Supported standards are automatically recognized. This allows you to test both fast and slow HDDs. Its original way of measuring time intervals makes it possible to work with the program through virtual DOS on Windows and almost does not reduce the accuracy.
The surface test is closely related to the drive's passport. LBA 28 and 48 bit modes are supported and automatically recognized. Everything that could be done automatically was done and no settings were required from the user.
Linear Reading (Verification)
Conducts a surface test in LBA addressing. Made for fast and accurate diagnostics of surface conditions. During the test, the program divides the entire space of HDD addresses into conditional identical sections. The access time to each site is measured and a rectangle of the corresponding color is drawn on the screen.
Random read
A surface test that uses a random number generator. This generator gives out side addresses. The range is set in the test menu. The result obtained by the test quite accurately describes the speed of the drive in real tasks.
Butterfly reading
The butterfly algorithm alternately reads the end and the beginning of the disk space, offset by one block. It differs from random in that this test scans the entire surface and all sectors according to a certain law and has an end. Performs scanning much slower than linear.
PIO reading
In this case, there is a real reading of sectors from the hard drive. The speed is low - 2-8 megabytes per second. Therefore, this reading is best done in small areas. Effective for detecting drive bugs and verifying interface and read channel functionality. To increase the reading speed, it is necessary to enable the maximum mode (PIO-4) in the BIOS.
PIO read to file (Read to file)
This method of reading "not to a file" is distinguished by the fact that information from the HDD is written to a file in the current directory. Victoria processes bad blocks so that zeros are set instead of defective areas. On error, the sector is read twice. First, with block access, then with sector-by-sector access.
Write (erase)
Sector data is erased. It is used to remove some defects. The erasure speed is close to PIO reading. But there is a faster way to delete information through the security subsystem.
Recording from file
The contents of the file are written to disk in sectors. A window will open through the built-in manager where you can select a file. The speed of such recording reaches six Mb / s. The procedure takes place with the participation of a visual scanner. Useful for cloning small disks and fixing corrupted file systems. The maximum file size is 2GB.
In order to test the surface of the hard drive, use the F4 key. You will see a menu. In it, you should select "Linear reading" and below "Ignore bad blocks" (ignore bad sectors). Select the spacebar button, navigate with the arrow keys - "up" and "down".

It is worth paying special attention to the third point. It has functions such as writing from a file and writing (erasing). When used, the data on the drive is erased. You can also lose data using "BB = Erase 256 sect". It's in the fourth menu.
After choosing the actions we need, scanning starts. The results will appear after a while in a special window.

Problems may arise during the scanning process. The hard disk freezes due to a system malfunction. If the diagnostic test hangs, the program continues after a timeout of 16 seconds. To indicate a timeout, Victoria shows the symbol "T" on the display. Frequent freezing of the program may mean that the HDD is not responding to requests. You can solve this problem by pressing F3 (Reset). If something is not clear, then use the help system (F1 key).
Checking the program interface
In order to do this, press F4 on the third menu item. Cycles of information are written to the memory of the hard drive buffer, and then reads it from there. Comparison of read data with written data is also performed. Reading time is also measured. If the read does not coincide with the written one, the program informs about it. To get a complete picture of the state of the hard disk, you need to diagnose it for quite some time.
To exit the program, click on "X". After you exit, you will find yourself in the "Volcov Commander". Exit from which is carried out by pressing F10 and confirming yes. Next is the "DOS" section. Ctrl + alt + del exits. The PC restarts and you need to remember to remove the disk from the drive and choose to boot from the hard disk.
Indicator Conventions
- DriveReady (DRDY)- the hard disk is ready to work and receive commands
- DriveSeekComplete (DRSC) - the past meaning that the HDD has finished installing the head on the track is outdated.
- Busy (BUSY)- the drive is busy processing data or is stuck. As long as this indicator is on, everything else does not work and Victoria only reacts to reset (F3).
- Index (INX)- after each revolution of the hard drive, this indicator appears. Not used on all devices.
- Eror (ERR)- means that an error has occurred. By its code, you can find out what kind of register it is.
- Data Request (DRQ) - the hard disk is ready to start the process of exchanging information with the interface.
Error codes
- UncorrectableDataError (UNC)- the information is not corrected by a redundant code, it is recognized as unreadable. The error may be due to damage to the hard drive or violation of the data checksum.
- IDNotFound (IDNF) - sector not found. Basically, this means that the microcode or format of the lower level of the drive is corrupted. Such an error appears for those working properly, if you refer to an address that does not exist.
- Aborted command (ABRT) – the hard disk refused to execute the command due to a malfunction or the command could not be executed because not supported by the drive.
- AddressMarkNotFound (AMNF) - means the inability to read the sector. Most likely a consequence of a hardware problem.
- Track 0 Not Found (T0 NF) – it does not work due to the impossibility, to recalibrate the starting cylinder. If you have a modern hard drive, then such an error may indicate the inoperability of the magnetic heads or microcode.
Above was provided information on how to use the victoria program. This program is free, which is a great advantage. It also does not require installation, takes up very little memory, and is fast. It includes many modes and thus and all of the above is superior to similar programs (Dalas, hddl, veryfi, vivard, etc.).
Victoria hard disk surface check