Volumetric pencil drawing. How it is done, how it works, how it works
Read also
And we figured out which ones we need to start drawing.
By the way, you can buy a lot of goods for creativity on AliExpress at a good price!
Today we have our first 3D drawing lesson. We will start with the simplest shape - spheres.
So let's get started ...
Learn to draw Is pretty much learning how to control the light and shadow in your image. In this tutorial, you will learn how to determine where the light source is and where the shadows of the objects in your drawing are. Let's draw a 3D sphere.
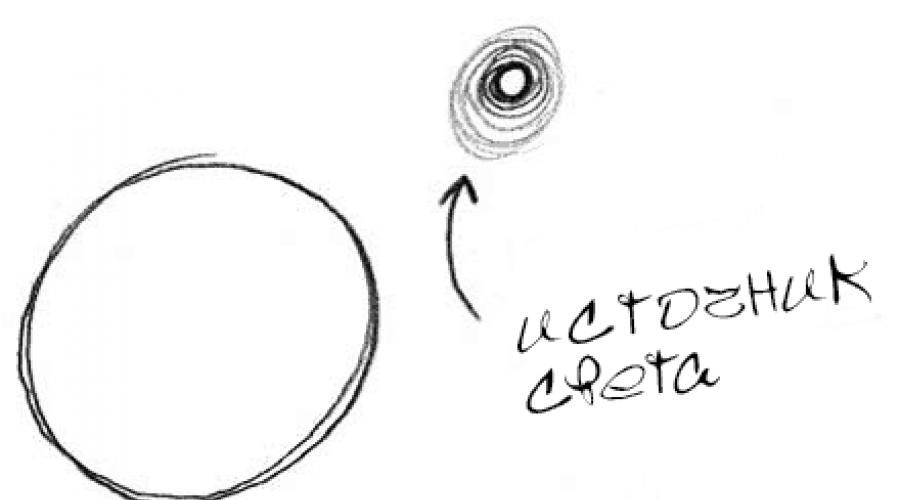
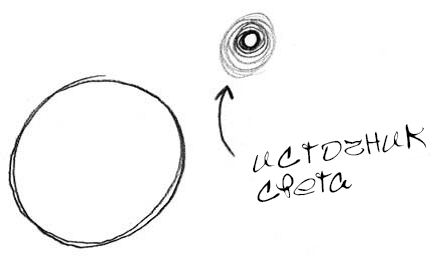
1. Draw a circle. Don't be discouraged if your circle looks like an egg or a flattened ball. Just touch your pencil to a piece of paper and draw a circle shape. If you like, trace the bottom of your coffee cup or coin.
2. Determine the location of the light source. Wait, what's that light source? How to determine where the light source is? Do you already feel overwhelmed ?! Wait, don't panic and don't throw your scrapbook across the room for now. Read on.
To draw a 3D image, you need to determine: where and in what direction the light hits the object. Then you apply a shadow on the opposite side of the light source.
Check: Raise your pencil an inch from the paper and notice the shadow it creates. If the light in the room is directly above the pencil, the shadow will be directly below it. But if the light comes out at an angle, then the shadow on the paper will expand the further it is from the light. It's a simple yet surprisingly effective way to bring your drawings to life. Play with the pencil and shadow for a few minutes, move it sideways, up and down. Place one end of the pencil directly on a piece of paper and notice how the shadow joins the pencil and becomes thinner and darker than the shadow when the pencil is in the air. Such a shadow is called falling.
In our example, the light source is at the top right of the sphere. Go ahead and draw a small swirling "sun" on the right side of our page.
3. Draw a falling shadow. Just as the drop shadow from your pencil appears on the table, your sphere will cast a shadow on the ground near it. Drop shadows are fantastic visual anchors that help keep objects on the surface of the paper. See how the shadow is drawn below. Now draw a drop shadow on the opposite side of your sphere from the light source on your leaf. It may seem to you that it looks sloppy and dirty. However, these sketches are a practice of your skills and do not need to be seen by others.

Just remember two important things: the position of the light source and the falling shadow on the surface near the object on the opposite side from the source.
4. Shade the sphere opposite the light source. It's okay if you go beyond the lines - don't worry about perfection.

Notice how the area at the farthest edge of the light is darkened, and how the lines get lighter and lighter as they get closer to the light. It is called shading... This is an amazing technique that is required to create the illusion of a 3D image.

5. Use your finger to blend in the shadow. Note: your finger is just like a brush! Cool effect, isn't it?
Voila! Congratulations! You have turned the scribbled circle into a 3D image! Easy or simple?
LESSON 1: PRACTICE
One of the important goals of these lessons is to teach you how to draw objects in the real world. In subsequent chapters, we will apply the concepts you learned from this 3D sphere drawing tutorial to draw interesting objects around you. Whether you want to paint a colorful fruit bowl on the table or a portrait of a family member, you will have the opportunity to do so.
Let's start by drawing an apple. In the following lessons, we will also deal with more complex objects such as buildings and people.

Take a look at this photo of an apple below. And try again. Or try drawing from life.
How is it? Happened? We share our work and get advice in
In recent times, many new drawing techniques have emerged in the world of fine arts. Some of them come back from the past, but there are also completely new modern ways of transferring images to paper, for example, 3D drawing. Surely you have seen three-dimensional pictures on the Internet more than once, drawn on paper, walls or even on asphalt. Looking at such images, you involuntarily ask yourself the question: "How to do this?", "What's the secret ?!" In this article, we will tell you how to master 3D drawing from the very beginning. Involve children in teaching, it will be very interesting for them, and you will definitely get something special!
How to draw in volume
Before we start to figure out how to draw 3D, let's find out exactly what 3D drawings are. They are drawn on plain paper using ballpoint pens or colored pencils. The effect of volume is created with the help of a virtuoso image of the shadow that the painted object would cast in reality if it were located on this sheet of paper.
Now let's talk about how to draw in volume. First of all, you need to very carefully consider the subject that we are going to depict. Of particular importance is the careful fixation of the shape of the object, its texture and shadow. For the most realistic transfer of the effect of chiaroscuro, before starting work, we must determine the light sources. It depends on what our subject will be in the picture. For example, if our subject is located close to a light source, we should depict it in light colors, and if, on the contrary, it is far away, more shadows will fall on it, and we will depict it in dark shades.
After studying the subject and all its properties, we proceed directly to drawing. First, as usual, we make a sketch to understand whether the light is transmitted correctly or not. We use light shades, because adding contrast is easier than making the drawing lighter, gradually thickening the colors in the right places. We try to make all the transitions between the drawing and its shadow as smooth as possible, so we get a more realistic drawing. To create smooth transitions, we use a soft eraser, a piece of cotton wool or paper, blending the lines in the right places. Remember that when depicting complex objects, you need to mentally break them down into simpler geometric shapes. This will make it easier to determine the source of light, and to understand how the shadow of this or that fragment should behave.
As you already know, you can draw three-dimensional drawings using ordinary stationery (pencils or pens), but there is also a special device that allows you to make a 3D drawing even without using the chiaroscuro effect - this is a special 3D pen for drawing. This wonderful object creates an image using special multi-colored plastic, which heats up and squeezes onto paper in the desired shape during drawing, and then instantly freezes. This is how volumetric images are obtained, they can even be felt, they will protrude above the sheet of paper, naturally, casting a shadow.
3D for kids
3D for children is a new trend in the development of creative abilities of kids, allowing them to develop spatial imagination, the ability to see the smallest details and convey them on paper. Volumetric drawings are real magic for a child, because the drawn object, although it is on a plane, seems absolutely real. You probably want to teach your little one to do miracles! Then we will tell you how to draw 3D drawings. Let's make a reservation right away that it is unlikely that your child will succeed in creating something complex, so please be patient and learn gradually. The first steps in volumetric drawing are usually done with images of simple geometric shapes: a ball (you can beat this figure as an image of a ball or a planet) or a parallelepiped (this will be a house). But the simplest 3D image that even the smallest baby can do is a drawing of a palm or foot. Here, using their example, we will tell you how to make a drawing three-dimensional.
For work, we take a sheet of thick white paper, a simple pencil, an eraser, a black felt-tip pen and colored pencils. First, we outline the baby's open palm with a simple pencil so that only its outline is obtained. In no case should you circle it, otherwise you will not get a volumetric effect!
Now we shade the entire space of the sheet, except for the one that is occupied by the palm, with horizontal lines at an equal distance from each other. As a result, we get a shaded sheet of paper with a palm.
We hatch the palm with the same black felt-tip pen as the background, but not with horizontal lines, but with convex ones, connecting their edges with the edges of horizontal lines outside the palm contour.
The gaps between the lines, convex and horizontal, are colored with colored pencils in an arbitrary color scheme. Our drawing is ready, it remains to hang it on the wall and move a short distance so that the effect of volume becomes noticeable.
As you can see, this technique of creating volume is quite simple, it can be used when depicting any other object, and when your kid masters it, it will be easier for him to move further in the exciting 3D drawing activity. We wish you creative success and beautiful drawings!
I advise you to watch the video of drawing a 3D drawing on paper before starting.
Here in the video are two tutorials on drawing 3D stairs and drawing 3D steps. Below I have saved step-by-step instructions on the stairs for you. I don't know if it will be easier for you to navigate by video or pictures. Decide youself.
First step. You will need some stiff paper. Cardboard or something like that will do. We bend the sheet exactly in the middle. Draw straight lines in both directions at the same angle. The lines should mirror each other. Approximately 35-40 degrees angle. Second step. Add steps.  Third step. At both sides!
  Fourth step. Take a ruler and connect the top of the stairs with a straight line. It will be a shadow. We take a soft (even 8B) pencil and make a shadow. You should not put pressure on the pencil, the shadow should not be too dark.
  Last step. Lift one piece of paper up and unfold the paper at an angle to the viewer. It is important to choose an angle so that the stairs appear straight. Due to the shadow, it will seem that this is a three-dimensional drawing:
  Did you like this tutorial?
Are you also attracted by these interesting works, which are called 3d drawings? Cool images, right? If you wanted to create a similar drawing, but do not know how to draw a 3d drawing on paper, then we will help you in drawing. Let's show one of the easy ways to draw a 3d picture on paper.
How to draw a 3d drawing on paper
In fact, you should not be afraid - drawing 3d drawings is easier than you might think. Of course, there are more complex ones, but you can draw them with experience, but for now, try to draw a simple 3d drawing on paper. So, let's begin.
We need to draw an even rectangle. Here you cannot do without the help of a ruler. Click on each image to enlarge it so you can better see each step.


We continue to draw the steps going down. Let me remind you that at the end of the lesson how to draw 3d drawing on paper, you have got an excellent drawing, you should try to draw all the lines even, and the distances are the same.

We look below what steps should be obtained.


The next step is to paint the inside of the steps gray. This can be done with a simple pencil.

Now you need to draw a line using a ruler. Just don't press hard on the pencil.
The red line shows exactly where you need to draw the line. Don't go beyond the rectangle. This, in fact, will be - a shadow.

So we come to the last stage - draw a shadow along the line. Use a feather shade or a hard (H) plain pencil to draw a shadow, and darken the last two small steps on the right a little. This stage is the most difficult, so try it.

Well, the drawing is drawn. You will probably ask - what is the 3d drawing here, where is it? Yes, you're right, as long as it doesn't look exactly like what was planned ... but if you look at the drawing from a certain angle, it becomes 3d! See below.

Liked? Then move on to other tutorials on how to draw a 3d drawing on paper using the links below. We are waiting for your comments, did you succeed or not?
More lessons about 3d drawings.
Before studying draw 3D Drawings you need to understand that the 3D effect is achieved by volume and shadows, so for those who want to learn how to draw objects so that they seemed real, you need to work hard first! The very first thing before learning is to learn how to draw a volume, try to draw a cube, ball or cone. It may take you a lot of time, but in the future it will be faster and faster. Further, after the volume, there are shadows and light. 3D objects cast shadows at the locations that define the light source. Before starting to create a three-dimensional drawing, you will need some time to study the object that you are going to draw - its shape, volume, shadows.
1.Sketch.
The first step to drawing a 3D image is to create a sketch. Satisfied just to create it, you should decide where the items will be on your sheet. After that, the object should be given a certain shape. Then you need to determine the light source in order to correctly display the shadows.
2.Shadows
I must say right away that it is better to adjust the shadows in layers. First create a shadow mask (light sketches) and then you can finish as you need. Where the shadows are very dark, then try to make their outlines not clear, this will give the picture more reality.
Use an eraser to create additional highlights. Carefully avoid the dark areas of the shadow so as not to hit them with the eraser - smear only the drawing.


