How to draw a snow woman. How to draw a snowman with a pencil step by step
Both children and adults love to sculpt snowmen. And today we will try to depict it in stages with colored pencils. Let's see what happens in the end!
Necessary materials:
- pencils in blue, red, green, yellow and brown tones;
- simple pencil;
- marker;
- eraser.
Drawing steps:
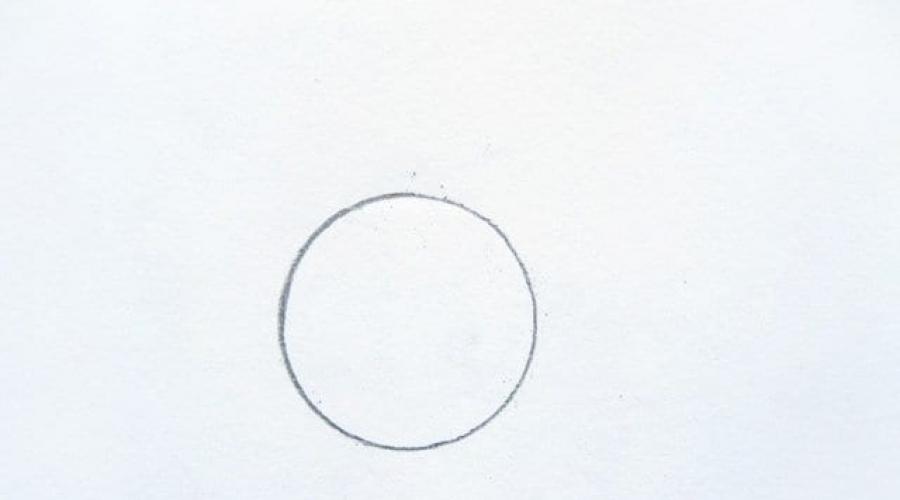
1. Draw a head in the form of a small circle.

2. Now add an oval made of snow. This will be the torso of the snowman. Therefore, we will place it under the circle.

3. Draw a large bucket on the snowman's head at a slight slope.

4. Draw arms on the sides of the body in the form of curved sticks. In the left hand we will depict a long stick.

5. Now you can draw a scarf under your head so that our snowman does not freeze in bad weather or severe frost.


7. At the top of the stick many lines should be drawn and it will turn into a broom. Add buttons to the body and draw a handle on the bucket.

8. Preparing the drawing for completion. Remove the auxiliary lines and shapes with the eraser. We outline all the details of the snowman.

9. Color the hands with a broom with a brown pencil.

10. With a light blue pencil, lightly paint the head and body of our winter hero.

11. The bucket on the snowman's head will be green.

12. Draw the scarf in a bright red color.

At this last stage, we can say that our simple drawing is complete. It can be cut and glued to the front of a Christmas card.


If you find an error, please select a piece of text and press Ctrl + Enter.
The snowman is one of the important characters in the New Year's holiday. New Year 2019 is coming soon and many will wonder how to draw a snowman? Our site site is a collection of instructions, we have answers to many life questions. The site constantly publishes new articles, creative master classes. In order not to miss new ones, you can subscribe.
Materials and tools:
Sketching markers;
- gray pencil;
- black pen;
- pencil;
- ruler;
- paper;
- eraser;
How to draw a snowman in stages?
Note: Artisticks alcohol markers were used in the workshop. When giving a shadow, the border is blurred with the marker that was before. If the edges don't blur well, repeat the action. If the shadows have become lighter, you can apply a dark tone again.
The drawing is drawn on sketching paper.
1. First, we make markings on a piece of paper.
2. Now we start sketching the body. We work with the bottom. First, make a rectangle (or square). Find the middle of the sheet. We make notes. We retreat from the middle by 3 cm on the left and right sides. We draw arcs.

3. We make the outline to draw the head. We find the middle of the sheet and set aside 2 cm from the middle. Draw a scarf and the beginning of a hat.

4. Finishing the hat. Give the snowman's face outlines. Add buttons to the body.

5. We draw hands, and there will be mittens on the hands. At this stage, you can fix something (erase with an eraser), add. If everything suits you, then proceed to drawing further.

6. We outline the sketch using a black pen. Nothing can be fixed here. Then we erase the pencil with an eraser.

7.
We work with snowman accessories. Take the blue marker B241 and sketch in. Then sketch in the buttons with the yellow marker Y225.

8. Give the shadow with a marker one tone darker. Marker B242. Sketch the hands with a brown marker E168. Carrot nose YR158. On the pompom border - in gray pencil.

Here we have such a joyful snowman. You can make a postcard, add New Year's inscriptions, New Year's elements in the form of a tree, sledges, New Year's toys, add gifts, or simply frame it and hang it on the wall. ...
Video. How to draw a snowman in stages?
But what to do if there is a desire, but there is no possibility - the cold, frost and caring mother do not allow.
Do not despair! Pustunchik will help you arrange a real winter holiday without even leaving your room. We cannot blind, then we will draw.
How to draw a snowman?
In order for the drawing to come out correct and beautiful, you need to know what main parts the Snowman consists of.
Usually these are three snowballs: the largest is the Snowman's abdomen, the smaller one is his chest, and the smallest is his head. Hands and feet for a Snowman can also be made from small lumps of snow. Often two small branches are attached to the place of the hands. The nose is usually made of carrots, and the eyes and mouth are made of coals. And, of course, an invariable attribute - a bucket, instead of a hat, and a broom, which he "holds" in his hands.
Now you can start drawing, and to make it easier for you, use the tips in the form of diagrams. They have all sorts of Snowmen on them!
Scheme 1
Scheme 2

Scheme 3

Winter fun for children cannot be imagined without a snowman. The fabulous character is simple, but without him the New Year's carnival and winter fun will not take place. You can make a unique sketch of a fabulous snowman not only from real snow, but also draw on paper. We draw a snowman in stages - with this phrase, a fascinating personification of a fantastic snow hero begins. You can use different methods to create an image.
How to draw a snowman in stages
Beginners do not know exactly how to draw a snowman, so you should follow the recommendations:
- a center is applied on a blank sheet, from which a circle is created (in its place there will be a head);

- the next ball is drawn slightly larger than the first and placed under the head; drawing

- as a result, two circles are obtained for the body, located along the same line;
- the base of the character ends with a large third circle; drawing

- we insulate the snowman with a scarf, which is considered as an element of style (the tips are hidden so that they do not hang out on the sides); drawing

- the rough lines of the pencil are erased;
- the drawing is outlined along the contour; drawing

- curved lines are added, which transform into a hat;

- the shape of the headgear is fully formed;

- arms are branches that attach to the body at the appropriate level

- the nose is a bright carrot (it is located in the center of the upper circle);

- a mouth is formed from stones or buttons;
- the smile is depicted as an arc;

- the eyes are drawn large with black dots inside to enliven the look;

- clothes are displayed with buttons in a row (even small circles);

- wavy lines are scattered against the main background, which will positively play on naturalness and earthiness;
- chaotic snowballs are added on the snowdrifts;
- the final correction of the contours takes place after the study of the background

How to draw a snowman using paints.
After getting acquainted with how to draw a snowman with a pencil, you can move on to another stage of drawing using paints. It will be more difficult to draw a snow hero,
therefore, you first need to prepare and take:
- a sheet of a convenient format;
- pencils B or B2;
- eraser;
- paints of different colors;
- brushes;
- container with water;
- clean sponge.
To begin the first drawing step, lay the worksheet vertically and sketch on it several lines located in different places (in their place there will be snowdrifts). Leaving space from the edges of the sheet,
- with a simple pencil, three lumps of snow are depicted (first a larger one, and then a smaller one);

- contours can be applied using caps;
- you can add a Christmas tree to the background, which will add contrast to the picture;
- everything behind the central character should be smaller;
- you can add a moon or a small circle of the sun to the sky;

- snowdrifts are accurately painted;
- the transition from one color of paints to another is smooth (the lower and upper parts of the sheet are merged using a palette of blue, blue, violet);
- the drawing is periodically dried so that the background does not spread;
- decorate the night sky by mixing bright yellow with white for the main luminary;

- decorate the Christmas tree with sweeping strokes using turquoise, cherry and blue colors;
- we leave the main drawing for the final stage, for which a thick mixture of paints is used;
- the snowman is completely shaded in one breath, choosing a certain shade as the basis, gradually saturating it with paint;
- volume is created by applying a thicker mixture to the left side;
- the tree is slightly wrapped in snow using white strokes;
- a thin brush will help draw hands, a mouth and funny eyes;
- you can tint white dried paint with blue strokes;
- friability and volume will give the picture a pale blue paint (it is applied with sliding movements).

Video for beginners and children, how to draw a snowman
Simple drawing of a snow hero by cells

It is faster to draw a snowman using a sheet outlined in a cage. The schematic drawing is beautiful if each cell is transferred from the sample. Initially, you need to count the distance to each cell and transfer it to the sheet where you plan to create a new drawing. It is better to be creative on printed paper, copying strokes, and then adding new ones. The overall look changes by experimenting with colors.


Video how to draw a snowman in an easy way
How to create a snowman from Frozen

To portray a playful snowman on paper for the pleasure of children. It is not difficult to portray it, following the points: Figure 7.23
- there are two ovals next to it (eye contour);
- a thick carrot nose is added;
- mouth wide open; Figure 7.24
- the snowman has an irregular egg-shaped head, on which three hairs are visible;
- a tooth peeps out of the mouth in a funny way;
- the body and arms are outlined last, adding a few buttons for beauty (Figure 7.16),
- add a flower. figure 7.25
Drawing will be useful if a special lesson is assigned for it, for which the child can draw a New Year's character, following his imagination. Starting with a few circles, you can then follow your intuitive hand movements, creating an original image of a snowman.
Snowman pictures drawn - this is an idea for a competition or for evening entertainment. Once a year, special attention is paid to the snowy fairy-tale character - he is drawn on different paper, using simple pencils or paints.


How to draw a snowman in stages with a pencil will more accurately tell you your imagination, which, step by step, will create a new image of the character


You can decorate it with a hat or a bucket on your head, a scarf or a jacket, but the carrot nose, button eyes and mouth made of pebbles remain unchanged. You need to start drawing in a good mood, leaving unnecessary thoughts in the background.
Surely everyone knows who a snowman is. This is a very popular winter sculpture made of snow that even a five-year-old can mold. And also a fabulous and cartoon character, therefore, the first to come up with exactly how illustrators. Snowman or Snow Woman - sculpted in winter
The tradition of sculpting this character came to us from ancient times. Due to the lack of electricity and the Internet, people had fun as best they could, and this fun was very popular. However, in our age of high technologies, this seemingly simple game finds its fans, and when enough snow falls, children pour out into the yards and begin to sculpt. Probably, it was from this, not counting the sand cakes, that the career of many famous sculptors began.
However, modern winters do not always provide an opportunity to create ice figures. At first there is no snow, then when it falls, it becomes too cold, and then it is already too dirty and melts quickly. Therefore, many children, as well as their parents, replace modeling with an image. Before drawing a snowman, let's figure out what parts it consists of.
Comment
It is made from two or more snow balls, which are obtained by painstaking and diligent rolling. To do this, they first sculpt a small dense lump, then put it on the crust and begin layer by layer, as it were, to wind such strips on it. To make the ball even, when rolling it is periodically unrolled at different angles.
Usually a snowman consists of three lumps. The largest of them is the belly, a little smaller is the chest, and, finally, the smallest is the head. Therefore, when asked how to draw a snowman, feel free to answer: "Simple", because it consists of three not very even circles. The rest of our character is usually created from what can be found in every courtyard.

Our snowman's arms can be made from two simple branches or small lumps. Often he is honorably awarded with a broom or a shovel, and then he is the guardian of order. Sometimes two small lumps of snow on the ground make a kind of boots. By tradition, our hero's nose is a carrot. It was used because it can be stored very well and could be found in every basement. However, modern snowmen are increasingly making it from simple pebbles or sticks. Also, with their help, the rest of the face is indicated. If there is an unnecessary leaky bucket, then you can make it a hat.
Draw
Now let's figure out how to draw a snowman in stages.
We need: paper, a pencil, an eraser. If desired, make it colored - paints, a brush and a jar of water.

So let's get started:
- To begin with, we outline its general outline.
- Draw a small oval above the middle. This is the head of our character.
- To it we add the gradually increasing middle and lower parts.
- Next, we move on to the upper limbs.
- How to draw a snowman without a face? It's impossible. Therefore, we depict our carrot, as well as dots-angles in the place of the mouth and eyes. Our character acquires its own features. And basically, what character he will have depends on this stage.
- This is followed by a cap. A simple headpiece with a pompom.
- In the left hand of our hero we draw a broom. We have it made in the old fashioned way, from rods, and not from polymer strips, as in modern times.
- Let's warm our snowman with a scarf with a beautiful knot around his neck.
- Completing the image, we erase unnecessary lines and lines.
- Boldly outline the contours, draw the buttons.
- We outline light spots and shadows. Shade them slightly.
- Paint over the scarf with a hat with a dark color.
- And finally, the very last stage: we will decorate his hat and scarf with snowflakes. It's winter. Here's how to draw a snowman with a pencil.
Finishing touch
If desired, a scarf with a hat and a broom can be made multi-colored using dyes.