How to draw an elegant sea. Step by step drawing of a seascape
Read also
What can bring us into a state of relaxation and at the same time more excitement than sea waves and ripples on the sparkling surface of water? And the fresh ocean breeze can fill you with joy and inspiration.
In just five easy steps, the following tutorial will help you paint a simple seascape with watercolors and convey the atmosphere of a sunny, windy day at sea.
You will need:
1. A sheet of cold-pressed semi-smooth watercolor paper, approximately 25x35.5 cm in size.
2. Three round brushes: large (# 12), medium (# 8) and very small for drawing fine details (pointed, # 4).
3. Paints:
- cobalt blue
- Neapolitan yellow
- cadmium red
- Venetian red
- phthalocyanine blue
- Prussian green.
Note: The last two colors will be used for the sea waves. You can replace them with other colors of blues and teals that are vibrant, clear, and deep.
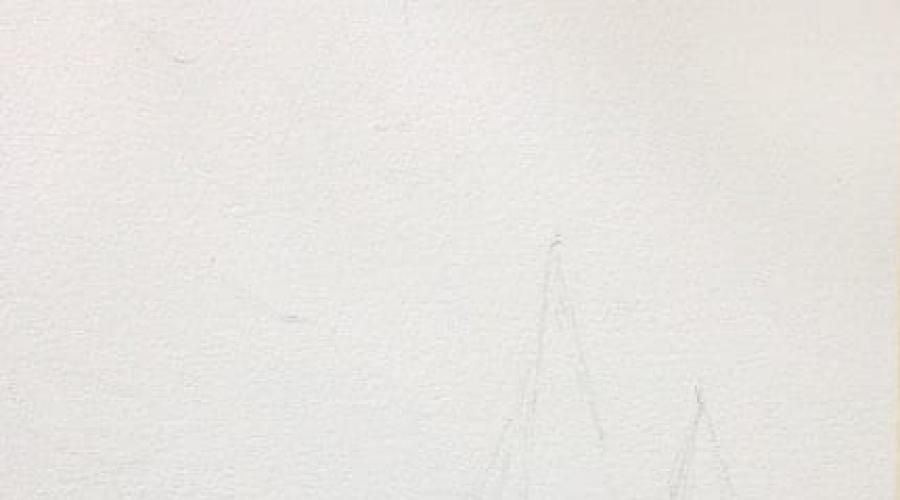
Step 1. Sketch with a pencil
Draw a sketch with light lines. The outlines should be barely visible on paper.

Step 2. Draw the sky
Wet the paper above the horizon, excluding objects in the foreground. Wait for the paper to absorb some of the water.
With a large brush, paint a few light strokes of Neapolitan yellow paint to indicate the location of the clouds. Dip a brush in cobalt blue paint and draw the upper outline of the clouds. Slightly blur the paths with a clean, damp brush for a smooth transition. Continue painting the blue sky, indicating the bottom of the clouds.

While the paper is still damp, paint shadows on the clouds using a mixture of cobalt blue and cadmium red.
Step 3. Draw the water
Apply a generous amount of phthalocyanine blue paint diluted with water to a large brush. Make the first strokes using the wet-on-dry technique (paint thinned with water on dry paper).
Using light, sliding movements, apply paint to the paper, alternately using the entire surface of the brush or only part of it. Due to the slightly grainy texture of the paper, some areas will remain unpainted, which will create the illusion of sparkling sea water.

While the water is still wet, add depth with a few short strokes of phthalocyanine blue and Prussian green paint. This will add dimension to the foreground image.
Step 4. Draw the background and waves
Mixing cobalt blue, Neapolitan yellow paint and a drop of cadmium red, paint the hills in the background. Try to make the colors appear muted and the outlines washed out to emphasize the remoteness of the hills.

Wait until the ocean area is completely dry before starting to paint waves and ripples on the water. To create depth in the image, strokes in the foreground should be larger and brighter than when drawing distant objects.
Step 5. Draw the boats
Using medium and small brushes, paint the boats and people on them. Mix Cadmium Red and Venetian Red to create an accent color. Do not try to carefully draw the figures of people - a slightly sloppy image will look more natural.

You may want to add depth to the hills to make them stand out even more. You can also bring the foreground closer with a few extra strokes.
Now it's time to put the finishing touches where needed. Don't forget to draw some seagulls hovering in the sky to add more life to your composition.

When it gets cold outside, you immediately have a desire to hit the road far away, to warm regions. And when the heat is wild, no one minds dumping there. What nonsense it turns out. Whatever time of year it is, all the time you want to go to the sea. That's how we live. Let's learn how to draw the sea with a pencil. The sea is a space filled with water that cannot be drunk by mere mortals. But you can safely devour any inhabitant of this large reservoir (if, of course, he does not devour you first). The sea is beautiful and dangerous, it attracts romantics, scuba divers, girls in mini bikinis, Patrick and, as well as those who like to paint landscapes.
The sea comes in different colors: black, red, Japanese, but the paradox is that it is blue all the time. Scientists are still racking their brains for themselves, but more often for others, why the sea is blue, but they find no other explanation, except why not. Moreover, the blue looks much more attractive than the Dead. The mystery of this state of water is best explored in the summer, in the company of beautiful girls in swimsuits. In such conditions, the level of scientific research increases over9000 times. From those several sources that talk about the subject, we know a few things:
- Blue Sea possesses hypnosis skills. Eyewitnesses claim that they saw the same thing in different parts of the world at the same time;
- It can be black drilled, whatever that means;
- Communicate directly with the Moon;
- A golden shark can be found in the sea, which will fulfill three dying wishes;
- Foam for no reason;
- With its magnetic abilities, it attracts people to the beach, so that later they can be dragged away and fed to Cthulhu.
- Try to draw yourself a sea.
How to draw the sea with a pencil step by step
Step one. Let's sketch out the horizon line, and these figures will indicate the location of the seagull birds.  Step two. Now we draw the outlines of the birds themselves.
  Step three. Let's draw each bird in detail.
  Step four. Let's add some shading to create the appearance of the waves. The sound of the surf might even be heard.
  Don't forget to color it in! And then take a new piece of paper and try to portray.
Artists who paint the sea have been learning this all their lives. After all, it is not so easy to convey all the riot of the elements, the play of colors, the nature of the waves, the depth of shades. Therefore, the seascape painter specializes only in working with paintings that convey the different state of the sea space. Before moving on to drawing pictures with paints, let's consider, and the beach with a pencil in stages.
Basic contours
The first step is to place the sheet vertically and draw a horizontal line approximately in the middle. She will separate the sky and the water.Then draw a line of the coast of slight curvature on either side of the sheet, at your discretion. It should start near the horizon and move down to the opposite corner of the sheet. Next, it is important to imagine how to draw the beach and the sea, what will be on the shore, and in what state the elements will be. On the coast, closer to the middle line, you can draw the outlines of stones or rocks. Over the horizon at the edge of the sheet, draw a couple of small hills, which are mountains in the distance. Mark the sun at the top of the sheet. On the land, which is the beach, draw the trunk of the future palm tree, slightly curved towards the sea. At the top of the tree, draw round coconuts and large, spreading palm leaves. Next to the trees, you can add a large open umbrella and an open sun lounger underneath. Draw a small and ballooning circle near the water. Draw the outlines of cloud clusters near the sun and some seagulls hovering in the sky. At this stage, we looked at how to draw the beach and the sea.

Shading
On the surface of the water, you need to draw small waves. To do this, apply a few strokes on the sea surface with a simple pencil. Shading the sea surface near the boulders will visually animate the waves. Lightly rub the rough lines with the eraser to soften the outline from the pencil. The sea surface can also be smoothed by rubbing with your finger or paper. These manipulations help you understand how to draw the beach and the sea to make them look more realistic. Repeat the same steps with the coast - shade the surface and rub lightly, creating the appearance of sand on the beach. Excess dark areas in the picture can be removed with an eraser. The rocks and mountains should be the darkest areas, so shade them with more pressure on the pencil and increased frequency of movement. On the clouds, draw faint hatching just enough to visualize the movement of the air. Onadditional details in the picture, apply strokes along the contour, creating a shadow and depth of the object.

Colorful painting
We have seen how to draw the beach and the sea using a pencil. Next, we will use gouache. In this case, the work is carried out without a pencil, but we will take the main contours of the previous drawing as a basis. We mark the horizon on paper and divide the heavenly space into three parts. The top will be blue, then pink and then yellow will be applied. With a damp, washed brush, blur the rough transition from one color to another. On the lower half of the sheet, again create three lines of color, starting from the horizon - blue, sand, orange, creating the sea, the coastal zone and the beach itself. Blur the transitions again without touching the middle line. We mark the clouds with white gouache and paint over the top with pink, the bottom with dark blue. Remembering our pencil drawing, we draw rocks, taking a brown gouache. Draw the relief, shadows and blur them along the top edge. We emphasize the line of the beach area with orange gouache and mark the contours of the sea waves with white. Use thin strokes to set the direction of the waves. Apply foam along the edges of the waves and crests with white gouache. Use blue strokes to highlight the shadows.

So we learned how to paint the sea and the beach with gouache. If you wish, you can add seagulls in the sky, and apply a few large stones on the coast.
Drawing lesson for children from 6 years old
Drawing master class. Landscape with the sunset on the sea
Voronkina Lyudmila Artemyevna, teacher of additional education MBOUDOD DTDM g.about. Tolyatti
This master class is intended for teachers, parents, children from six years old.
Target: Create a landscape with a sunset on the sea
Tasks:
- get great pleasure from the drawing process
- create a "masterpiece" in 20 minutes, which will become not only a decoration, but also a talisman of the house
- relieve fatigue, improve mood, self-esteem
- to contribute to the education of the individual, to bring up a reverent attitude towards the native nature.
Purpose: interior decoration, gift.
Landscape is a special genre of painting. It combines the feelings that awakened in the artist from the contemplation of nature, and the skill with which he conveys the state of his soul to the viewer. In this master class, you have the opportunity to truly depict the living colors of nature, the beauty of a sunset at sea.
It is impossible to be able to do everything, although, in contrast to the same phrase, there is another, no less famous - "a talented person is talented in everything." It's hard to disagree. Perhaps, in reality, something is easier for us, something is more difficult. But the result depends solely on the dedication and desire to achieve the goal. Therefore, even being by nature a person of an absolute technical profession, never encountering creativity, one can learn to draw. For example, you can start by painting a landscape.
In this master class, we will create with you a landscape with a sunset on the sea.
For work we need
A sheet of white paper, A3 size (I have paper for watercolor)
Gouache: yellow, orange, red, ruby, purple, black (gouache should be "live", ie soft, sour cream consistency).
Brushes (I use synthetic brushes # 3 and # 1, sharp)
A jar of water.
Progress:
Select the layout of the sheet. It can be positioned both horizontally and vertically.
I placed it horizontally. Open all the paints.

I have always loved to watch the sunset.
The sun spills paint across the sky.
Today, like many years ago,
I again plunge into this fairy tale.
With a brush # 3, draw a horizon line in the middle of the sheet with yellow gouache.

We begin to paint the sky with the same paint.

Next, add a little orange to the yellow paint. Making a color stretch from yellow to orange


Add red paint to the orange paint

Add ruby to the red paint (you can skip this step)

Add purple paint to the ruby paint

Turn the sheet upside down and repeat all the previous steps.


Next, draw a black line along the horizon.

How to draw the silhouette of the mountains

Let's paint over the mountains. I take purple and black paints on a brush

Use small strokes with a brush # 1 to paint the reflection of the mountains on the water

How to draw the silhouette of the yacht

Paint over, paint a reflection on the water

Let's draw a mast. Let's just draw a straight line up

Let's draw a sail

In the distance we will paint more yachts

The final touch - seagulls

The works of my pupils, grade 3 students


As you can see, they showed imagination - palms, dolphins appeared
More work, painted in the summer camp today

You can draw such a calm sea.
We make the general markup of the picture

draw clouds in the sky

draw the branches of a palm tree

now, sea

add shadows from the palm tree

now, you can paint with colored pencils or paints

There are several types of paintings to paint the sea.
The first option is to divide the sheet into horizon and sea. You can draw a circle, which will be the sun, and the shore.


Then we draw a coast with stones and a boat.

Here's another way of painting the sea.
every artist paints the sea as he sees it. but when it comes to drawing in stages, the most important thing is to draw the waves. if you can cope with this task, consider that you have already drawn the sea. at least it seems to me so. the algorithm for drawing waves is given below:


If you draw the sea in black and white, then in addition to a pencil, you can also use charcoal, so you will quickly achieve the desired effect, where you need to darken to black ...

I draw your attention to the second picture where the sea with seagulls is depicted ..))

but already a color version, they drew quickly, did not work on small details, you can see right away,

and the last picture shows that the artist tried to depict the bottom of the sea ..)

You can try to depict the sea by watching this master class:
The work is quite painstaking, not easy, but the result will definitely be worth the effort. And the drawing process itself, I am sure, will bring a lot of pleasure.
I present a very simple way like draw the sea in stages... To do this, first draw two lines, then sketch the coast and mountains in the background. After that we draw a boat. Next, add the birds and move on to coloring the picture.

It is very difficult to paint the sea like real marine painters. It is necessary to have talent, like Aivazovsky.
The sea has a sea (sorry for the tautology) of colors, shades, overflows. In addition, its color changes from weather changes, from the presence of sunlight, etc.
In the drawings that Enua suggested, I liked the penultimate one, which depicts the bottom of the sea. This detail alone gives more or less realism to the picture.
If you draw the sea not picturesquely, but schematically, then there is no need to draw anything!)). It is enough to depict a sailing boat, and anyone will say that it is a drawing of the sea.
Look how I did it literally in one minute in Paint! (however, I draw ships badly ..)

Drawing the sea is not easy, but it's worth a try.
It is important to choose the style itself, the technique in which you want to paint, to present the general appearance of the picture.
You want to show the storm or the coastal surface, or maybe the oncoming waves.
With paints, a wave can be conveyed with small strokes, mixing shades, adding white color to draw foam and waves. The distant shot can be left flat.

It is better to draw small hills and the crests of the waves.
Green, blue, purple - these shades can be used to liven up a painting and convey shadows for volume.


After that we take ready-made drawings and draw again, but this time on our sheet. Any boat, crab, nudists, boiled corn traders, bio-toilet, beer bottles and other attributes of the modern sea can perfectly fit here. I decided to add such necessary items as a palm tree and a naked woman:

You can also shove the ships in the ocean liner Queen Mary 2 and the minion, tk. this topic whose hour is very popular, as well as the shark:

It remains to decorate beautifully)
Of course, draw the sea it is not easy, it can be quiet, calm, and it can be just a dangerous avalanche that destroys all living things, but still most people adore it and dream of a vacation in the sea. Below is an example of a phased drawing of the sea along with the beach, adding sun loungers and a couple of palm trees - it will be just a real paradise.
At the beginning, we will mark the lines of the horizon, sea and land, then add rocks and boulders, show light waves, while coloring, do not forget about the greenery on the coast. This is how it should all look.