Fallout 4 star core id. Side quest "precious medallions"
Read also
- To the transit center "Yader-Mir".
It will become available to you automatically immediately after installing this DLC.
Target. Listen to the Yader-Kola radio station.
The first task will appear. Open your Pip-Boy, go to the radio tab and select a new radio wave - "Nuka-Cola Radio". Listen to what the announcer is broadcasting, after which the task will automatically become completed.
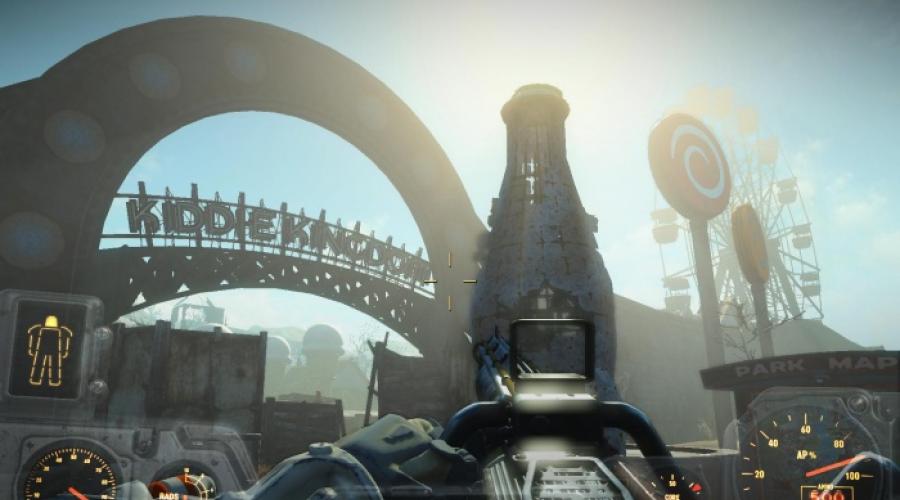
You will learn about an amusement park called Yader-Mir. Everyone who wants to have a rest is invited there. You can get to the park only through the Yader-Mir transit center, where you need to board the Yader-Express.
Target. Get to the Yader-Mir transit center.
The location you need is located to the west, at the very edge of the Commonwealth. Follow there, but be careful - several bands of shooters are waiting for you. You will need to fight, including with the shooting assaultron, Commander Keylor, using stealth in battle.
How to defeat a stormturmotron?
Try to make sure that this opponent does not use energy weapons located on the head. One shot will almost destroy your character. If he does shoot, then try to dodge to the side. The Assaultron will attack you continuously. You must make sure that he doesn't corner you. Try to constantly be at a distance from the enemy, which will be useful for you to carry out vital maneuvers.
Use more powerful weapons that you have. Take with you a companion who will distract the attention of this "piece of iron".
Having approached your destination, explore the Yader-Mir transit center, look for useful loot. Look into the building to the right of the main gate. There is an elevator here that will take you to the roof. There is a bridge at the top that leads to another roof. You can also climb up the ruins of the building on the left side. On the roof of the building on the left (relative to the gate) there is a bag, a chest and a safe with a lock of medium difficulty. Inside you will find supplies, weapons and even explosives.
What is Yader-Mir? This is a Nuka-Cola theme park. You can find different types of Yader-Cola cans in garbage cans throughout the park. For this reason, it can look into urns if you need to restore health. You will see buses in the transit center. Inside the bus, near the entrance, you can find covers, inside a cache. Search the bodies of passengers and one of them will find tickets for Yader-Arcada. Surely they will come in handy in the park!
To obtain one of the achievements, you will need to use 100,000 Yader-Arcade tickets.
Follow down the Yader-Mir transit center, chat with Harvey about everything.
Target. Talk to Harvey.
According to this man, he was robbed by raiders and kidnapped by his wife and son. Raiders are in the park, contrary to the assurances of the merchants Harvey had met the day before. The man asks to help him find a family. Offer Harvey a stimulant, but for some reason he refuses.
Charisma
If your level of charisma allows you to use persuasion (hard), then you have three options to find out what exactly Harvey is hiding. Whether you can solve Harvey's secret or not, you will learn the password from the control terminal, which allows you to activate the monorail and go to Yader-Mir.
Target. Restore power supply to Yader-Express.
Explore the territory of this station. On the left side you can find a first aid kit and a staff quarters with an easy lock. There will be antiradin inside. You don't have to break this door at all. Follow the detour through the rails, where there will be a passage. At the end of the rail there is a safe with a lock of medium difficulty.
On the right side you can find the office, inside which the Yader-Express control terminal is located. This is the ticket office. Log in to the terminal, click on Grid Management and select Activate Monorail Power.
Target. Get to Yader-Mir by Yader-Express.
It's time to go to the research of "Yader-Mir". Inside "Yader-Express" you need to activate the control panel of this monorail, which is in front of the car, where the driver should be.
Hear Porter Gage's message about the trap ahead. Looking ahead, it's worth noting that Gage is the main quest giver in the DLC.
SUBJECT QUEST "HERE HERE HERE RENTAL"
Where to go:- To the station "Yader-Mir".
- to the arena for Yader-Mobile.
Upon completion of the quest "To the Places!" you will find yourself in the Yader-Mir amusement park.
Target. Complete the Test.
A test will begin, which you must pass. Find the purified water located below the structure with the terminal at the Yader-Mir station. As mentioned earlier, you had to go here in full combat readiness, taking with you a partner, ammunition and medicines.
Turret room
Move through the doorway with the ENTER sign. Follow the stairs down and you will find yourself in the first test room. There are several different types of turrets here. How to get through the rooms:
- Try to deal with these turrets (some of them) before entering the room. As soon as the door slams, the turrets will be on alert. It is for this reason that you have a great opportunity to start firing at visible turrets from the doorway. Use the V.A.T.S. system to make it easier to deal with mechanical opponents.
- When you go inside, then follow the shelter on the left side, where there is a wall and a Nuka-Cola vending machine. Not all turrets can reach you here. Deal with those who are still firing at you. Run to the opposite wall and finish off the rest of the turrets.
- Some of the turrets are hidden behind the wall and you won't be able to notice them right away. Be careful!
After destroying these turrets, explore the room. On the right side there is a counter under which there is a cache with covers. On the left side, at the end of the room, you can find a first aid kit. See the shelves of cards that have fallen down? There is an ammo box here.
Trap room
Continue to move through the location, guided by the white arrows depicted on the walls and other objects. The new room will have a strip of obstacles and traps. Be sure to look where you step, pay attention to the walls. Disarm the traps until you find yourself at the end of the room.
If you have mastered picking locks, then you can completely bypass these traps. On the left side, behind the first trap, there will be a small corner with another trap, where there is a red door. A lock of a difficult level is to be broken. Open this door and go around several traps at once.
Falling floor room
After overcoming the room with traps, or after passing through the door that allows you to bypass them, move up the wooden steps. You have to overcome the floor of falling boards. You can go around this line using a narrow section of the floor. To see her, turn the other way after going up the stairs here. If you do not have time to cross the boards and fall, then return here and use this part of the floor.
Now you need to walk along the windows, but first you should definitely look into the niche on the side. There is a safe with an easy lock. But do not rush to hack it, because there is a trap on the ceiling, which must first be neutralized. Move past the windows, pay attention to the traps under your feet. There are also traps on the ceiling. Soon you will find yourself in a corridor with three red doors.
Three red doors and a radiation room
The desired door is located on the left side, while the other two lead to dead ends with traps. Opening the door in the middle reveals a monkey playing cymbals. Opening the door on the right side, you will come across a grenade trap. Move through the left door until you go down into the room with barrels. You will need protection from radiation, several doses of antiradine.
But still, you can not stay here for a long time and do without antiradiation. You must open a red door with a lock on a difficult level. Either use your hacking skills if they allow you to, or find a bunch of keys. It sits on top of a shelf tucked away in a small niche behind the checkout counter in the corner. Under the counter itself there is a cache with covers.
Turret and Monkey Room
Walk down to the door that leads to the Yader-Mira tunnels. Go there and search the cabinets on the left side, where you will find ammunition. Use the terminal that controls the turret and is located on the table. An easy level is required for hacking. This terminal will be very useful to you a little later! Hack it beforehand.
Move to the new room, search the racks on both sides and see the turrets. They attack you only when the monkey on the other side starts hitting the cymbals. If you deal with the monkey before, then the turrets will not shoot at you. Otherwise, you will need to go back to the terminal hacked earlier and disable the turrets.
In order to leave the room with the monkey and the turrets, you must open the door to the Yader-Mira storage room. The key is on the parts located behind the monkey's position.
Labyrinth with traps
Next, you will find a small labyrinth in which there are traps - buttons in the floor, mines, turrets disguised as aliens. Get to the door on the other side of the room. When you pass the alien, then climb the wooden steps and move along the surface of the equipment - along the upper part of the maze. Jump down to where the exit is on the other side.
Deal with the turret at the front door. There will be a box and explosives behind this door with the middle level of the lock. Move along the tunnel with destroyed equipment, paying attention to the mines placed everywhere. Use the V.A.T.S. system to detect them. Disarm mines by shooting them from a distance. Through the tunnel you will reach a dilapidated bridge consisting of planks. As soon as you stand on it, it will begin to fall. Once on the other side, you will see a door. It needs to be broken - a mid-level lock.
If you have a low level of burglary, which does not allow you to open the door, or the bridge collapsed, and you did not manage to get to the door, then you will have a duel with the bogs living below. Moreover, one of the opponents will be the legendary glowing swamp. Killing him is not easy! Try to sit somewhere higher, use the distractions of your companion. When you deal with the opponents, then blow up the eggs from different sides using explosives. Otherwise, bogs will begin to hatch from them.
Move through the cave, which will lead you to the same place as the door with the middle lock on top, behind the crumbling bridge. But before you open the door, you need to defuse the trap on its canvas. The door will lead you into a narrow corridor with floor traps. At the end of it, a new part of the tests will begin, one of the most interesting in this task.
Gas room
After you go into the room, the door will slam behind you. Gradually, the room will fill with gas that kills you. To leave the room, you must turn off the gas supply, or simply find a way out as quickly as possible. To shut off the gas supply, you need to use the valves. There are four gates in total that you can find:
- on the left side of the entrance;
- behind a locked door located near the first valve;
- behind the grate on the left side, below, closer to the floor;
- in another part of the room, next to the door.
Everything would be fine, but besides the difficulty with the gas, you will also be attacked by radar cockroaches. You must destroy them using melee weapons. If you fire a firearm, the gas will ignite. In the room to the left of the front door, there is a table on which you can find the password for the power station. In the room on the right side, which is located at the end of the service room, there is a key to the door of the Yader-Mira electrical substation
Opening the closed door near the first gate, you will find another of the four. There is also an electrical substation terminal and several radroaches. Deal with the opponents, use the terminal and enter the password found in the room to the left of the entrance. By opening the door, you can get out of the trap. Next, you need to visit the Yader-Mira office building.
Indoors, you will meet ants - new enemies in Fallout 4. They fly or crawl. There is a closed door with a light lock near the abandoned vehicle. Behind the door is a file cabinet with a cache, inside of which are hidden covers. Go through the doorway on the other side of the room. You will find yourself in the corridor, where instead of the roof there is a grid. This mesh will prevent you from shooting at the raiders attacking you from above.
On the way, you will find yourself on a section with hanging grenades, which must not be touched. There will also be turrets that you probably haven’t had time to miss. Move along the corridor, as soon as possible, go through the door to the arena with "Nuclear Cells". Follow up the stairs to the second tier. Here the last stage of your tests will begin - you have to fight the boss of a raider gang named Colter. He has very powerful armor, chances are slim, but you have them.
Target. Enter the dressing room.
You have time to prepare. Go to the indicated dressing room through the open door after talking with Colter. When you go inside, you can chat with Gage. You should go to the intercom located on the wall.
Target. Talk on the intercom.
Walk up to the wall and chat with Gage. Find out what's going on here.
Charisma
If your level of charisma is average, then you can put pressure on Gage, who will tell you everything. Gage clearly wants to help you. There is no way to defeat Colter, as his power armor is constantly powered by a power source in the arena. The enemy is invulnerable. In one of the cabinets there is a weapon from Gage that will allow you to destroy the boss.
Target. Find a weapon.
You can collect weapons and ammunition in the locker room, but it is useless in a fight against Colter. On the bottom shelf of the cabinet you will find Gage's weapon. In that locker, which is located near the bench in the corner. Here is the Thirst Quencher. This is an ordinary water pistol ...
Target. Talk to Gage on the intercom.
According to Gage, this particular weapon is ideal against Colter. Why? The water causes short circuits that shut off Colter's power armor for a short period of time.
Now you must find the arena where you have to fight Colter. There are a few other things you can do to keep your chances high. Go to the toilet located in the dressing room. Move into the break in the wall and take the nuclear block from the generator. This will reduce the arena power by 30%. This means that Colter's power will drop by the same amount. All Yader-Mir raiders will watch the battle.
Target. Defeat boss Colter.
How do you defeat Colter? Pick up the Thirst Quencher, pour water into the Colter to cause a short circuit. Then swap the Thirst Quencher for the most powerful weapon in your inventory and shoot the boss as much as possible until his armor is restored. Repeat these actions until you finally hit the enemy. It is very good to have a companion with you. This is not prohibited in combat!
Use power armor, enter stealth mode ...
After defeating Colter, be sure to search him. You will receive a boss key and password, which will be useful to you in the future. By the way, you can pick up Colter's power armor.
Power armor, as always, consists of six parts - two arms, two legs, head and torso. The torso is a legendary piece that, among other things, deals electrical damage to nearby enemies.
Learn more about the stats of Colter's Power Armor:
- Head: resistance to damage - 220, resistance to electrical damage - 220, radiation resistance - 150, weight - 14.
- Torso: resistance to damage - 320, resistance to electrical damage - 320, radiation resistance - 300, weight - 22.
- Left and right hands: resistance to damage - 170, resistance to electrical damage - 170, radiation resistance - 150, weight - 16.
- Left and right legs: damage resistance - 170, electrical damage resistance - 170, radiation resistance - 150, weight - 17.
Target. Talk to Gage.
As it turned out, now you have become the new boss of the raider gang and will be able to meet in person with Gage. Chat with a man, find out that the raiders have long wanted to kill Colter. Currently "Yader-Mir" is divided between three gangs of raiders, called Adepts, Operators and Flock.
Colter was a bad leader and therefore this place is on the brink of war. It is you who have to change everything and return the world to Yader-Mir (such is the tautology). The boss's den is located inside the restaurant located on Mount Fizztop. You will get there in the third story mission, but more on that later.
Mount Fizztop, where the lair of the raider boss is located.
Explore the "Yader-Mobile" arena, move to the amusement park. Inside the trash can near the entrance to the arena there is a new drink - "Yader-Cola Pobeda".
Let's compare "Nuka-Cola Victory" and "Quantum Nuka-Cola":
- "Nuka-Cola Victory": health points - 840, radiation - 11, action points - 0, weight - 1, price - 40.
- "Quantum Nuka-Cola": health points - 400, radiation - 2, action points - 100, weight - 1, price - 50.
Look for a terminal with a business card with a map of the park. Look down to find a first aid kit. Inside the terminal, you can study information about the park, nothing more.
SUBJECT QUEST "AMBITIOUS PLAN"
Where to go:- At Yader Town, USA.
- To the Fizztop grill bar.
- Mount Fizztop.
- To the restaurant-theater "Salon".
- The Bradburton Amphitheater.
Target. Talk to Gage at the boss's quarters.
When Porter Gage declares you the boss of the raiders, you will hear from him that you need to meet inside the boss's den, which is located in the restaurant on Mount Fizztop. Go there now!
Mount Fizztop is located in Yader Town (USA). You can find the entrance to this territory of the park as soon as you leave the Yader-Mobile arena. Activate the radio waves of "Yader-Cola" and move through the "Yader-Town" to the specified mountain. The fastest way:
- Go through the gates of Yader Town.
- Move on the right side.
- Turn into the first lane on the right, from where you will see the mountain.
- Go forward towards the mountain.
When you enter the mountain, you can meet with Sierra Petrovita. This will activate the task in the "Miscellaneous" section. Objective: talk to Sierra Petrovita. After the conversation, you will receive a new side quest - "A Lid in a Haystack".
Go around the lake to find yourself in the right place, near Mount Fizztop. There is a lift that goes directly to the den, to the Fizztop grill bar.
Upstairs you will meet Porter Gage. Chat about everything, find out about the plans of the raiders on Yader-Mir. There was supposed to be a huge base here, but Colter did not want to continue taking over the park. Gage says that you will need to get support from three different gangs to get started.
Charisma
If the level of your charisma allows (medium), then ask Gage what ideas he has on achieving this goal. Gage will tell you exactly what to promise each of the gangs in exchange for their support:
- Adepts - a lot of blood.
- Operators - a lot of money.
- Pack - you need to prove that you are the strongest.
First of all, you need to talk to the leaders of these three gangs, and then begin the capture of Yader-Mir. You can look around the restaurant, find an armor service station, a chemical laboratory, supplies and drinks. The nuclear unit is hidden in the bedside table. There is also a safe with a complex lock.
Target. Meet with the leader of the Adepts.
The Adepts are located not far from you, in Mount Fizztop. They are bloodthirsty raiders living in violence and wearing masks. Their leader is Nisha. Communicate with a woman about everything, not forgetting about the Adepts' addiction to blood. You must capture the park and make the Adepts the main ones, and then go to capture the Commonwealth.
Niche will offer you a job. You can do it at will. To get the quest, talk to Nisha again. The side quest is called "It was secret, it will become apparent."
Before you go to the new gang, you can explore Mount Fizztop. Anything you find here can be taken away. In addition to ammunition, food and medicine, you can find the Quartz Nuka-Cola, which Sierra Petrovita needs. You will learn more about this in the "Miscellaneous: The Secret of Sierra Petrovita" quest.
The bottle can be found near the place where the Adepts rest. Move from the entrance to the right side in a circular motion until you see mattresses scattered on the floor. If possible, hack the Nishi terminal (difficult level). The terminal is in the Adept boss room, at the top of the mountain. You will need to climb up the slope. Inside it there is information on the objects that Nisha followed, the hobologists (for more details, see the quest "Miscellaneous: Learn more about the hobologists" and the mysterious mansion called "Grandchester." Grandchester ".
Target. Meet with the Operator leader.
As for the gang of Operators, they are inside the restaurant-theater "Salon". This place is located outside the territory of Mount Fizztop, near the monument to the Master of the Bottle and Mister Cap. Their leader is Maggie Black, whose right hand is Brother William. Outwardly, they are a kind of opposite of the Adepts. They are completely non-aggressive, neat and well-mannered people. Chat about everything, not forgetting their love for lids. Operators want the park to be able to pump out caps from visitors, but using different methods. In addition, they do not recognize other gangs.
Maggie Black can give you a task if you want to complete it. To do this, you need to talk to her again and take the side (repeating!) Quest "Under the collar".
Inside the theater restaurant there is a huge amount of ammunition, food and drinks.
Through the kitchen you can reach the office of Lizzie Wyeth, the scientist. She is testing an unknown drug in humans. The idea is that the drug should make people do exactly what Lizzie wants. There are reports on this in the terminal with an easy access level.
If your level of hacking is high enough, then you can go to Maggie's room, located on the right side of the stage. The door is closed inside and the level of the castle is very difficult. Inside you can find a cache with lids, a holographic record of Maggie and William's backstory, a terminal with a difficult access level, inside which there is a dossier on Yader-Mir gamblers. There is also a safe on the wall with supplies and weapons of medium difficulty.
Target. Meet with the leader of the Pack.
The flock is located inside the Bradburton Amphitheater, located at the exit of Yader Town, not far from the Yader Mobile arena. There is a real madness going on inside this place. You will see dogs, animals in cages, furniture from other creatures. The boss of the gang is Mason, who sits on a kind of throne, next to the place where the mole rats fights take place. Chat with him, not forgetting that they will go after the strongest person.
Charisma
If your level of charisma is high enough, then you can find useful information from Mason. Namely:
- Medium charisma will allow you to ask if Mason wanted to take the place of the raider boss.
- Hard level of charisma will allow you to learn more about the story of Gage and Colter.
Mason will also offer you additional work. To take the task, talk to the raider again. You will receive a side (repeating!) Quest "Once and for all"
Explore this part of the amusement park, be sure to go to the backstage of Yader Town, through the door on the right side of the prisoners in the cage. Useful items can be found here. You can pick up the Pack suits, colorful weapons, including the Pack assault rifle. You can hack the terminal of a difficult level and find Mason's notes about the key figures of Yader-World.
Target. Return to Gage.
When you have communicated with all the leaders, then return back to the Fizztop Grill Bar, where Gage is waiting for you. Talk to him and find out a plan for further action. You must capture the entire territory of the Yader-Mira park. When capturing a territory, you need to place the flag of any gang on this place. From this moment on, the land will belong to this particular gang. Only you decide who and what to leave.
Gage will agree to cover you. That is, he is your new partner (optional).
SUBJECT QUEST "BIG TOUR"
Target. Capture the Children's Kingdom zone.Go around Mount Fizztop on the left side and move diagonally slightly to the right, towards the Ferris wheel. This will take you to the "Children's Kingdom" zone. Go to the territory and destroy the first painted ghouls ..
SUBJECT QUEST "CHILDREN'S KINGDOM"
Target. Search the pavilion of laughter.Find the pavilion of laughter and go inside. Kill the ghouls and then head through the door on the right. Next, a labyrinth awaits you. Nothing really complicated, the enemy is one charred ghoul. Go through the red door to the next corridor.
Around the bend, you will need to run against the treadmill. It is desirable to do this with the SHIFT key held down and constant jumps. It will be faster.

Entrance to the "Children's Kingdom".
Next, there will be a segment where you have to jump onto one rotating platform, pick up the moment and jump to another, and then to the door. If you fall down, then be ready to fight with two ghouls.
There is an easy-access terminal to the left of the door. Use it to reduce the level of nausea in hypnosis rooms. Either way, go through the door. Go forward and turn into the tunnel on the right. Walk left and take the tunnel on the left. Look to the left at the end of the tunnel - you came from there, but the path is blocked by a mirror. You need to go to another long tunnel and look to the left. Here the room is more spacious than the previous ones. Run forward towards the door, but be careful. There are holes in this tunnel and you can fall down.
If this happens, then under the metal stairs, find a passage leading to a room with rotating platforms. It will be necessary to repeat the path from here again. Go through the door.
Next, you will find a room with upside-down doors and windows. Get to the room with a rotating floor. Open all doors in turn. You need a red door leading to a corridor with a green door. Go through the green door.
Open the doors with chains and go outside.
P. S. You can go to the left in front of the doors with chains and try to catch the clown, but if this is your first visited place, then nothing will come of it.
Target. Search the tunnels.
Leave the pavilion of laughter. If you stand with your back to the front door, then on the right side behind the fence you can see rails along which cars periodically move. Move there. Go against the traffic. You will need to jump over them. Halfway there will be a door leading to the tunnels you need.
Walk down the corridor and through the window on the right, listen to the conversation between Oswald and the painted ghoul. The goal has been achieved. Leave the tunnel.
Target. Search the theater.
You must find the Yader-King's castle. To do this, continue walking on the rails against the movement of cars. On the left side there will be a bridge leading to the castle. Go through it, killing opponents, and go through the indicated red door into the courtyard. Do not forget to heal and get rid of radiation using antiradians.

The road to the castle "Yader-King".
Target. Deal with Oswald the Shocking.
Inside, go to the scene and wait for Oswald to appear. After a short speech, he will attack you, reviving other ghouls along the way. Kill them all, shoot Oswald until he runs out of HP. But that is not all.
Go to the stage, there will be a passage here. Get to the elevator on the left and go up to the fourth floor.
There are two options. If your charisma level allows, then you can convince Oswald that there is no cure (difficult) or that he should help Rachel (difficult). If something comes of this, then Oswald will give you his sword, hat, and then leave the location. Otherwise, you will have to fight with him. Another zone is captured!
Target. Appoint a gang in charge of the Children's Kingdom.
Choose one of the three gangs by hanging their emblem on the indicated flagpole (located in the same place where you last saw Oswald). In our case, they are Adepts.
Target. Capture the Galaxy zone.Move to the left of Mount Fizztop, where there will be a passage. You will see a stand with a map of the park. Go along the bridge to the left to find a new location - "Galaxy". After a few seconds, a new task is activated.
As soon as you collect 20 star cores as part of the Star Dispatcher quest (out of 35 possible), you can turn off protective mode. After that, this zone can be transferred to the disposal of one of the gangs.
STORY QUEST "STAR CONTROLLER"
Target. Examine the star dispatcher.Examine the corpse lying on the ground. Be sure to pick up Tiana's diary to update the quest.
Open your inventory, go to the "Miscellaneous" section and select Tiana's diary. Open the first entry to update the assignment.
Target. Find the Star Dispatcher.
Move to the territory of the zone. Here you will need to destroy several robots. In addition to them, there are laser turrets hanging on the walls - be sure to pay attention to them. Approach the marker to find a new location.
Discovered: Nuka-Spaceport.
Enter the room with the power armor in the center through the glass door. Find the star dispatcher inside and interact with him. Requires at least one stellar core.
Target. Find the stellar core.
Turn around and near the corpse on the right, find a stellar core - a bright and colorful device.
Target. Install the stellar core.
The hardware will indicate where you should install the stellar core. Just press the E key.
Target. Restart the central computer.
It is pointless to interact with a computer, because for this you need to collect all the lost stellar cores. Examine the equipment and you will realize that in total there are over 30 stellar cores missing. Let's go in search of them!
NOTE... To capture this territory on the "Big Tour" quest, it is enough to find 20 star cores. But we will find them all!
First, we indicate the stellar cores located in the territory of the "Galaxy" zone, but not inside objects that can be visited. That is, outside.
1. First, leave the building and look at the entrance. There are stairs to the right and left. But in addition to the stairs, there is also a passage. Go around the building on the right side, go past the old technology, through a small building, in which there may be two robots. Eventually, you will find a room with a yellow bulldozer. To his left is a corpse, near which lies stellar core (2/35)... The first core, if you remember, was found earlier
2. Return back to the star dispatcher and from the street go up any steps upward. There is a glass showcase inside the room above the room with the dispatcher. A stellar core lies in the showcase. There are two options. Either you break open the mid-level showcase, or you break open the door with an easy lock of the room located here. This is the administrator's room. Inside you will find a table with a terminal and an administrator key. Take this key and use it to open the showcase. Take away stellar core (3/35).
3. Return to the star dispatcher building. Look to the right. Nearby there is a staircase, and further - a passage. Follow through it and up the steps. Ahead you will see a huge rocket and a signboard "Yader-Galaktika" in English. There will be many opponents here. One of them is on the left side of the structure. It consists of several flights leading upward. Find the passage and climb to the very top. There will be a dashboard with stellar core (4/35).
4. Look at the entrance to the Nuclear Galaxy. A path leads up to it. But to the right of this path there are two red booths. In the farthest of them (closer to the wall), find the dashboard with stellar core (5/35).
5. Move to the RobCo Arena. Face the building and go left. Ahead there will be a road going up through the tunnel. At the very beginning, on the left side, there is a remote control with stellar core (6/35).
ATTENTION! There is another core outside, but you will only pick it up after you finish the main storyline.
Inside the building "Nuka-Galaxy" there will be seven cores at once, but you will have to clean it from numerous robots. There are two options: either use a suit with a jetpack, or go through the main entrance (described in the fourth paragraph) and break very difficult locks. The first option is to find the key. But we will describe the second option with the main entrance and lock picks.
6. Go to the corridor and destroy three robots Mr. Penka and one laser turret in the upper right corner. Follow the only path to the left to find a somewhat spacious room with galactron guards and one powerful robot. This fenced building looks like a subway station - there are narrow rail tracks. Approach these paths and go to the cockpit on the right, white. It will contain that powerful robot inside you will find stellar core (7/35).
7. There is a red booth on the other side of the room. To the right of it is a passage with rails. But between the rails and the booth there is a barely visible door. The castle is very complex. After breaking it, enter the room and climb up the stone steps. Pull the next one out of the equipment. stellar core (8/35).
8. Here, find a door with another very complex lock. Hack it and find in the control room stellar core (9/35)... You could see this room when you climbed the first steps and killed two robots inside it.
9. Go downstairs and pick the very difficult lock of another door without going back. Go into the room and kill the robot at the terminal. Pull the terminal out of this stellar core (10/35)... By the way, this room contains a rocket and a girl sitting on it - "Yader-Girl".
10. From this room, move along the rails in the other direction, against the direction of the missiles. Through one room you will find yourself in a spacious and high hall with a huge number of robots and turrets installed on the bottom of the flying saucers. Jump to the very bottom and in the corner find the terminal with stellar core (11/35).
11. Next, find a door on the side wall (you need to move downward from this corner, the door is in the middle of the wall, below). Go to the corridor, click on the red button to push the bridge. Call the elevator on the right side and go up (or down?). Be that as it may, go down the steps and pull out from the panel stellar core (12/35)... Kill the robots below, including the giant star guard.
12. Return upstairs on the same elevator, but now go right, to where you have not been. Climb the slope, move into the passage with the stairs. Upstairs there will be a brave space lieutenant and a panel with stellar core (13/35).
Get out of the "Nuka-Galaxy" building. Find the RobCo Arena approximately in the middle of the Galaxy Zone. Go inside. Here you have to find six cores at once.
13. Enter through the two double red doors opposite the large carousel that once revolved in a circle. Go to the spacious room, but don't go down the stairs. You can destroy the robots first. You need the door on the left, with the Employees Only sign. Hack it and go up to the service room upstairs. Take away one (14/35) and other stellar cores (15/35)... Everything in one room.
14. Return to the main room. Do you see the robot behind the glass? You need to go there. Go down the steps and go through the door on the left. Follow the door on the right and kill the robot. In a small niche there is a panel with one (16/35) and others stellar cores (17/35).
Attention! As soon as you take the cores, a battle against robots will begin in several stages. Having defeated everyone, be sure to take away nuclear blocks from the body of a large robot.
15. Exit through the same door, but now go down the stairs to the right. After destroying the robots, remove from the red dashboard stellar core (18/35).
16. Return to the main hall where there are steps and glass. Between the steps there is a passage leading, as it were, under the stands. Go there and behind the bar, where there may be a robot, find on the shelf stellar core (19/35).
Go to the Vault-Tech: Among the Stars building. Go inside through the main entrance opposite the large ball.
17. There are two lifts on the left side. But you go right until you exit the tunnel, after which you will need to destroy three robots among the stones. There is a door behind the stone. Hacking it, inside you will find a panel with stellar core (20/35).
18. Move further along the path, deal with the enemies. Get down below. Don't rush to jump down where there are robots. Go right, where there will be a descent even lower and a small foyer. There is a counter at the kitchen wall and a refrigerator. There is a break in the wall. Go through it, destroy two robots and a turret, and then pull out of the panel stellar core (21/35).
19. Go back. If you stand with your back to this gap, then on the left side you will find two more doorways. Go through the right one. You will find yourself in the children's room. Follow further, you will find yourself in a room with several paths. Kill Novatron and other opponents. Do you see the panel with the core behind the glass? On the right, there is a door to this room with a very intricate lock. Having hacked it, find inside the room one (22/35), other (23/35) and third (24/35) core... Three cores in one room !!!
20. Return back to the room with the kitchenette and the breach, behind which you found the star core. Stand with your back to the breach when in the kitchen area. Do you see the door on the right? Open it by hacking or by finding the key to the Vault-Tek laboratory. The key is in the same building. Inside you will find the key to the hall and stellar core (25/35).
Exit the RobCo arena through the other door and head right (north). On the right, there will be a door leading to the Starlight Cinema.
21. Find the central hall here, in which, in addition to the usual robots, there will be a large star bartender. After destroying it, take two nuclear units. There is a remote control in the hall with the first one at this location stellar core (26/35).
22. Stand facing the screen and go through the far left passage (or the near one if you are standing near the screen). In the hallway, go to the toilet. Go to the right restroom and find the breach. Lying next to a human corpse stellar core (27/35).
23. Exit through the main room with the screen into the corridor on the right, through the passage next to the screen. Go to the kitchen, destroy the star chef. Hack the door and take stellar core (28/35) from the panel.
24. Return to the corridor and move in the direction of the exit. Do not go to the hall with missiles and a screen, but find the elevator on the right side. Use the elevator to go downstairs. Kill the robot and find in the panel on the right stellar core (29/35)... This is the final core at this location.
You can find the rest of the stellar cores in the rest of the Yader-Mir territory. These are six cores. The last core, as mentioned above, is in the "Galaxy" zone, but you can pick it up at the end of the plot.
25. Go to Yader Town and go to the market, in the southern part of the city, practically opposite the Yader Express station. Inside, on one of the counters, find one stellar core (30/35), between the first and the second trader from left to right (clockwise). You need to go through the red door, which is indicated by the white inscription "MARKET INSIDE".

Entrance to the Yader Town market.
26. Go towards Mount Fizztop. In front of the last doorway (to the reservoir) on the left side there will be an entrance to the Yader-Arcada building. On the right side there is also the Operators' Salon. Enter the "Yader Arcade" and go forward. Go down the steps and in the room on the right, find the door to the service staff room. Open it and another next. Inside a room with some kind of aggregates, on the table on the right, find stellar core (31/35).
27. Next stellar core (32/35) look for the "Yader-Mira" dump. It is located west of Yader Town. Move to the point shown in the screenshot below. There will be a metal barn on the right side at the entrance to the landfill. Go inside and go upstairs. At the very end, where the turret disguised as an animatron is located, there will be a stellar core in the panel on the left.

The landfill located west of Yader Town.
28. Move to the Yader-Cola bottling plant. Climb the metal stairs so that you will be on the roof of the left side of the building, where the blue tower is located. Standing at the top of the stairs, look down and you will see a blue extension, like in the screenshot below. Go inside and immediately through the blue door on the left to enter the "World of Freshness". Once the download is complete, head right. Move up the steps, and then further and down several flights. There will be two corpses on the floor below. Lying near one of them stellar core (33/35).

The passage you need at the bottom left.
29. Move to the Dry Gorge Theater. Go to the left side of its designation on the map. That is, you need to get to the other side of the overturned trolleys from the roller coaster. Among the corpses, at the pillar, you will find stellar core (34/35).
30. The last stellar core remains. After completing the quest "Demonstration of power" and restoring power in the park, you can return to the "Yader-Spaceport", go upstairs to where the star core was found under the glass showcase, and use the elevator car in the center. Go upstairs where you can find the last stellar core (35/35) inside the console.
So, go downstairs and place all the remaining cannonballs in their sockets inside the control room. Interact with the star dispatcher, select the protocol for accessing the diorama and confirm its opening.
Reward
The protective glass in the center will go down, and you will be able to pick up a new set of power armor - "Quantum X-01 Type V".
- Head: resistance to damage - 300, resistance to electrical damage - 220, radiation resistance - 150, weight - 14.3.
- Torso: resistance to damage - 400, resistance to electrical damage - 290, radiation resistance - 300, weight - 24.
- Left and right hands: damage resistance - 250, electrical damage resistance - 190, radiation resistance - 150, weight - 18.
- Left and right legs: damage resistance - 250, electrical damage resistance - 190, radiation resistance - 150, weight - 18.
Unique ability. If you use all the elements of power armor, then the speed of recovery of action points increases.
Target. Assign the gang in charge of the Galaxy.
Choose the gang that will get the "Galaxy" zone. Move to the "Nuka-Spaceport" area, go upstairs, where you found a star core under a glass display case, and hang up the flag of the desired gang.

Power armor "Quantum X-01 Type V".
SUBJECT QUEST "BIG TOUR" (CONTINUED)
Target. Capture the Dry Gorge zone.From the "Galaxy" zone, move to the left, towards the "Dry Gorge". Here you will be greeted by sandworms. Destroy them and go a little further, where a robot named Sheriff Hawk is waiting for you. Talk about everything, use a robot expert.
SUBJECT QUEST "DISASSEMBLY IN A DRY GORGE"
Target. Collect the cipher pieces from the safe.Now you need to talk to three robots. You can either complete their tasks or use the "Robot Expert" to avoid them and take the cipher pieces.
The next part of the text is for those who cannot use the Robot Expert.
Find the first robot (walk forward) named Scout nearby. Chat with him. Either use the Robot Expert or complete his assignment.
Purpose (optional). Take Dandelion to the corral.
When you find a saloon, then stand with your back to it. Look left and see another street parallel to the one opposite the saloon. There is a tower on the left side at the beginning of the street. There are some alien growths at the bottom. To the right of the tower you can find the Buttercup robopony. Walk from the tower so that the saloon remains on the right side. Go into the pen, open the "Trash" tab in your inventory and discard the roboponi. After talking to the robot, you will receive a piece of the cipher.
Find Doc Phosphate's saloon, talk to him and get the task to serve drinks.
Purpose (optional). Serve drinks.
Go up to the second floor and put a glass of "Yader-Cola" on the indicated table. Exit the saloon and go forward. To the right and to the left there will be two open buildings with tables, on which you need to put one more bottle of Yader-Cola.
Not far from the saloon (you need to leave it and go straight) there is a building that is guarded by One-Eyed Ike. Talk to him, he will offer a duel. Agree, for what you will get a revolver with cartridges. Equip it and then stand in the center. When the robot says to shoot, then shoot it once. You will receive the next part of the cipher.
Target. Find the key to the Mad Mulligan Mine.
When you collect all the parts of the cipher, then follow the marker to the theater of the "Dry Gorge". Inside the specified building, open the safe (how to kill opponents) and take the key. By the way, the safe could have probably been hacked if you knew its location.
Target. Enter the Mad Mulligan Mine.
Go to the indicated location and open the door using the key.
Target. Destroy the Bloodworm Lair.
Get inside the lair, get to the bloodworm womb and destroy it. Get outside, talk to the robot Sheriff-Eagle. Now you can assign a gang here.
Target. Appoint a gang in charge of the Dry Gorge.
Select the gang in charge of this area by hanging their flag on the flagpole. To find it, go to the Sheriff-Eagle robot and break open the door on the right side (difficult level). In a small room, you immediately need to break open another door (complex lock) in order to be on the other side of the building. There are steps leading up to the building. Climb them, and then - along the lowered wooden stairs. Hang the flag of the selected gang on the flagpole. In our case - Operators.
SUBJECT QUEST "BIG TOUR" (CONTINUED)
Target. Capture the beverage dispensing plant.Head from the Children's Kingdom towards the factory and the first place that you find is “The World of Freshness”. The quest of the same name will begin.
SUBJECT QUEST "WORLD OF FRESH"
Target. Clean up the Yader-Cola bottling plant.Get down into the water and enter the dark tunnel in the middle, where the marker is pointing.
Inside this building, you will have to destroy opponents. We are talking about large "Yader-Krabakh" (all) and assaultrones.
ADVICE... In order not to miss anything, as soon as you get here, move along the tunnel with water, dealing with opponents. He will lead you to a dead end, but behind the screen on the right there will be a passage to the workshops. There will be assaultrons in the shops. As soon as all opponents are destroyed, one of the mission objectives will be crossed out.
Target. Clean up everything around the Yader-Cola bottling plant.
Find another way out of the Yader-Cola bottling plant. It can be a narrow tunnel, or it can be a door that can only be opened after breaking into a terminal nearby.
Outside, you will need to kill all the same "Yader-Crabs", as well as their Mother (in a huge "puddle"). You need to finish off the remaining enemies on the building itself. To do this, climb up the metal stairs. When you kill everyone, you will need to choose a gang.
Target. Raise the flag to take over the beverage bottling plant.
Follow the marker and you will see a building in the form of a red rocket. There is an extension next to it. Go through the annex to the ski lift and go upstairs. There will be a flagpole - select the flag of one of the three gangs.
SUBJECT QUEST "BIG TOUR" (CONTINUED)
Target. Capture the Safari.This is the last zone that needs to be captured as part of our walkthrough. Go across the bridge from the bottling plant, go to the territory and help a savage named Cyto to destroy the crocodile claw. A new quest will begin.
SUBJECT QUEST "SAFARI"
Target. Find out where the crocodile claws came from.Talk to the savage, agree to help. Follow Cyto inside the primate house. On the way, you will need to kill one crocodile claw.
Target. Listen to Dr. McDermott's holotape.
After talking with Cyto, the task will be updated. Open your inventory, go to the "Miscellaneous" section. Find the item "Diary of Dr. McDermott, Entry 47B". Open it up.
After listening, be sure to chat with Cito. Using a high level of charisma, you can ask the gorillas for help.
Target. Enter the large triangular house.
Move to the indicated place - to the reception center. The task will be updated.
Target. Examine the triangular building and find the entrance to the cloning department.
Go downstairs, destroy the crogodileclaw and find the locked door with the terminal around the turn.
Target. Examine the terminal by the door.
Explore the terminal, see all the tabs. As it turns out, the code is now set to "Grizzly", which means the doors are completely locked. We must unblock them!
Target. Find out if Cyto knows anything about Evil Anaconda.
Chat with Cyto.
Target. Get to the giant metal snake.
You have probably already noticed a house on a high tree in the northern part of Safari. So to the left of it there is the House of Reptiles. When approaching him, he will be marked on the map. That is, from the tree house, the Reptile House is to the west, to the left. A stream flows next to it. Follow the stream north and see a huge roller coaster. This is the "Wicked Anaconda".
Target. Look for Dr. Hein's password near the giant metal snake.
Move to the location, kill opponents, among whom there will even be a two-headed bull. You are interested in a small hut with a yellow horizontal stripe. You will need to pick the lock of a difficult level. Inside there will be a scientist's corpse and a wooden case on the table. From there you need to get Hein's password.

Dr. Hein's body, to the right is a table with a password.
Target. Get into the cloning department.
Follow the Safari marker and enter the park. You need to go forward to the reception center where you examined the terminal. Examine the terminal again and select the item that opens the doors.
Target. Disable the faulty cloning machine.
Move along the corridor, kill the crocodile in the room and follow through the red door in front. After the next corridor go down below, into the room with water. Kill the Regular Crocodile Claw and the Albino Crocodile Claw. Interact with the indicated red bar. Disable the current replication procedure.
Target. Kill the remaining crocodile claws in the Safari Territory (15/21).
In your case, the numbers may be different. Exit the niche with the terminal, two more crocodile claws will appear. After killing them, go to the place where they appeared. There is a pipe with a break here. If you go through it to the left, then you will run into the front door. But it is locked. Go back and look at the pipe outside. There is a terminal here. Use it to open that very door. Go outside.
Walk across the bridge located between the tree house and the Reptile House. Behind the cages there will be a trapdoor to the basement called "Bear's Den". Kill the bear and crocodile claw, and then exit through another passage.
You've probably noticed the angry bear sculpture. Go to her. There is a grate fence to the north of it. There is a break in it. Go through the pool and find another crocodile claw.
After the kill, new markers will appear on the map. So, one by one, kill all opponents. After that, return to the primate house and talk to Cyto. You can use medium charisma to convince Cyto to live with new Raider friends. You can just ask him to leave. Or you can attack at all - with or without dialogue. But then you have to kill both Tsito and the gorillas.
Target. Appoint a gang in charge of Safari.
You need to go up to the roof of the reception center. If you look at the front door of this building, then you should look for the stairs to the roof on the right side. Choose the gang to which you will give this territory. Mission "Big Tour" completed!
SUBJECT QUEST "HOUSE, DEAR HOUSE"
Target. Talk to Shank.Go to Shank, who stands near the Yader Town market. Talk to him about everything and agree to be based in the Commonwealth.
Target. Capture a gang outpost.
Decide what to do: try to ask the settlers to leave the territory of the outpost, or destroy them together with the raiders. The first option is chosen.
ATTENTION! When Shank asks which gang you will give the territory to, remember who has how much at their disposal. In total, five different locations were captured. Two gangs went to two, one to the third. Or did you give everything to one? Then the war will definitely break out! If you acted wisely, as described in the proposals earlier, then give the outpost to the gang that has one zone at their disposal.
Next, you will need to select an outpost located not far from the settlements. Shank recommends the following outposts - Potogonka, Krups Mansion, Tuffington Boathouse, and Greentop Nursery. The solution is the Greentop greenhouse.
If the selected settlement belonged to you, then you will lose control over it, after which you will have to recapture it. This was the case in my case with the Greentop greenhouse.

Shank, advisor to the boss.
SUBJECT QUEST "GREENTOP GREENHOUSE: CLEAR UP"
Target. Greentop Greenhouse: persuade residents to leave the settlement.Move to the settlement, talk to the main, marked with a marker. Use charisma several times to avoid wasting covers. On the other hand, you can tell the residents to leave immediately and then offer about 1000 caps.
Target. Build a signal flag for your gang at the workshop in Greentop Greenhouse (or whatever location you choose).
Use the workshop, go to the very last section (new) - "Raiders". Select the first item - flags. Set a signal flag depending on which gang you are giving territory to.
Target. Meet with the squad.Just chat with the marked member of the selected gang, who, in a group with his friends, will arrive in the newly captured settlement.
Target. Talk to Shank.
Chat about everything with Shank, who will inform you that now you need to provide the ranger outpost with supplies.
Target. Get the settlements to supply your gang with supplies.
There are two ways - either decide peacefully, or get into a fight, like last time. The first option is chosen. So, now all gangs have the same number of zones - some have two zones in Yader-Mir, and someone has one zone in Yader-Mir and an outpost on the territory of the Commonwealth. Therefore, you can choose any gang that will look after the settlement, giving supplies to the outpost captured minutes earlier. Make a choice (in our case, the Adepts).
Choose a settlement from the available ones.
SUBJECT QUEST "COUNTRY CROSSING: EXTORTION"
Purpose (optional). Switch on the radio transmitter in the Greentop Greentop settlement.First, return to the captured settlement, the raider outpost. Enter the workbench menu, go to the "Raider - Resources" section and select the "Yader-Mira" transmitter. After creating it, install it anywhere in the location. The task was completed even without being connected to the power supply.
Target. Country Crossing: Convince the villagers to supply your gang with supplies.
Just chat with the settler and try to negotiate using caps or charisma.
SUBJECT QUEST "HOUSE, DEAR HOUSE" (CONTINUED)
Target. Talk to Shank.Return to Yader Town again and talk to Shank. It turns out that enemy raiders are about to attack your outpost in the Commonwealth. It's up to you to talk to them or kill them. Since these are bad people, you can even go into battle without hesitation.
Target. Greentop Greenhouse (or an outpost you captured): meet with a squad of raiders.
Return to the outpost you captured, where one of the three gangs is located. Talk to the gang members to upgrade the objective.
Target. Greentop Greenhouse: Protect the settlement.
You can use charisma to chase away the raiders, or silently attack them.
Target. Talk to Shank.
Report to Shank that you have completed the task. Shank will wrap up the introduction and walk you through the contents of the outpost.
Send Shank to the outpost, or offer to carry out additional operations (to capture other points).
Purpose (optional). Talk to Shank about new operations.
Target. Provide the outpost with everything you need (N%).
If you have this task, then something is missing in the outpost. There should be no problems with food, so the marker will surely point you to the workshop. Get enough energy, bed, and protection. Be sure to add an amplifier to the transmitter that boosts the signal from the Yader-Mira radio wave and, for example, a kiosk with drugs. In general, what improves the mood in the settlement. You need to achieve 100% of the result.
Target. Create Raider Outposts (1/3).
In total, you need three captured and well-functioning outposts. One already exists. Just talk to Shank, choose operations, create an outpost. Click on the outpost you would like to capture. Shank will say if it's possible or not. If not, then choose another location.
When you capture two outposts, and there will be a total of three of them (when capturing, you need to either convince the settlers to leave, or kill them, and then fly a flag through the workshop), then the task will end. But a new one will become available - "Demonstration of Power".
NOTE... If you want to access the tribute chest, you will need to create five more, and in total - eight raider outposts.
SUBJECT QUEST "DEMONSTRATION OF POWER"
Target. Talk to Shank.This happens if one of the gangs does not like the fact that the other has more territories. Return to the indicated place of "Yader-Mir" and talk to the leaders of the gangs who are waiting for you.
There are two options:
- Either look for a previous save and make one of the decisions in favor of the gang (give them territory).
- Either agree with these circumstances and go to the destruction of the gang and its leader.
In any case, one of the gangs will not like something after the previous task. You have to destroy it! You can simply choose which gang you want to get rid of - give the last two outposts from the previous quest to those gangs that you want to leave.
In our walkthrough, a gang of Adepts was destroyed.
After talking with the leaders of the other two gangs, you will have no choice - you need to agree with the harsh punishment of the traitors.
Target. Find and kill Nisha (or the leader whose gang you are destroying).
Go up the hill along the path, kill gang members. Enter the inside of the Yader-Mira power plant. You need to climb to the very top of the power plant, killing opponents along the way. Next, get out on the roof and deal with the last enemies and the leader of the gang.

Power plant "Yader-Mira", where the enemy gang settled.
Target. Take the key from the control center.
Search the body of the gang leader to collect the control center key.
Target. Get to the control center.
Enter the blue rooftop building using the same key.
Target. Activate the main switch.
Interact with the marked remote with a button. So you will return electricity to Yader-Mir.
Target. Talk to Gage.
After speaking with Gage, you will complete the storyline of the Fallout 4: Nula-World add-on to the post-apocalyptic RPG site
FALLOUT 4 ENDINGS: NUKA-WORLD
The game has several endings - one bad and three good.First, you must understand that you cannot keep all three gangs alive. The start of what kind of ending you earn is taken from Yader-Mir. You yourself choose the gangs that will reside in a particular territory.
The first ending. Bad good
SIDE QUEST "SEASON OF HUNTING". GOOD ENDING?
At the beginning of Yader-Mir there is the Yader-Town market. Go to it, the door on the left. Useful items can be purchased here. One of the merchants is named Mackenzie. Talk to her and get an offer. She will offer you to kill all the gang leaders. What will come of it? Check it out!Target. Find and kill Mason.
Target. Find and kill William Black.
Target. Find and kill Maggie Black.
Target. Find and kill Nisha.
In general, you will have to destroy the three leaders (the Operators have two leaders), then return to the market, clear everything there and talk to Mackenzie. So you will free all the slaves and save Yader-Mir. But all tasks related to the storyline and the capture of the park will fail. It seems that the gangs have been destroyed, but you will not get satisfaction from this.
Second / third / fourth endings
You have already received one of them. To take others, you need to pay less attention to the Operators or the Pack, in order to destroy them.
ATTENTION! Depending on which gangs remain, you will receive unique perks - one per gang.
The Operator's Perk is called "Professional"... Increases the level of stealth in the shadows and damage from weapons with a silencer.
The Perk of the Pack is called "Leader of the Pack" (in the abilities section, look for "Alpha Male of the Pack")... Damage resistance is significantly increased, as well as damage done in melee and melee weapons.
The perk of the Adepts is called "Adept"... When you kill enemies with melee weapons, you recover 25% of your action points.
"STRICT DISCIPLINE" SIDE QUEST (REPEATING)
The task is taken in the lair of the Adepts from their leader Nishi. Talk to her to find out about the goal.Target. Rexford Hotel: Collar on target (Scavenger).
Return to the Yader-Mira monorail and ride it to the Commonwealth. Move to a location near the Neighborhood. Approach the indicated point and follow to Neighborhood.
Walk around the building on the left side and go inside the Rexford Hotel. Move towards the goal in the back room opposite the entrance. There are three options:
- Press the CTRL key to enter stealth mode, and then go to the Scavenger and press R to put on the collar (the corresponding inscription will appear). In this case, if you succeed, no one will raise the alarm.
- You can approach the Scavenger and during the dialogue use charisma (easy level) to offer to wear a necklace. But in this case, Markowski and his bandits will attack you, as the Scavenger will raise the alarm.
- The third option is to invite the Scavenger to go with you. Need mid-level charisma! If he agrees, go towards the exit and through the blue door on the right. Go downstairs. Here you can use the second option, inviting the Scavenger to put on the necklace through the dialog box. He will scream, but no one will attack you.
Target. Return to Niche.
Return on the "Yader-Express" to the "Yader-Mir" park, where you will report to Nisha about the completion of the task.
SIDE QUEST "GUARDIAN OF GOODS" (REPEATING)
Target. Meet with the squad.This side quest is taken from the same Niche, the head of the Adepts. A prerequisite is to complete her previous assignment called "Strict discipline."
Move to the Commonwealth, select the closest control point to the marker - for example, "Atomic Cats Garage".
If you follow this route, you will meet several Minutemans along the way. The fact is that it is they who will attack the detachment of Adepts in the future. Do not touch them for now, go further to the indicated building. The task should be updated.
Target. Kill all opponents.
Kill all the minutemans that attack you. Hide inside the building, behind the remains of a car nearby, in order to attack some opponents, and hide from others.
SIDE QUEST "GET TO THROW OUT THE GARBAGE"
Target. Kill the Scavenger at the "Bench" location.The task is given by Nisha, the leader of the Adepts. A prerequisite is to successfully complete the previous mission "Guarding the Goods".
Talk to Nisha and learn about the defector who went to the Operators. You need to eliminate the target. Follow the Commonwealth, move to Diamond City. In the city, go down and to the right. Find the entrance to the "Bench" building. The Scavenger will be sitting on the sofa inside. There are two options:
- Either you kill him in front of everyone and engage in battle with the rest of the characters, among whom there is an important NPC for the original Fallout 4.
- Either you offer the Scavenger to go with you (if you used this option in one of the previous quests, then charisma is not required). Take the Scavenger to the back room and shoot with an accurate headshot.
Target. Return to Niche.
Return to the quest giver in the Adept camp and complete the task.
THE SIDE QUEST "IT WAS SECRET, WILL BECOME EVER
Target. Meet with the squad.The task is taken from Nishi, the head of the Adepts, after completing the quest "We need to throw out the trash" (required!). Talk to the woman in the Adept camp, on the top floor.
Travel to the Commonwealth, to Andrew Station. Move north, where the squad is waiting for you.
Target. Kill the guards near the cache.
Enemies will be everywhere - outside and on the territory of the place where the cache is located. One opponent will probably be at the top. When you kill everyone, return to Yader-Mir and report the work done to Nisha.
ATTENTION! After this task, Nisha will continue to issue new ones, but similar to those that have already existed - to attach a collar to another Scavenger, eliminate him, etc.
SIDE QUEST "ONCE AND FOREVER"
This is the first quest that can be taken from the leader of the Operators - Maggie Black. Just talk to her at the Salon.Target. Kill the Super Mutant Chieftain in Lanky John's Junkyard.
Go to the indicated location in the Commonwealth. There will be a huge number of super mutants here, but your target is marked with a red marker. It is enough to destroy this enemy, and hide from the rest. You can use the rocket launcher to finish off the enemy faster. Return to Maggie and turn in the quest to her.
SIDE QUEST "IMORAL BATTLE"
When you go through the storyline, leave the Commonwealth and return to it again, you will hear a message from a passer-by: someone has come to the test.Target. Talk to Fritsch.
Go inside the specified building "Yader Arcade" and talk to its owner - a raider named Fritch. There are three options for the development of events (a person appeared who followed the same path as you):
1. You are fighting a poor fellow from the Wasteland.
2. You declare that you will not fight. In this case, he will be flooded in the labyrinth.
3. You order Fritch to free the person. The task will fail.
Target. Enter the Yader-Mobile arena.
If you agree to fight, then this task will appear. Prepare for battle. The fight will be held in a 1 versus 1 format.
SIDE QUEST "LID IN THE HAY STACK"
To get the task, you must chat with a blond girl with glasses named Sierra Petrovita. It can be found on your first visit to Yader-Mir, when you head towards Mount Fizztop. Either way, look for her in Yader Town. After communication, agree to help.Target. Put on glasses Mister Caps.
Sierra will give you points. Look for them in your inventory in the "Clothes" section. Put on your glasses. Only in them will you be able to see the hidden drawings. In total, you need to find 10 drawings. These are clues to the whereabouts of Bradburton, the creator of Nuka-Cola.
Let's clarify right away - you will find images of Mister Covers with one of the Latin letters. From them you will need to make a word.
Target. Find the hidden images of Mister Cap in Yader Town.
Put on your glasses! It is necessary! Go to the Fizztop Grill Bar, where your lair is located. From the bar, if you are facing the entrance, move left, west. You will see the Nuka-Cherry sign. Found it? Then go from the sign to the left, along the buildings. On the right, there will be a porch with an entrance to two restrooms. You must go past this porch and turn right. On the wall behind the bushes will be the first hint (picture) Mister Caps (1/10)... This is the letter G.
ATTENTION! You have to go to the clue image and interact with it. Only in this way will this point be counted. By the way, there is only one hint in Yader Town, so you will see how the achieved goal is crossed out.
Target. Find hidden images of Mister Cap in Dry Gorge.
Move to the "Dry Gorge" theater, which is at the beginning of this zone. On the right, there should be an opening with an orange cloth visor and the THEATER sign. But you must turn away from him to the left and walk forward along the fallen pillar on your left hand. Turn left behind the post. There is a stroller diagonally to the right (for reference). But you go ahead, leaving her on the right hand. There will be a small fence in front, and next to it is a haystack (to the left). Behind this fence is a small cemetery with tombstones. On the highest gravestone on the left, by the brickwork, find hint (picture) Mister Caps (2/10)... This is the letter E.
Move in the same location to the point called "Crazy Mulligan's Trolleys". Inside this building, you were still looking for the worm's womb. Go inside through the red door, go into the passage on the right, to which 3-4 steps lead. After the long shaft tunnel you will see a staircase. But to her on the left side there is another descent down, with a yellow fence. Below there is a metal building, on the wall of which, to the right of the entrance, there will be hint (picture) Mister Caps (3/10)... This time with the letter H.
Target. Find hidden images of Mister Cap in Galaxy.
Use fast travel to find yourself in the "Yader Spaceport". Face the entrance, there are stairs to the left and right. Walk to the right of the stairs on the left side! Walk along the "Yader-Spaceport" building and in the place where there will be a narrow passage, on the wall of a high flower bed on the left, find hint (picture) Mister Caps (4/10)... Remember the letter S.
Approach the entrance to the Yader-Spaceport building again, but this time stand with your back to it and walk away, towards the exit from the Galaxy zone. In the center of the location there is some kind of structure with a planet. Before reaching it, turn left. There are steps here. Climb them, go to the right. Behind the next span there will be a signpost. Look at the passage to the non-working escalator staircase, but walk past it to the left. Find the passage behind the bridge with the SPACEWALK sign on top. Approach the passage, but do not go forward, but turn left. Find on the wall hint (picture) Mister Caps (5/10)... This will be the letter R.
Target. Find hidden images of Mr. Cap in Children's Kingdom.
Move to this area and enter the Pavilion of Laughter. Inside the building, go through the door on the left, on which the chain originally hung (before the passage of the story). Continue to the left into the corridor and open the red door. You will find yourself in a room with a rotating floor. Remember that? The floor doesn't rotate here anymore. Unless, of course, you turned it off. After going inside, open the second door if you go to the right (it will be red just like this one).
There will be a small room behind the door with hint (pattern) of Mr. Cap (6/10)... This is the letter F.
Stay in this area. Move to the Yader-King's castle. Do not go inside the theater where you fought Oswald. Go back, cross the bridge. Stand facing the bridge you just came back across. But don't go there, but look to the left. There is a tower with a ruined roof, to which there are steps. Climb up them, go inside the building and follow the stairs to the fourth floor. Just after the last step, look at the wall on the left, where there will be hint (picture) Mister Caps (7/10)... This is the letter I.
Target. Find hidden images of Mister Caps in Safari.
Move to the "Primate House", go inside it. Approach the entrance inside, but on the right side, find a path among the trees. Approach the wall and look even more to the right. That is, now you will be standing with your back to the "House of the Primates". On the brick wall ahead you will see hint (picture) Mister Caps (8/10)... Here is the letter N.
Follow to the roof house of Mister Covers. Go through the passage with the inscription, take turns after the first fork: right, right, left, right. To the right of the tree, if you look at it with your face in the direction of the roller coaster, there will be a brick wall with the desired hint (pattern) of Mr. Cap (9/10)... This is the second letter E.
Target. Find the hidden images of Mr. Caps at the Yader-Cola Bottling Plant.
Move along the World of Freshness marker. Enter inside through a tunnel with water, where there is an inscription in black on blue: "ENTER". Go forward through the tunnel with water, into the corridor with the WORLD OF REFRESHMENT sign on top. Run all the way forward, turn under the arch on the right (you will walk past a model of small multi-storey buildings). Next up is a Wild West layout with cacti and old saloons. You need a third or fourth saloon house on the left side. If you look at this house, then you should go around it on the right side and find on the outer wall hint (picture) Mister Caps (10/10)... This is another letter R.
Target. Return to Sierra Petrovite.
Go back to Yader Town and chat with the girl. It will make a password from letters - REFRESHING.
Target. Take advantage of the digital panel.
The Sierra will be standing near the door you need. There is a panel on the right - enter the received code.
Target. Search the office.
As soon as the password is confirmed, then go inside Bradburton's office. The quest has several endings at once.
Explore the office, but know that you need to climb to the second tier. Use the terminal and read some useful information. You can either hack Bradburton's safe or open it later when you have the key. The inside of the safe is actually nothing related to the quest.
Go to the Nuka-Cola vending machine in the corner, click on the hidden button located on the right outer wall. After opening the secret passage, call the elevator and go downstairs on it. You will find yourself in the lair of Mr. Bradburton and even get to know him. His life has been supported by a special machine for over a century.
You will have immediately three options for completing this quest:
“Either you are acting humanly and kill Bradburton, who is tired of this existence. As a reward, you will get access to his secret vault with powerful weapons. Also in the safe you will find the "Nuka-Cola" formula, which you can pass on to Sierra Petrovita.
- Either you don't touch Bradburton at the request of Sierra Petrovita, for which you get a unique Yader-Mira jumpsuit from the girl.
- Either you agree not to kill Bradburton, get a jumpsuit from Sierra Petrovita, and then you still deal with a desperate man. In this case, you will get both awards, but the angry Sierra will have to be shot.

All that remains of John-Caleb Bradburton, the creator of Nuka-Cola.
SIDE QUEST "PRECIOUS MEDALLIONS"
A robot in the shape of a bottle (red) from the floor of Yader-Cola is walking around the territory of Yader Town. Find him and talk about everything. You will receive another collectible side quest. In total, you will need to find seven medallions. You may have found some of them before.Target. Receive the Ferris Wheel Medallion.
Move to the "Children's Kingdom", to the Ferris wheel (in the lower left corner of the park on the map). There is a medallion machine on the side of the Ferris wheel. Interact with him to get Ferris wheel medallion (1/7).
Target. Receive the Mad Mulligan Mine medallion.
At the location "Dry Gorge", move to the point of the "Crazy Mulligan Trolley". Go inside the building, Mulligan's mine. Go through the passage on the right, go past the descent downward, where there is a metal building with a drawing of Mr. Cap (read the quest above). Move along the wall and note that to the left you can jump off the bridge. There will be stairs up. Go up and in the room ahead, find a machine gun, from where you get Mad Mulligan Mine medallion (2/7)... Or at the entrance, go to the room on the left and find a machine gun, which is probably even easier.
Target. Receive the Tree House Medallion.
Stand at the aisle to the treehouse in the Safari location. Go through the passage with the inscription, turn right at the fork. Then go left, right and the next turn to the left, in front of a metal arch, similar to the entrance passage to the house. Turn left, left again and through the metal arch. Go further, taking turns to the right. There will be two more such arches, and then an elevator leading to the tree. Go up to the tree house and find the machine with medallions inside. Take away tree house medallion (3/7) on the first floor.
Target. Receive the Vault-Tec: Among the Stars Medallion.
To search for this medallion, move to the "Galaxy" zone, to the point "Vault-Tec: Among the Stars". Find not the main entrance, but the back one, with the usual red door and a red EXIT sign above it. To do this, after moving to the point, jump down to the left (if you have power armor). Go through the passage of this building and see a door on the left. Go inside, immediately after the turn on the right there will be a machine with medallions. Take away medallion "Vault-Tec: Among the Stars" (4/7).
Target. Receive the World of Freshness medallion.
Open the map and navigate along the "World of Freshness" marker. The vending machine with medallions is located outside, opposite the Yader-Cola bottling plant. Take away medallion "World of Freshness" (5/7).
Target. Receive the Nuka Racers medallion.
Move to the pavilion of laughter. From here, find the very tracks you walked through the tunnel when you overheard the conversation between Oswald and some wild ghoul. But you don't have to go into the tunnel. When you again find rails with moving cars, then find an automatic machine right next to the fence next to them. Take away medallion "Nuclear Racers" (6/7).
Target. Receive the Nuka-Galaxy Medallion.
Select the control point "Nuka-Galaxy" in the "Galaxy" zone. Climb up and enter through the front door. Move along the corridor until you enter the hall with the rocket rails. Follow the rails to the hall with "Yader-Girl". Climb the steps from her statue and find a medallion machine. Get out of there medallion "Nuka-Galaxy" (7/7).
Target. Receive a reward from Leah.
As soon as you have all 7 medallions (they are in your inventory in the "Miscellaneous" section), then go back to "Nuclear Town" and talk to Leah. As a reward, you will receive "Dark Nuka-Cola", "Nuclear Grapes" and "Quantum Nuka-Cola".
THE HISTORY OF THE MYSTERIOUS MANSION OF THE GRANDCHESTERS
This is, rather, not a quest, but a plot narration. You can learn about the terrible events that happened at the Grandchester Mansion. The main culprit is Lucy. To get to the mansion, you need to go west from the Yader-Express station, beyond the hobology camp. The mansion is visible from afar.During the period of prosperity of the Yader-Mira park, the attraction “Mysterious Mansion Grandchester” was very popular among visitors. By visiting it, one could learn about the terrible history of the Grandchester family. A daughter named Lucy was possessed by the devil, did terrible things. The parents tried to exorcise the demons until, ultimately, Lucy killed them, after which she committed suicide.
Someone unknown turned this mansion, a former attraction, into a huge death trap. Surely someone's ominous presence is hiding behind these traps ...
The mansion consists of linear corridors - you will not be allowed into that part of the building where it is too early to enter. Be careful - neutralize the traps you meet on the way.
Enter the room on the left through the red door. Disarm the trap at the entrance - there will be scales under your feet, and there is a trap on the wall above them. The door will open further. Go there (if the door did not open, then study the hall of the mansion again).
Destroy the robot shooter in the corridor with flamethrowers. Look at the wall on the right and see a box. There is a switch inside - switch it to disarm the trap.
By the way, some doors in the rooms open only after the end of the speaker's speech. When the announcer has finished speaking, a door will open through which it will be possible to leave the upside-down room.
In the kitchen, kill two robots and climb the steps to the next door. It will open after the announcer's speech ends.
After destroying the turret, go to the hall balcony, where you could already visit. Go further, when you are in the children's room, then immediately leave it, as grenades fall from the ropes. In the next room you will meet Zechariah. After killing him, take the key to the Grandchester mansion. It is here that there is a recipe for "Yader-Impact". Read below.
SIDE QUEST "JOURNEY TO THE STARS"
You can get the quest from Dara Hubbell, who lives on the location "Hobology Camp", which is to the west of "Yader Town". But first, it seems, it is imperative to find the Purified One. If you come to the camp without speaking to the man, then most likely the hobologists and Dara will attack you. In short: you must find 5 spacesuits at the location "Vault-Tec: Among the Stars" in the "Galaxy" zone and bring them to Dara.For spacesuits, you will receive 200 caps, but if you use charisma and complete three stages, then raise the reward to 350 caps.
The suits must be removed from the animatrons (alien dummies).
Take the hobologists to the junkyard. Or tell them that it has been cleaned (if you have been before). Once in place, take the power distributor and cores. Approach the alien ship. Install the three fused cores as Dara asks to see a good ending.
If you install four fused cores, ignoring Daru, then all hobologists will die, and you will see a bad ending. If you do not kill them (install three cores), you will receive 100 cartridges for the alien cannon from Dara, and all the hobologists will disappear after that.
OTHER
After the completion of the storyline, several tasks will appear at once in the quest "Miscellaneous". Select it and click on the tasks you want to track.Target. Talk to Lizzie Wyeth.
Chat with the girl who is in the "Salon" of the Operators. You will receive the "Persuasion" grenade from her. Throwing such a projectile at the feet of opponents, you can convince them of something.
Target. Talk to Harvey.
Do you still remember the guy who tried to lure you into Yader-Mir? So you can find it near the Yader Town market. Just chat and decide what to do with him - kill or spare.
Target. Collect the first tribute collected from the Commonwealth.
Return to Mount Fizztop, where the boss's lair is. There is a red chest on the upper balcony, inside of which you will find the first lids from the Commonwealth, looted by the raiders.
WHERE TO FIND ALL YADER-RECIPES?
In total, the game has 15 books with recipes for "Nuclear-something-there".1. In Yader Town, stand near the doors to the Salon, where the Operators are. Walk diagonally from the mountain and you will find Mr. Covers' cafe here. Inside the cafe, go to the room in front and on the counter on the right you will find recipe "Yader-Tsida" (1/15).
2. If you go south from Yader Express, down the map, you will find Evan's house. Chat with the home owner to get recipe for "Yader-Love" (2/15).
3. If you go from the station "Yader-Express" to the west, to the left on the map, you will find the camp of hobologists. Yader Frutti Recipe (3/15) located on one of the tables inside the diner.
4. Move from the hobology camp to the west and slightly down the map. Here you must discover the mysterious Grandchester Mansion. Inside the room with the portrait, on a wooden curbstone lies recipe "Yader-Impact" (4/15)... Where exactly this room is located and how to study the mansion, read the description above.
Note. To get inside the mansion, you need to talk to the robotic ticket collector to the left of the entrance. Either you buy a ticket or use your charisma to convince you that you need to provide free admission. Moreover, you can buy a ticket not with caps, but in pre-war dollars. Only 65 pieces are needed!
5. Move to the "Galaxy" zone and stand facing the "Yader-Spaceport". Go left through the passage labeled STAR MARKET. One of the stands in the back street on the left will have Yader-Breezer recipe (5/15).
6. Go inside the Starlight Cinema. There is a small building in the main hall. Under the roof on the counter lies another "Yader" -recipe (6/15).
7. Go inside the "RobCo Arena", go downstairs, and then turn around and go into the room under the steps. Again, find stands with books where the "Yader" -recipe (7/15).
8. The next place is the nuclear power plant "Yader Town". Inside you need to find a small office with a table on which a fan, terminal and documents are located. On the edge of the table is also Nuclear Power recipe (8/15).
More on this. So, after moving to the location, go inside the building. Go down and then go up. There will be two more paths in the office - either up or down again. Take the path down. From the room with the red remotes, go down to the left. Find the stone steps to the right and go up. As a result, you have to climb up the long span. On the right there will be a room with the corpse of a burnt ghoul (possibly), and on the left - a descent to the office you need.
9. Move to the theater "Dry Gorge" and go to its territory with stands. Look at the stands and to the left of them find a storage (warehouse), where there is a large mannequin bottles from under the "Nuka-Cola" and take away from the table Nuka-Dawn recipe (9/15).
10. Follow the "Dry Gorge" and climb the building where the flagpole for the gang's flag is located. That is, on the same tribunes of the theater, which were written about in the ninth paragraph. There will be a table on which lies recipe "Yader-Extreme" (10/15).
11. In a dry gorge, find an alley with a shooting gallery - a shop signed with two words: "BANDIT ROUNDUP". The tent is located to the right of the tower, on the side of which you could find Dandelion's roboponi. To the right of it, if you look towards the bench, there will be a table with with the recipe for "Yader-Bombochki" (11/15).
12. Follow the "Safari" area and enter the building of the reception center. On one of the admin desks that are located below (form an open circle), find Nuka-Onslaught recipe (12/15).
13. In the "Safari" zone, go to the "Reptile House", located diagonally from the treehouse. You had to pass by it (over the bridge) when you were moving towards the giant snake (roller coaster). Stand with your back to the bridge and go down the steps. Turn right. On the left side in front, you will see a scene. There is a hut behind the stage, inside of which lies on the table recipe for "Yader-Sportsman" (13/15).
14. Move inside the "Pavilion of Laughter" and go to the control room, which became available after passing all the obstacles. That is, after entering, go into the passage on the left and immediately turn into the corridor on the right. On one of the control panels, standing close to each other, lies recipe "Yader-Lixira" (14/15).
15. Go inside the castle "Yader-King", more precisely, inside the theater on the territory of the castle. Where you fought Oswald. On the first floor, find a utility room (go through the audience hall) and look for a room with a curbstone on the right. Take away from the table recipe "Yader-Berries" (15/15).
WHERE TO SEARCH ALL ISSUES OF THE MAGAZINE MAGAZINE?
There are five magazines in total in the supplement. You will learn more about where to find them in this chapter.1. Move to the "Yader-Spaceport" and go around it on the left side. Find the minibus frame behind the gate in the form of a lattice. Near him, on a box, lies the first issue of the "Scavenger!" (1/5).
Impact: Increases the likelihood of being tested for credibility.
2. Next issue, go to the dump to the left of Yader Town. Go to the barn on the right (with a broken gate), go to the room on the left and go up the red metal staircase. Go to the very end on top, where the animatron is located - a turret disguised as an alien. Perhaps, when you came here for the stellar core, you have already destroyed the enemy. The second issue of the "Scavenger!" (2/5) lies on the table next to the safe and animatron.
Impact: + 25% Combat Knife and Switch Knife Damage.
3. Move to the Children's Kingdom area and enter the Pavilion of Laughter. Through the mirror maze, along the platforms rotating in a circle in the water, get to the room with hypnotizing tunnels (hypnosal). Take the first corner on the right. Look to the left. Move forward until it stops (through the tunnel). Lying on the ground on the right the third issue of the "Scavenger!" (3/5).
Impact: + 10% damage in melee combat.
4. Move to the mysterious Grandchester mansion and go inside. If you have not been here, then read our walkthrough above (History of the Grandchester Mansion) to find out how to get into the room with Zachariah (he has the key to the Grandchester Mansion). In this room you could find one and "Nuclear" recipes. There is also a red door to the left of the bed. Hack it, move through the corridor and open the broken door of the same color. Go to the back room filled with all sorts of junk. Immediately after entering, pay attention to the wooden box on the right, on which lies the fourth issue of the "Scavenger!" (4/5).
Impact: + 5% damage from explosions.
5. Move to the theater "Dry Gorge". Move forward and keep to the right to head towards the other exit, where the robot sheriff is. Before reaching it, on the right there will be a red rocket at an angle. Go upstairs along it, jump along the rocks so as to climb the ledge to the left. There will be other ledges to the left. Climb along them to the stone fence of the "Dry Gorge" zone. Turn around and look towards the flagpole. It is on the right, but on the left side, it turns out, there is another territory. Jump down there.
Discovered: "Zone for employees of the Dry Gorge."
Kill the ghouls. You need to go to the roof of the building in the center of the territory. To do this, on the right, find wooden planks, along which you can climb to the roof of another building, and from there - along other wooden planks to the roof of the desired one. Here is a hundred with the fifth issue of the "Scavenger!" (5/5).

Here it is, a hidden area for Sukhoi Gorge employees.
This magazine three different influences, depending on how many covers you have in your backpack. More about this:
- If you have more than 10,000 lids in your backpack, then you get + 1 point to strength and + 1 point to endurance.
- If you have more than 1000 caps in your backpack (but less than 10000), then you get + 2 points to strength and + 2 points to endurance.
- If you have more than 100 caps in your backpack (but less than 1000), then you get + 3 points to strength and + 3 points to endurance.
HOW TO QUICKLY EARN (WIN) ARCADE TICKETS?
This question will be asked by those gamers looking to earn all sorts of achievements in the game, including the Nuka-World expansion. To get one of the achievements, you must spend 100,000 arcade tickets in the Yader-Arcade building. All these tickets can be found on the territory of Yader-Mir. But they come across several hundred maximum.You spend them in this building to get unique weapons or armor. Most of the new weapons and armor (unique) without such tickets and you will not get at all! Here are some basics:
1. Tickets are earned by playing mini-games in the Yader Arcade building.
2. To play these mini-games, you must spend Arcade Tokens, which can be found anywhere. The first of these you will receive from Fritsch, who owns the establishment.
3. All earned or found arcade tickets can be spent in the Yader-Arcada terminal. Interact with the terminal and select "Spend" (Use up), then insert the arcade tickets. You can buy prizes for them!
Where to find arcade tokens:
1. Arcade tokens can be found in garbage cans on the territory of Yader-Mir, or they can be obtained for pre-war money.
2. For one pre-war dollar (let's call this money so) you get 3 arcade tokens. To exchange, use the token machine located inside the building, in the main hall to the left of Fritsch.
3. To start the mini-game, you must interact with the coin slot on the corresponding slot machine. This will spend one arcade token. You will have limited time to complete the mini-game and earn arcade tickets. Each game (slot machine) is different from the other.
And here are some ways to quickly get a huge amount of arcade tickets:
BEST WAY TO GET ARCADE TOKENS.
Go to the shooting gallery on the left side. There is a BANDIT ROUNDUP sign at the top. The slot for the badge is at the bottom of the rack. Take with you a weapon with the maximum clip capacity!The best weapon you could use is the unique Spray n "Pray" submachine gun.
Also, the task is greatly simplified if you use a weapon with an explosive effect. You don't even need to aim. Just shoot at the top left and bottom right corners to destroy each of the targets.
How many arcade tickets can you earn on a dash? The shooting range will allow you to earn about 600 tickets at a time if you use an automatic weapon. When using explosive, you can get about 1000 arcade tickets at a time.
ATTENTION! If you use the legendary explosive automatic weapons, you can earn about 4,000 arcade tickets in one game.
Where can I find the Press and Pray submachine gun? This legendary weapon can be purchased from a merchant named Cricket. Look for these vendors outside Diamond City, in Vault 81 or Bunker Hill.
Publication date: 09/06/2016 08:02:17
V Fallout 4: Nuka-World there is a quest called "Star Dispatcher" in which the player needs to collect 20 star cores in order to fix the mainframe. An optional part is collecting all the cores to unlock new armor.
This mission is part of the "Big Tour" story quest, which takes place throughout the "Galaxy" zone. You can complete the Star Dispatcher simply by destroying all the robots and turrets on the map in their respective locations (marked on the map as attractions), but finding star cores will pay off in the future. For this, galactic modifications are issued, and of course you can get power armor.
Zone "Galaxy"
There are four locations here: the Starlight Cinema, RobCo Arena, Vault-Tec: Among the Stars and the Nuka-Galaxy zone. By completely clearing them, you will collect 23 stellar cores - more than enough to reboot the mainframe. These are the lightest cores, since you can find out exactly how much is left in each zone, and after clearing it of enemies, you just have to thoroughly search the area.
For convenience, kernels will be listed in the order they are found from entry, where possible. If you miss a couple, it's best to go back to the entrance and start a thorough inspection from the beginning.
Cinema "Star Light"
This small, confusing room contains only 4 cores.

Starting from the entrance, head left into the corridor until you reach the toilets at the far end of the passage. Go to the men's room (with blue paint) and look for a broken wall. There lies a dead merchant with a stellar core.

Walk from the entrance to the right corridor until you find the kitchen. There will be a door behind which you will find the core.

Search the main theater hall. Opposite the screen, at the back of the room, there will be a console with another core.

Take any of the elevators to the catwalks or control room above the cinema. The control room will have a console with a fourth star core.
Arena "RobCo"
There are six star cores in this location, but to get them, you will have to fight with a couple of heavy robots.

From the entrance to the location, go to the seating areas for spectators and turn sharply to the left. Look for a closed door along the wall, behind which there will be two star cores.

Walk between the aisles in the auditorium to the gift shop at the end of the room. There, on the shelf, you will find a star core.

Face the robot arena, walk counterclockwise to find tunnels leading downward (watch out for the guard robots). There is a kernel in the console.

Finally, save yourself and go inside the arena itself, where you will find two star cores. Be careful, as the door will not open until you pass through three waves of dangerous robots.
"Vault-Tech: Among the Stars"
In this confusing and deadly location, six star cores are located.

After entering the location, go to the elevator to "start the ride" on the attraction. In the room with stones and protektrons, look for a closed door that is not visible from the path of the attraction. There will be a stellar core behind it.

Follow the paths until you reach the living room. There are several exits from the room. One of the closed sliding doors leads to a room with a star core.

The two exits from the living room form a small loop. There is a room with high radiation contamination along the way. The core lies there.

Finally, there is a nursery at the exit from the living room. Opening the sliding door lock, you will find yourself in the central office - beware of the novatron. One of the doors leads to the main observation center, where three star cores and a treasure chest await.
Zone "Nuclear-Galaxy"
There are seven cores in this linear location. If you go through the game in secret, you can work on the lighting in one of the terminals. Otherwise, normal alarm lighting will help you see better.

From the entrance, head across the queue lines to the boarding site. Standing facing the direction of the attraction paths, look for the door to the right of the paths. This room will have a stellar core.

From the last room, go through the door that leads deeper into the attraction. When you enter the room with many planets, go to the opposite side of the edge you started with and you will see a staircase leading down. Walk across the room to the corridor and you will find a star core in it.

Continue along the corridors and take the elevator on the left. At the exit from it, turn left and you will find a small passage leading to the next room. Exactly opposite the entrance there will be a console from which you can take the star core.

Walk through the stone setting until you reach a hidden door, followed by a long path up the stairs. When you go up to the paths of the attraction again, immediately turn left and go up a small flight of steps - there you will find another console with a cannonball.

At the end of the ride, you can collect the star core and key from the console in the drop-off area. Use the key on the nearest door to open the path to the entrance. In a small tunnel between the entrance and exit of the attraction, there is a small staircase leading to the office. There is a stellar core.

Finally, enter the small control booth in the previously mentioned office and take the star core from the computers.
Yader-Mir and amusement park
There are also 12 star cores outside the locations. Seven of them are in the "Galaxy" zone, and five are simply scattered throughout the Nuclear World.
Zone "Galaxy"
In the park itself, you can find seven cores.
- One of them is located near a corpse lying not far from the mainframe in Yader Spaceport.
- The second can be found in a closed display case on the top floor of Nuka Spaceport.
- At the base of Nuka Spaceport, go through the gate and search the houses for a star core. It should be near the next corpse.
- Another core is in the console at the top of the Arcjet G-Force, which is accessed by a very long stair climb. It itself is located not far from the Nuclear Galaxy.
- Standing at the entrance under the very frame of the Nuclear Galaxy, search the house on the right. There you will find another core.
- One of the star cores is hidden on the console, near the lower exit of the Spacewalk. If you descend from Nuka Spaceport, then at the very end it will be on your right hand. When approaching the RobCo arena, he will be to the left, but it will be much more difficult to spot him from here.
- The last stellar core is at the very top of the Nuclear Spaceport, and it is available only after the completion of the storyline to restore power to the Nuclear World.
Yader-Mir
To get the last five star cores, you will have to fully explore the map of Nuclear World.

Yader Town Market, on the north side, there is a core right on the table.

Inside the Nuclear Arcade. Turn right from the entrance and go to the employee area.

A core can be found in the barn in the northeast of the landfill. The dump itself is located in the southwest of the map (if you have any difficulties finding this location, go through the "Hubologists" quest).

South of Doc Phosphate's saloon in Dry Gorge, near a corpse.

Near a corpse at a beverage bottling plant. Get to the quantum zone and turn right to find it.
Among the large amount of content that was added to Fallout 4 with the release of the Fallout 4: Nuka World add-on, there is a quest called "Star Dispatcher", in which players are asked to find 20 star cores in order to restore power to the park and capture the zone. Optionally, you can collect not 20, but all 35 cores, which will unlock a completely new set of power armor, located in a closed showcase on the first floor of the building with the "Star Dispatcher".
This mission is a necessary step in the "Big Tour" story quest and takes place in the "Galaxy" zone. You can complete the "Star Dispatcher" quest by simply destroying every robot and turret on the map and their associated zones (indicated by fast travel symbols), but you should still complete it "correctly" by collecting star cores. So you can advance along the storyline and use the new power armor. Great reward for hard work!
The task is complicated by the lack of markers indicating the location of stellar cores. Below we will tell you where to find all 35 items.
Star cores in the park "Galaktiki"
There are a total of four dungeons in the Nuka World Galaxy Zone - Starlight Cinema, RobCo Arena, Vault-Tec: Among the Stars and Nuka-Galaxy. Clearing them will allow you to collect a maximum of 23 star cores - more than enough to restart the star dispatcher. We are talking about the easiest stellar cores to find, since you know their total number in each of the indicated places. As soon as the enemies are killed, then it is a matter of time when you find all the cores. You can check how many cores are left to collect in one place or another through the star dispatcher control panel.
Nevertheless, two or three others are very easy to miss, so we have listed the location of all stellar cores in the main zones of the Galaktika Park. Where applicable, we have tried to sort them in the order in which the kernels can be found if you follow the zone in a linear way. Therefore, if you are missing at least one core, then just use our sequential route and check each point to find the core that was missed.
All star cores in the Starlight Cinema Zone (four cores)
Within this cinema you can find a total of four star cores:
- From the entrance, follow the left corridor until you reach the restrooms at the far end. Enter the men's restroom (blue walls) and look for a rift in one of the walls. There will be a dead merchant with a stellar core.
Star core near a corpse inside the men's restroom
- From the entrance, follow the right corridor until you reach the kitchen at the far end. There will be a door behind which there is a second star core inside the terminal.
- Enter the main cinema area. In the far part of the room, behind the counter opposite the screen, there is a console with a third star core.
- Take any lift to reach the control room on the top floor. On the console, inside it is the final star core in the movie theater.
All stellar cores of the "RobCo Arena" zone (six cores)
There are six star cores in this location, but you will need to first destroy a considerable number of strong robots in order to pick up the last of them. If you don't need every core, then just ignore the last item on the list below.
- From the entrance, enter the auditorium and immediately turn left. Walk along the wall to find a locked door that leads to a room with two star cores. This room is on the right side when facing the arena entrance. There you will also find the keys.
- Follow one of the aisles between the stands in the main hall to find a gift shop hidden in the distance. There is one stellar core on the shelf. In this case, look not for a store, but simply for a counter against the wall with a lamp.
- Next, you will need to find the main participant in the battle of robots in the arena, below, and pull the core out of the terminal
- Finally, save yourself, and then enter the robot battle arena, where you can collect two more star cores. Before you can get out of here, you will need to cope with three waves of attacking robots. By the way, using the terminal, it will be possible to disable the robots in advance so as not to fight with them.
All stellar cores of the Vault-Tec: Among the Stars exposition (six cores)
This tangled and sometimes deadly region contains six stellar cores. As a guide, we will take the scenery of each room.
This attraction has several locked rooms at once, and also with different keys. For this reason, it is worth entering through the "exit" for visitors who took a ride on the attraction (from the north side). Move to the very end and you will see a closed door on the left side. On the right side there is a table, inside which you need to find keys. With their help, open the door and go downstairs to find another bunch of keys on another table.
The lab key is located inside the red-lit corridor. There is a dead end at the end of the corridor, so you shouldn't go there.
- There are three star cores behind one of the locked doors with a complex lock.

Three star cores are located behind this door.
- Open another door with the key and you will see a room that looks like a hideout. On the left side there is a laboratory, which must be opened with a key. There is a fourth stellar core and other useful items here. Be sure to take the key to the Vault-Tec control room. If you could not open the rooms above with a lockpick, you can do it with the key you just found, and then pick up three star cores.
- Find a kitchen area with a hole in the wall. Behind this hole is the fifth stellar core. Get ready for high radiation levels!
- Find the door that is labeled "Atrium". Walk forward until you find an exposition where there will be a door with the last core. This door is hidden, so you can skip it. You can open it with keys, but if you have a high level of hacking, then it is completely unnecessary to look for them.
All stellar cores of "Nuka-Galaxy" (seven cores)
There are a total of seven star cores in this linear location. There are two ways to explore this area. If you go through the main entrance, you will need to pick several difficult locks. But if you have a jetpack, then you can use the emergency entrance (this way you will find the key and nothing will need to be hacked).
- From the entrance, take the only path to the landing site. Before moving on the rails, find the door on the right. Inside this control room is the first stellar core.
- On the other side of the control room, all the same rails have a door, barred by a red cockpit. It is locked with an intricate padlock. If you hack it, you will find yourself in the office premises. There are two cores at once - one in the control room, and the other in the terminal upstairs.
- Once in the room with the core-girl, where the terminal is located, find the key and the next stellar core, the fourth in a row.
- From the girl's model, move to the right side (along the rails, but against the movement of the missiles), go down the stairs until you reach the ledge. The terminal houses the fifth stellar core.
- Look for an elevator nearby and go downstairs. After leaving the elevator car, turn left and you will find yourself in a room that simulates the surface of the planet. Follow down to the terminal and take the sixth star core.
- Take the elevator back up and turn right. Move up the corridor, go forward and even higher to find the terminal with the seventh core.
Stellar cores in the Nuclear World and the "Galaxy" zone
Despite the huge number of star cores that can be collected on the territory of individual locations in the "Galaxy" zone, there are 12 more pieces that you will find while exploring the rest of the Nuclear World. Seven star cores are located in the same "Galaxy" zone, while the remaining five are scattered in other parts of the game world.
All stellar cores in the "Galaxy" zone (seven cores)
Galaktika Park has a total of seven stellar cores. Kill opponents to make the task easier.
- Go to the "Nuka-Galaxy" and find a tower nearby. At the top is the next core.
- Follow to the entrance to the "Nuka-Galaxy" and look for the star core inside the red cabin.
- Move to the second entrance to the "RobCo Arena" and look for a star core in the terminal nearby.
- The last core is at the top above the stellar dispatcher. You can get there only by an elevator, which will work after installing 20 cores and returning the power of the Nuclear World.
All stellar cores in the Nuclear World
To get the last five stellar cores, you will need to survey the rest of the Nuclear World.
- On a table in Yader Town Market, north end.
- Inside the Yader-Arcada personnel room. Turn right from the entrance and return to the work area.
- In the barn northeast of the dump, found in the southwest of the game location (the "Hobology" quest will lead you to the dump). Look in the lower left corner of the map.
- Find the corpses in the Dry Gorge and look for the star core lying nearby.
- Next to the corpse at the Nuka-Cola bottling plant. Enter through the entrance just below the huge blue rocket mock-up on the roof and walk all the way to the right until you see a staircase leading down. There will be a corpse with a core.
Star Core IDs via Developer Console
Although there is a code that allows you to create star cores via the console (ID 0601E367), you will not be able to install them on the star dispatcher, and therefore you will not be able to complete the quest.
In a location called "Galaxy", you can find a supercomputer called "Star Dispatcher". So in order for the performance of this computer to reach 100%, it is necessary to find and bring 35 star cores. However, this is not all. The bottom line is that if you bring all 35 parts, then you will get access to a unique power armor called "Quantum X-01 Type V". So if you are wondering "Where can I find all the stellar cores?", Then this guide will certainly help you.
→ Attention: The first Star Core can be found in the same room as the supercomputer, so don't miss the first detail!
Location: "Galaxy"
To begin with, I recommend that you fully explore the "Galaxy" zone, since there are as many as five Stellar cores hidden in it. Moreover, its first core, as indicated above, can be found on the second floor of the mission, which contains the "Star Dispatcher". To be precise, the core is located inside the showcase, the key from which can be obtained in the next room.
The second core can be found near the trader's corpse in the "backyard" area. Note, however, that a gate will close the road to this part, but it will not be difficult to get across it. Just let the gate serve as a guide.
=
The next stellar core can already be found on the tower, which in turn is located near a place called "Nuka-Galaxy". Climb to the very top and take a close look, the screenshot below will make your search easier.

The last stellar core in this territory can be found again not far from the "Nuka-Galaxy". You will need to find the place shown in the screenshot below. Having reached this place, look further for a red booth - the cherished core will lie inside.

→ Attention: You can get the last Star Core only after you have finished the main storyline of the "Nuka-World" expansion. Only after that, on the second floor of the building in which the supercomputer is located, the elevator will turn on, which will take the hero to the cherished core.
Where to go:- To the transit center "Yader-Mir".
It will become available to you automatically immediately after installing this DLC.
Target. Listen to the Yader-Kola radio station.
The first task will appear. Open your Pip-Boy, go to the radio tab and select a new radio wave - "Nuka-Cola Radio". Listen to what the announcer is broadcasting, after which the task will automatically become completed.
You will learn about an amusement park called Yader-Mir. Everyone who wants to have a rest is invited there. You can get to the park only through the Yader-Mir transit center, where you need to board the Yader-Express.
Target. Get to the Yader-Mir transit center.
The location you need is located to the west, at the very edge of the Commonwealth. Follow there, but be careful - several bands of shooters are waiting for you. You will need to fight, including with the shooting assaultron, Commander Keylor, using stealth in battle.
How to defeat a stormturmotron?
Try to make sure that this opponent does not use energy weapons located on the head. One shot will almost destroy your character. If he does shoot, then try to dodge to the side. The Assaultron will attack you continuously. You must make sure that he doesn't corner you. Try to constantly be at a distance from the enemy, which will be useful for you to carry out vital maneuvers.
Use more powerful weapons that you have. Take with you a companion who will distract the attention of this "piece of iron".
Having approached your destination, explore the Yader-Mir transit center, look for useful loot. Look into the building to the right of the main gate. There is an elevator here that will take you to the roof. There is a bridge at the top that leads to another roof. You can also climb up the ruins of the building on the left side. On the roof of the building on the left (relative to the gate) there is a bag, a chest and a safe with a lock of medium difficulty. Inside you will find supplies, weapons and even explosives.
What is Yader-Mir? This is a Nuka-Cola theme park. You can find different types of Yader-Cola cans in garbage cans throughout the park. For this reason, it can look into urns if you need to restore health. You will see buses in the transit center. Inside the bus, near the entrance, you can find covers, inside a cache. Search the bodies of passengers and one of them will find tickets for Yader-Arcada. Surely they will come in handy in the park!
To obtain one of the achievements, you will need to use 100,000 Yader-Arcade tickets.
Follow down the Yader-Mir transit center, chat with Harvey about everything.
Target. Talk to Harvey.
According to this man, he was robbed by raiders and kidnapped by his wife and son. Raiders are in the park, contrary to the assurances of the merchants Harvey had met the day before. The man asks to help him find a family. Offer Harvey a stimulant, but for some reason he refuses.
Charisma
If your level of charisma allows you to use persuasion (hard), then you have three options to find out what exactly Harvey is hiding. Whether you can solve Harvey's secret or not, you will learn the password from the control terminal, which allows you to activate the monorail and go to Yader-Mir.
Target. Restore power supply to Yader-Express.
Explore the territory of this station. On the left side you can find a first aid kit and a staff quarters with an easy lock. There will be antiradin inside. You don't have to break this door at all. Follow the detour through the rails, where there will be a passage. At the end of the rail there is a safe with a lock of medium difficulty.
On the right side you can find the office, inside which the Yader-Express control terminal is located. This is the ticket office. Log in to the terminal, click on Grid Management and select Activate Monorail Power.
Target. Get to Yader-Mir by Yader-Express.
It's time to go to the research of "Yader-Mir". Inside "Yader-Express" you need to activate the control panel of this monorail, which is in front of the car, where the driver should be.
Hear Porter Gage's message about the trap ahead. Looking ahead, it's worth noting that Gage is the main quest giver in the DLC.
SUBJECT QUEST "HERE HERE HERE RENTAL"
Where to go:- To the station "Yader-Mir".
- to the arena for Yader-Mobile.
Upon completion of the quest "To the Places!" you will find yourself in the Yader-Mir amusement park.
Target. Complete the Test.
A test will begin, which you must pass. Find the purified water located below the structure with the terminal at the Yader-Mir station. As mentioned earlier, you had to go here in full combat readiness, taking with you a partner, ammunition and medicines.
Turret room
Move through the doorway with the ENTER sign. Follow the stairs down and you will find yourself in the first test room. There are several different types of turrets here. How to get through the rooms:
- Try to deal with these turrets (some of them) before entering the room. As soon as the door slams, the turrets will be on alert. It is for this reason that you have a great opportunity to start firing at visible turrets from the doorway. Use the V.A.T.S. system to make it easier to deal with mechanical opponents.
- When you go inside, then follow the shelter on the left side, where there is a wall and a Nuka-Cola vending machine. Not all turrets can reach you here. Deal with those who are still firing at you. Run to the opposite wall and finish off the rest of the turrets.
- Some of the turrets are hidden behind the wall and you won't be able to notice them right away. Be careful!
After destroying these turrets, explore the room. On the right side there is a counter under which there is a cache with covers. On the left side, at the end of the room, you can find a first aid kit. See the shelves of cards that have fallen down? There is an ammo box here.
Trap room
Continue to move through the location, guided by the white arrows depicted on the walls and other objects. The new room will have a strip of obstacles and traps. Be sure to look where you step, pay attention to the walls. Disarm the traps until you find yourself at the end of the room.
If you have mastered picking locks, then you can completely bypass these traps. On the left side, behind the first trap, there will be a small corner with another trap, where there is a red door. A lock of a difficult level is to be broken. Open this door and go around several traps at once.
Falling floor room
After overcoming the room with traps, or after passing through the door that allows you to bypass them, move up the wooden steps. You have to overcome the floor of falling boards. You can go around this line using a narrow section of the floor. To see her, turn the other way after going up the stairs here. If you do not have time to cross the boards and fall, then return here and use this part of the floor.
Now you need to walk along the windows, but first you should definitely look into the niche on the side. There is a safe with an easy lock. But do not rush to hack it, because there is a trap on the ceiling, which must first be neutralized. Move past the windows, pay attention to the traps under your feet. There are also traps on the ceiling. Soon you will find yourself in a corridor with three red doors.
Three red doors and a radiation room
The desired door is located on the left side, while the other two lead to dead ends with traps. Opening the door in the middle reveals a monkey playing cymbals. Opening the door on the right side, you will come across a grenade trap. Move through the left door until you go down into the room with barrels. You will need protection from radiation, several doses of antiradine.
But still, you can not stay here for a long time and do without antiradiation. You must open a red door with a lock on a difficult level. Either use your hacking skills if they allow you to, or find a bunch of keys. It sits on top of a shelf tucked away in a small niche behind the checkout counter in the corner. Under the counter itself there is a cache with covers.
Turret and Monkey Room
Walk down to the door that leads to the Yader-Mira tunnels. Go there and search the cabinets on the left side, where you will find ammunition. Use the terminal that controls the turret and is located on the table. An easy level is required for hacking. This terminal will be very useful to you a little later! Hack it beforehand.
Move to the new room, search the racks on both sides and see the turrets. They attack you only when the monkey on the other side starts hitting the cymbals. If you deal with the monkey before, then the turrets will not shoot at you. Otherwise, you will need to go back to the terminal hacked earlier and disable the turrets.
In order to leave the room with the monkey and the turrets, you must open the door to the Yader-Mira storage room. The key is on the parts located behind the monkey's position.
Labyrinth with traps
Next, you will find a small labyrinth in which there are traps - buttons in the floor, mines, turrets disguised as aliens. Get to the door on the other side of the room. When you pass the alien, then climb the wooden steps and move along the surface of the equipment - along the upper part of the maze. Jump down to where the exit is on the other side.
Deal with the turret at the front door. There will be a box and explosives behind this door with the middle level of the lock. Move along the tunnel with destroyed equipment, paying attention to the mines placed everywhere. Use the V.A.T.S. system to detect them. Disarm mines by shooting them from a distance. Through the tunnel you will reach a dilapidated bridge consisting of planks. As soon as you stand on it, it will begin to fall. Once on the other side, you will see a door. It needs to be broken - a mid-level lock.
If you have a low level of burglary, which does not allow you to open the door, or the bridge collapsed, and you did not manage to get to the door, then you will have a duel with the bogs living below. Moreover, one of the opponents will be the legendary glowing swamp. Killing him is not easy! Try to sit somewhere higher, use the distractions of your companion. When you deal with the opponents, then blow up the eggs from different sides using explosives. Otherwise, bogs will begin to hatch from them.
Move through the cave, which will lead you to the same place as the door with the middle lock on top, behind the crumbling bridge. But before you open the door, you need to defuse the trap on its canvas. The door will lead you into a narrow corridor with floor traps. At the end of it, a new part of the tests will begin, one of the most interesting in this task.
Gas room
After you go into the room, the door will slam behind you. Gradually, the room will fill with gas that kills you. To leave the room, you must turn off the gas supply, or simply find a way out as quickly as possible. To shut off the gas supply, you need to use the valves. There are four gates in total that you can find:
- on the left side of the entrance;
- behind a locked door located near the first valve;
- behind the grate on the left side, below, closer to the floor;
- in another part of the room, next to the door.
Everything would be fine, but besides the difficulty with the gas, you will also be attacked by radar cockroaches. You must destroy them using melee weapons. If you fire a firearm, the gas will ignite. In the room to the left of the front door, there is a table on which you can find the password for the power station. In the room on the right side, which is located at the end of the service room, there is a key to the door of the Yader-Mira electrical substation
Opening the closed door near the first gate, you will find another of the four. There is also an electrical substation terminal and several radroaches. Deal with the opponents, use the terminal and enter the password found in the room to the left of the entrance. By opening the door, you can get out of the trap. Next, you need to visit the Yader-Mira office building.
Indoors, you will meet ants - new enemies in Fallout 4. They fly or crawl. There is a closed door with a light lock near the abandoned vehicle. Behind the door is a file cabinet with a cache, inside of which are hidden covers. Go through the doorway on the other side of the room. You will find yourself in the corridor, where instead of the roof there is a grid. This mesh will prevent you from shooting at the raiders attacking you from above.
On the way, you will find yourself on a section with hanging grenades, which must not be touched. There will also be turrets that you probably haven’t had time to miss. Move along the corridor, as soon as possible, go through the door to the arena with "Nuclear Cells". Follow up the stairs to the second tier. Here the last stage of your tests will begin - you have to fight the boss of a raider gang named Colter. He has very powerful armor, chances are slim, but you have them.
Target. Enter the dressing room.
You have time to prepare. Go to the indicated dressing room through the open door after talking with Colter. When you go inside, you can chat with Gage. You should go to the intercom located on the wall.
Target. Talk on the intercom.
Walk up to the wall and chat with Gage. Find out what's going on here.
Charisma
If your level of charisma is average, then you can put pressure on Gage, who will tell you everything. Gage clearly wants to help you. There is no way to defeat Colter, as his power armor is constantly powered by a power source in the arena. The enemy is invulnerable. In one of the cabinets there is a weapon from Gage that will allow you to destroy the boss.
Target. Find a weapon.
You can collect weapons and ammunition in the locker room, but it is useless in a fight against Colter. On the bottom shelf of the cabinet you will find Gage's weapon. In that locker, which is located near the bench in the corner. Here is the Thirst Quencher. This is an ordinary water pistol ...
Target. Talk to Gage on the intercom.
According to Gage, this particular weapon is ideal against Colter. Why? The water causes short circuits that shut off Colter's power armor for a short period of time.
Now you must find the arena where you have to fight Colter. There are a few other things you can do to keep your chances high. Go to the toilet located in the dressing room. Move into the break in the wall and take the nuclear block from the generator. This will reduce the arena power by 30%. This means that Colter's power will drop by the same amount. All Yader-Mir raiders will watch the battle.
Target. Defeat boss Colter.
How do you defeat Colter? Pick up the Thirst Quencher, pour water into the Colter to cause a short circuit. Then swap the Thirst Quencher for the most powerful weapon in your inventory and shoot the boss as much as possible until his armor is restored. Repeat these actions until you finally hit the enemy. It is very good to have a companion with you. This is not prohibited in combat!
Use power armor, enter stealth mode ...
After defeating Colter, be sure to search him. You will receive a boss key and password, which will be useful to you in the future. By the way, you can pick up Colter's power armor.
Power armor, as always, consists of six parts - two arms, two legs, head and torso. The torso is a legendary piece that, among other things, deals electrical damage to nearby enemies.
Learn more about the stats of Colter's Power Armor:
- Head: resistance to damage - 220, resistance to electrical damage - 220, radiation resistance - 150, weight - 14.
- Torso: resistance to damage - 320, resistance to electrical damage - 320, radiation resistance - 300, weight - 22.
- Left and right hands: resistance to damage - 170, resistance to electrical damage - 170, radiation resistance - 150, weight - 16.
- Left and right legs: damage resistance - 170, electrical damage resistance - 170, radiation resistance - 150, weight - 17.
Target. Talk to Gage.
As it turned out, now you have become the new boss of the raider gang and will be able to meet in person with Gage. Chat with a man, find out that the raiders have long wanted to kill Colter. Currently "Yader-Mir" is divided between three gangs of raiders, called Adepts, Operators and Flock.
Colter was a bad leader and therefore this place is on the brink of war. It is you who have to change everything and return the world to Yader-Mir (such is the tautology). The boss's den is located inside the restaurant located on Mount Fizztop. You will get there in the third story mission, but more on that later.
Mount Fizztop, where the lair of the raider boss is located.
Explore the "Yader-Mobile" arena, move to the amusement park. Inside the trash can near the entrance to the arena there is a new drink - "Yader-Cola Pobeda".
Let's compare "Nuka-Cola Victory" and "Quantum Nuka-Cola":
- "Nuka-Cola Victory": health points - 840, radiation - 11, action points - 0, weight - 1, price - 40.
- "Quantum Nuka-Cola": health points - 400, radiation - 2, action points - 100, weight - 1, price - 50.
Look for a terminal with a business card with a map of the park. Look down to find a first aid kit. Inside the terminal, you can study information about the park, nothing more.
SUBJECT QUEST "AMBITIOUS PLAN"
Where to go:- At Yader Town, USA.
- To the Fizztop grill bar.
- Mount Fizztop.
- To the restaurant-theater "Salon".
- The Bradburton Amphitheater.
Target. Talk to Gage at the boss's quarters.
When Porter Gage declares you the boss of the raiders, you will hear from him that you need to meet inside the boss's den, which is located in the restaurant on Mount Fizztop. Go there now!
Mount Fizztop is located in Yader Town (USA). You can find the entrance to this territory of the park as soon as you leave the Yader-Mobile arena. Activate the radio waves of "Yader-Cola" and move through the "Yader-Town" to the specified mountain. The fastest way:
- Go through the gates of Yader Town.
- Move on the right side.
- Turn into the first lane on the right, from where you will see the mountain.
- Go forward towards the mountain.
When you enter the mountain, you can meet with Sierra Petrovita. This will activate the task in the "Miscellaneous" section. Objective: talk to Sierra Petrovita. After the conversation, you will receive a new side quest - "A Lid in a Haystack".
Go around the lake to find yourself in the right place, near Mount Fizztop. There is a lift that goes directly to the den, to the Fizztop grill bar.
Upstairs you will meet Porter Gage. Chat about everything, find out about the plans of the raiders on Yader-Mir. There was supposed to be a huge base here, but Colter did not want to continue taking over the park. Gage says that you will need to get support from three different gangs to get started.
Charisma
If the level of your charisma allows (medium), then ask Gage what ideas he has on achieving this goal. Gage will tell you exactly what to promise each of the gangs in exchange for their support:
- Adepts - a lot of blood.
- Operators - a lot of money.
- Pack - you need to prove that you are the strongest.
First of all, you need to talk to the leaders of these three gangs, and then begin the capture of Yader-Mir. You can look around the restaurant, find an armor service station, a chemical laboratory, supplies and drinks. The nuclear unit is hidden in the bedside table. There is also a safe with a complex lock.
Target. Meet with the leader of the Adepts.
The Adepts are located not far from you, in Mount Fizztop. They are bloodthirsty raiders living in violence and wearing masks. Their leader is Nisha. Communicate with a woman about everything, not forgetting about the Adepts' addiction to blood. You must capture the park and make the Adepts the main ones, and then go to capture the Commonwealth.
Niche will offer you a job. You can do it at will. To get the quest, talk to Nisha again. The side quest is called "It was secret, it will become apparent."
Before you go to the new gang, you can explore Mount Fizztop. Anything you find here can be taken away. In addition to ammunition, food and medicine, you can find the Quartz Nuka-Cola, which Sierra Petrovita needs. You will learn more about this in the "Miscellaneous: The Secret of Sierra Petrovita" quest.
The bottle can be found near the place where the Adepts rest. Move from the entrance to the right side in a circular motion until you see mattresses scattered on the floor. If possible, hack the Nishi terminal (difficult level). The terminal is in the Adept boss room, at the top of the mountain. You will need to climb up the slope. Inside it there is information on the objects that Nisha followed, the hobologists (for more details, see the quest "Miscellaneous: Learn more about the hobologists" and the mysterious mansion called "Grandchester." Grandchester ".
Target. Meet with the Operator leader.
As for the gang of Operators, they are inside the restaurant-theater "Salon". This place is located outside the territory of Mount Fizztop, near the monument to the Master of the Bottle and Mister Cap. Their leader is Maggie Black, whose right hand is Brother William. Outwardly, they are a kind of opposite of the Adepts. They are completely non-aggressive, neat and well-mannered people. Chat about everything, not forgetting their love for lids. Operators want the park to be able to pump out caps from visitors, but using different methods. In addition, they do not recognize other gangs.
Maggie Black can give you a task if you want to complete it. To do this, you need to talk to her again and take the side (repeating!) Quest "Under the collar".
Inside the theater restaurant there is a huge amount of ammunition, food and drinks.
Through the kitchen you can reach the office of Lizzie Wyeth, the scientist. She is testing an unknown drug in humans. The idea is that the drug should make people do exactly what Lizzie wants. There are reports on this in the terminal with an easy access level.
If your level of hacking is high enough, then you can go to Maggie's room, located on the right side of the stage. The door is closed inside and the level of the castle is very difficult. Inside you can find a cache with lids, a holographic record of Maggie and William's backstory, a terminal with a difficult access level, inside which there is a dossier on Yader-Mir gamblers. There is also a safe on the wall with supplies and weapons of medium difficulty.
Target. Meet with the leader of the Pack.
The flock is located inside the Bradburton Amphitheater, located at the exit of Yader Town, not far from the Yader Mobile arena. There is a real madness going on inside this place. You will see dogs, animals in cages, furniture from other creatures. The boss of the gang is Mason, who sits on a kind of throne, next to the place where the mole rats fights take place. Chat with him, not forgetting that they will go after the strongest person.
Charisma
If your level of charisma is high enough, then you can find useful information from Mason. Namely:
- Medium charisma will allow you to ask if Mason wanted to take the place of the raider boss.
- Hard level of charisma will allow you to learn more about the story of Gage and Colter.
Mason will also offer you additional work. To take the task, talk to the raider again. You will receive a side (repeating!) Quest "Once and for all"
Explore this part of the amusement park, be sure to go to the backstage of Yader Town, through the door on the right side of the prisoners in the cage. Useful items can be found here. You can pick up the Pack suits, colorful weapons, including the Pack assault rifle. You can hack the terminal of a difficult level and find Mason's notes about the key figures of Yader-World.
Target. Return to Gage.
When you have communicated with all the leaders, then return back to the Fizztop Grill Bar, where Gage is waiting for you. Talk to him and find out a plan for further action. You must capture the entire territory of the Yader-Mira park. When capturing a territory, you need to place the flag of any gang on this place. From this moment on, the land will belong to this particular gang. Only you decide who and what to leave.
Gage will agree to cover you. That is, he is your new partner (optional).
SUBJECT QUEST "BIG TOUR"
Target. Capture the Children's Kingdom zone.Go around Mount Fizztop on the left side and move diagonally slightly to the right, towards the Ferris wheel. This will take you to the "Children's Kingdom" zone. Go to the territory and destroy the first painted ghouls ..
SUBJECT QUEST "CHILDREN'S KINGDOM"
Target. Search the pavilion of laughter.Find the pavilion of laughter and go inside. Kill the ghouls and then head through the door on the right. Next, a labyrinth awaits you. Nothing really complicated, the enemy is one charred ghoul. Go through the red door to the next corridor.
Around the bend, you will need to run against the treadmill. It is desirable to do this with the SHIFT key held down and constant jumps. It will be faster.
Entrance to the "Children's Kingdom".
Next, there will be a segment where you have to jump onto one rotating platform, pick up the moment and jump to another, and then to the door. If you fall down, then be ready to fight with two ghouls.
There is an easy-access terminal to the left of the door. Use it to reduce the level of nausea in hypnosis rooms. Either way, go through the door. Go forward and turn into the tunnel on the right. Walk left and take the tunnel on the left. Look to the left at the end of the tunnel - you came from there, but the path is blocked by a mirror. You need to go to another long tunnel and look to the left. Here the room is more spacious than the previous ones. Run forward towards the door, but be careful. There are holes in this tunnel and you can fall down.
If this happens, then under the metal stairs, find a passage leading to a room with rotating platforms. It will be necessary to repeat the path from here again. Go through the door.
Next, you will find a room with upside-down doors and windows. Get to the room with a rotating floor. Open all doors in turn. You need a red door leading to a corridor with a green door. Go through the green door.
Open the doors with chains and go outside.
P. S. You can go to the left in front of the doors with chains and try to catch the clown, but if this is your first visited place, then nothing will come of it.
Target. Search the tunnels.
Leave the pavilion of laughter. If you stand with your back to the front door, then on the right side behind the fence you can see rails along which cars periodically move. Move there. Go against the traffic. You will need to jump over them. Halfway there will be a door leading to the tunnels you need.
Walk down the corridor and through the window on the right, listen to the conversation between Oswald and the painted ghoul. The goal has been achieved. Leave the tunnel.
Target. Search the theater.
You must find the Yader-King's castle. To do this, continue walking on the rails against the movement of cars. On the left side there will be a bridge leading to the castle. Go through it, killing opponents, and go through the indicated red door into the courtyard. Do not forget to heal and get rid of radiation using antiradians.
The road to the castle "Yader-King".
Target. Deal with Oswald the Shocking.
Inside, go to the scene and wait for Oswald to appear. After a short speech, he will attack you, reviving other ghouls along the way. Kill them all, shoot Oswald until he runs out of HP. But that is not all.
Go to the stage, there will be a passage here. Get to the elevator on the left and go up to the fourth floor.
There are two options. If your charisma level allows, then you can convince Oswald that there is no cure (difficult) or that he should help Rachel (difficult). If something comes of this, then Oswald will give you his sword, hat, and then leave the location. Otherwise, you will have to fight with him. Another zone is captured!
Target. Appoint a gang in charge of the Children's Kingdom.
Choose one of the three gangs by hanging their emblem on the indicated flagpole (located in the same place where you last saw Oswald). In our case, they are Adepts.
Target. Capture the Galaxy zone.Move to the left of Mount Fizztop, where there will be a passage. You will see a stand with a map of the park. Go along the bridge to the left to find a new location - "Galaxy". After a few seconds, a new task is activated.
As soon as you collect 20 star cores as part of the Star Dispatcher quest (out of 35 possible), you can turn off protective mode. After that, this zone can be transferred to the disposal of one of the gangs.
STORY QUEST "STAR CONTROLLER"
Target. Examine the star dispatcher.Examine the corpse lying on the ground. Be sure to pick up Tiana's diary to update the quest.
Open your inventory, go to the "Miscellaneous" section and select Tiana's diary. Open the first entry to update the assignment.
Target. Find the Star Dispatcher.
Move to the territory of the zone. Here you will need to destroy several robots. In addition to them, there are laser turrets hanging on the walls - be sure to pay attention to them. Approach the marker to find a new location.
Discovered: Nuka-Spaceport.
Enter the room with the power armor in the center through the glass door. Find the star dispatcher inside and interact with him. Requires at least one stellar core.
Target. Find the stellar core.
Turn around and near the corpse on the right, find a stellar core - a bright and colorful device.
Target. Install the stellar core.
The hardware will indicate where you should install the stellar core. Just press the E key.
Target. Restart the central computer.
It is pointless to interact with a computer, because for this you need to collect all the lost stellar cores. Examine the equipment and you will realize that in total there are over 30 stellar cores missing. Let's go in search of them!
NOTE... To capture this territory on the "Big Tour" quest, it is enough to find 20 star cores. But we will find them all!
First, we indicate the stellar cores located in the territory of the "Galaxy" zone, but not inside objects that can be visited. That is, outside.
1. First, leave the building and look at the entrance. There are stairs to the right and left. But in addition to the stairs, there is also a passage. Go around the building on the right side, go past the old technology, through a small building, in which there may be two robots. Eventually, you will find a room with a yellow bulldozer. To his left is a corpse, near which lies stellar core (2/35)... The first core, if you remember, was found earlier
2. Return back to the star dispatcher and from the street go up any steps upward. There is a glass showcase inside the room above the room with the dispatcher. A stellar core lies in the showcase. There are two options. Either you break open the mid-level showcase, or you break open the door with an easy lock of the room located here. This is the administrator's room. Inside you will find a table with a terminal and an administrator key. Take this key and use it to open the showcase. Take away stellar core (3/35).
3. Return to the star dispatcher building. Look to the right. Nearby there is a staircase, and further - a passage. Follow through it and up the steps. Ahead you will see a huge rocket and a signboard "Yader-Galaktika" in English. There will be many opponents here. One of them is on the left side of the structure. It consists of several flights leading upward. Find the passage and climb to the very top. There will be a dashboard with stellar core (4/35).
4. Look at the entrance to the Nuclear Galaxy. A path leads up to it. But to the right of this path there are two red booths. In the farthest of them (closer to the wall), find the dashboard with stellar core (5/35).
5. Move to the RobCo Arena. Face the building and go left. Ahead there will be a road going up through the tunnel. At the very beginning, on the left side, there is a remote control with stellar core (6/35).
ATTENTION! There is another core outside, but you will only pick it up after you finish the main storyline.
Inside the building "Nuka-Galaxy" there will be seven cores at once, but you will have to clean it from numerous robots. There are two options: either use a suit with a jetpack, or go through the main entrance (described in the fourth paragraph) and break very difficult locks. The first option is to find the key. But we will describe the second option with the main entrance and lock picks.
6. Go to the corridor and destroy three robots Mr. Penka and one laser turret in the upper right corner. Follow the only path to the left to find a somewhat spacious room with galactron guards and one powerful robot. This fenced building looks like a subway station - there are narrow rail tracks. Approach these paths and go to the cockpit on the right, white. It will contain that powerful robot inside you will find stellar core (7/35).
7. There is a red booth on the other side of the room. To the right of it is a passage with rails. But between the rails and the booth there is a barely visible door. The castle is very complex. After breaking it, enter the room and climb up the stone steps. Pull the next one out of the equipment. stellar core (8/35).
8. Here, find a door with another very complex lock. Hack it and find in the control room stellar core (9/35)... You could see this room when you climbed the first steps and killed two robots inside it.
9. Go downstairs and pick the very difficult lock of another door without going back. Go into the room and kill the robot at the terminal. Pull the terminal out of this stellar core (10/35)... By the way, this room contains a rocket and a girl sitting on it - "Yader-Girl".
10. From this room, move along the rails in the other direction, against the direction of the missiles. Through one room you will find yourself in a spacious and high hall with a huge number of robots and turrets installed on the bottom of the flying saucers. Jump to the very bottom and in the corner find the terminal with stellar core (11/35).
11. Next, find a door on the side wall (you need to move downward from this corner, the door is in the middle of the wall, below). Go to the corridor, click on the red button to push the bridge. Call the elevator on the right side and go up (or down?). Be that as it may, go down the steps and pull out from the panel stellar core (12/35)... Kill the robots below, including the giant star guard.
12. Return upstairs on the same elevator, but now go right, to where you have not been. Climb the slope, move into the passage with the stairs. Upstairs there will be a brave space lieutenant and a panel with stellar core (13/35).
Get out of the "Nuka-Galaxy" building. Find the RobCo Arena approximately in the middle of the Galaxy Zone. Go inside. Here you have to find six cores at once.
13. Enter through the two double red doors opposite the large carousel that once revolved in a circle. Go to the spacious room, but don't go down the stairs. You can destroy the robots first. You need the door on the left, with the Employees Only sign. Hack it and go up to the service room upstairs. Take away one (14/35) and other stellar cores (15/35)... Everything in one room.
14. Return to the main room. Do you see the robot behind the glass? You need to go there. Go down the steps and go through the door on the left. Follow the door on the right and kill the robot. In a small niche there is a panel with one (16/35) and others stellar cores (17/35).
Attention! As soon as you take the cores, a battle against robots will begin in several stages. Having defeated everyone, be sure to take away nuclear blocks from the body of a large robot.
15. Exit through the same door, but now go down the stairs to the right. After destroying the robots, remove from the red dashboard stellar core (18/35).
16. Return to the main hall where there are steps and glass. Between the steps there is a passage leading, as it were, under the stands. Go there and behind the bar, where there may be a robot, find on the shelf stellar core (19/35).
Go to the Vault-Tech: Among the Stars building. Go inside through the main entrance opposite the large ball.
17. There are two lifts on the left side. But you go right until you exit the tunnel, after which you will need to destroy three robots among the stones. There is a door behind the stone. Hacking it, inside you will find a panel with stellar core (20/35).
18. Move further along the path, deal with the enemies. Get down below. Don't rush to jump down where there are robots. Go right, where there will be a descent even lower and a small foyer. There is a counter at the kitchen wall and a refrigerator. There is a break in the wall. Go through it, destroy two robots and a turret, and then pull out of the panel stellar core (21/35).
19. Go back. If you stand with your back to this gap, then on the left side you will find two more doorways. Go through the right one. You will find yourself in the children's room. Follow further, you will find yourself in a room with several paths. Kill Novatron and other opponents. Do you see the panel with the core behind the glass? On the right, there is a door to this room with a very intricate lock. Having hacked it, find inside the room one (22/35), other (23/35) and third (24/35) core... Three cores in one room !!!
20. Return back to the room with the kitchenette and the breach, behind which you found the star core. Stand with your back to the breach when in the kitchen area. Do you see the door on the right? Open it by hacking or by finding the key to the Vault-Tek laboratory. The key is in the same building. Inside you will find the key to the hall and stellar core (25/35).
Exit the RobCo arena through the other door and head right (north). On the right, there will be a door leading to the Starlight Cinema.
21. Find the central hall here, in which, in addition to the usual robots, there will be a large star bartender. After destroying it, take two nuclear units. There is a remote control in the hall with the first one at this location stellar core (26/35).
22. Stand facing the screen and go through the far left passage (or the near one if you are standing near the screen). In the hallway, go to the toilet. Go to the right restroom and find the breach. Lying next to a human corpse stellar core (27/35).
23. Exit through the main room with the screen into the corridor on the right, through the passage next to the screen. Go to the kitchen, destroy the star chef. Hack the door and take stellar core (28/35) from the panel.
24. Return to the corridor and move in the direction of the exit. Do not go to the hall with missiles and a screen, but find the elevator on the right side. Use the elevator to go downstairs. Kill the robot and find in the panel on the right stellar core (29/35)... This is the final core at this location.
You can find the rest of the stellar cores in the rest of the Yader-Mir territory. These are six cores. The last core, as mentioned above, is in the "Galaxy" zone, but you can pick it up at the end of the plot.
25. Go to Yader Town and go to the market, in the southern part of the city, practically opposite the Yader Express station. Inside, on one of the counters, find one stellar core (30/35), between the first and the second trader from left to right (clockwise). You need to go through the red door, which is indicated by the white inscription "MARKET INSIDE".
Entrance to the Yader Town market.
26. Go towards Mount Fizztop. In front of the last doorway (to the reservoir) on the left side there will be an entrance to the Yader-Arcada building. On the right side there is also the Operators' Salon. Enter the "Yader Arcade" and go forward. Go down the steps and in the room on the right, find the door to the service staff room. Open it and another next. Inside a room with some kind of aggregates, on the table on the right, find stellar core (31/35).
27. Next stellar core (32/35) look for the "Yader-Mira" dump. It is located west of Yader Town. Move to the point shown in the screenshot below. There will be a metal barn on the right side at the entrance to the landfill. Go inside and go upstairs. At the very end, where the turret disguised as an animatron is located, there will be a stellar core in the panel on the left.
The landfill located west of Yader Town.
28. Move to the Yader-Cola bottling plant. Climb the metal stairs so that you will be on the roof of the left side of the building, where the blue tower is located. Standing at the top of the stairs, look down and you will see a blue extension, like in the screenshot below. Go inside and immediately through the blue door on the left to enter the "World of Freshness". Once the download is complete, head right. Move up the steps, and then further and down several flights. There will be two corpses on the floor below. Lying near one of them stellar core (33/35).
The passage you need at the bottom left.
29. Move to the Dry Gorge Theater. Go to the left side of its designation on the map. That is, you need to get to the other side of the overturned trolleys from the roller coaster. Among the corpses, at the pillar, you will find stellar core (34/35).
30. The last stellar core remains. After completing the quest "Demonstration of power" and restoring power in the park, you can return to the "Yader-Spaceport", go upstairs to where the star core was found under the glass showcase, and use the elevator car in the center. Go upstairs where you can find the last stellar core (35/35) inside the console.
So, go downstairs and place all the remaining cannonballs in their sockets inside the control room. Interact with the star dispatcher, select the protocol for accessing the diorama and confirm its opening.
Reward
The protective glass in the center will go down, and you will be able to pick up a new set of power armor - "Quantum X-01 Type V".
- Head: resistance to damage - 300, resistance to electrical damage - 220, radiation resistance - 150, weight - 14.3.
- Torso: resistance to damage - 400, resistance to electrical damage - 290, radiation resistance - 300, weight - 24.
- Left and right hands: damage resistance - 250, electrical damage resistance - 190, radiation resistance - 150, weight - 18.
- Left and right legs: damage resistance - 250, electrical damage resistance - 190, radiation resistance - 150, weight - 18.
Unique ability. If you use all the elements of power armor, then the speed of recovery of action points increases.
Target. Assign the gang in charge of the Galaxy.
Choose the gang that will get the "Galaxy" zone. Move to the "Nuka-Spaceport" area, go upstairs, where you found a star core under a glass display case, and hang up the flag of the desired gang.
Power armor "Quantum X-01 Type V".
SUBJECT QUEST "BIG TOUR" (CONTINUED)
Target. Capture the Dry Gorge zone.From the "Galaxy" zone, move to the left, towards the "Dry Gorge". Here you will be greeted by sandworms. Destroy them and go a little further, where a robot named Sheriff Hawk is waiting for you. Talk about everything, use a robot expert.
SUBJECT QUEST "DISASSEMBLY IN A DRY GORGE"
Target. Collect the cipher pieces from the safe.Now you need to talk to three robots. You can either complete their tasks or use the "Robot Expert" to avoid them and take the cipher pieces.
The next part of the text is for those who cannot use the Robot Expert.
Find the first robot (walk forward) named Scout nearby. Chat with him. Either use the Robot Expert or complete his assignment.
Purpose (optional). Take Dandelion to the corral.
When you find a saloon, then stand with your back to it. Look left and see another street parallel to the one opposite the saloon. There is a tower on the left side at the beginning of the street. There are some alien growths at the bottom. To the right of the tower you can find the Buttercup robopony. Walk from the tower so that the saloon remains on the right side. Go into the pen, open the "Trash" tab in your inventory and discard the roboponi. After talking to the robot, you will receive a piece of the cipher.
Find Doc Phosphate's saloon, talk to him and get the task to serve drinks.
Purpose (optional). Serve drinks.
Go up to the second floor and put a glass of "Yader-Cola" on the indicated table. Exit the saloon and go forward. To the right and to the left there will be two open buildings with tables, on which you need to put one more bottle of Yader-Cola.
Not far from the saloon (you need to leave it and go straight) there is a building that is guarded by One-Eyed Ike. Talk to him, he will offer a duel. Agree, for what you will get a revolver with cartridges. Equip it and then stand in the center. When the robot says to shoot, then shoot it once. You will receive the next part of the cipher.
Target. Find the key to the Mad Mulligan Mine.
When you collect all the parts of the cipher, then follow the marker to the theater of the "Dry Gorge". Inside the specified building, open the safe (how to kill opponents) and take the key. By the way, the safe could have probably been hacked if you knew its location.
Target. Enter the Mad Mulligan Mine.
Go to the indicated location and open the door using the key.
Target. Destroy the Bloodworm Lair.
Get inside the lair, get to the bloodworm womb and destroy it. Get outside, talk to the robot Sheriff-Eagle. Now you can assign a gang here.
Target. Appoint a gang in charge of the Dry Gorge.
Select the gang in charge of this area by hanging their flag on the flagpole. To find it, go to the Sheriff-Eagle robot and break open the door on the right side (difficult level). In a small room, you immediately need to break open another door (complex lock) in order to be on the other side of the building. There are steps leading up to the building. Climb them, and then - along the lowered wooden stairs. Hang the flag of the selected gang on the flagpole. In our case - Operators.
SUBJECT QUEST "BIG TOUR" (CONTINUED)
Target. Capture the beverage dispensing plant.Head from the Children's Kingdom towards the factory and the first place that you find is “The World of Freshness”. The quest of the same name will begin.
SUBJECT QUEST "WORLD OF FRESH"
Target. Clean up the Yader-Cola bottling plant.Get down into the water and enter the dark tunnel in the middle, where the marker is pointing.
Inside this building, you will have to destroy opponents. We are talking about large "Yader-Krabakh" (all) and assaultrones.
ADVICE... In order not to miss anything, as soon as you get here, move along the tunnel with water, dealing with opponents. He will lead you to a dead end, but behind the screen on the right there will be a passage to the workshops. There will be assaultrons in the shops. As soon as all opponents are destroyed, one of the mission objectives will be crossed out.
Target. Clean up everything around the Yader-Cola bottling plant.
Find another way out of the Yader-Cola bottling plant. It can be a narrow tunnel, or it can be a door that can only be opened after breaking into a terminal nearby.
Outside, you will need to kill all the same "Yader-Crabs", as well as their Mother (in a huge "puddle"). You need to finish off the remaining enemies on the building itself. To do this, climb up the metal stairs. When you kill everyone, you will need to choose a gang.
Target. Raise the flag to take over the beverage bottling plant.
Follow the marker and you will see a building in the form of a red rocket. There is an extension next to it. Go through the annex to the ski lift and go upstairs. There will be a flagpole - select the flag of one of the three gangs.
SUBJECT QUEST "BIG TOUR" (CONTINUED)
Target. Capture the Safari.This is the last zone that needs to be captured as part of our walkthrough. Go across the bridge from the bottling plant, go to the territory and help a savage named Cyto to destroy the crocodile claw. A new quest will begin.
SUBJECT QUEST "SAFARI"
Target. Find out where the crocodile claws came from.Talk to the savage, agree to help. Follow Cyto inside the primate house. On the way, you will need to kill one crocodile claw.
Target. Listen to Dr. McDermott's holotape.
After talking with Cyto, the task will be updated. Open your inventory, go to the "Miscellaneous" section. Find the item "Diary of Dr. McDermott, Entry 47B". Open it up.
After listening, be sure to chat with Cito. Using a high level of charisma, you can ask the gorillas for help.
Target. Enter the large triangular house.
Move to the indicated place - to the reception center. The task will be updated.
Target. Examine the triangular building and find the entrance to the cloning department.
Go downstairs, destroy the crogodileclaw and find the locked door with the terminal around the turn.
Target. Examine the terminal by the door.
Explore the terminal, see all the tabs. As it turns out, the code is now set to "Grizzly", which means the doors are completely locked. We must unblock them!
Target. Find out if Cyto knows anything about Evil Anaconda.
Chat with Cyto.
Target. Get to the giant metal snake.
You have probably already noticed a house on a high tree in the northern part of Safari. So to the left of it there is the House of Reptiles. When approaching him, he will be marked on the map. That is, from the tree house, the Reptile House is to the west, to the left. A stream flows next to it. Follow the stream north and see a huge roller coaster. This is the "Wicked Anaconda".
Target. Look for Dr. Hein's password near the giant metal snake.
Move to the location, kill opponents, among whom there will even be a two-headed bull. You are interested in a small hut with a yellow horizontal stripe. You will need to pick the lock of a difficult level. Inside there will be a scientist's corpse and a wooden case on the table. From there you need to get Hein's password.
Dr. Hein's body, to the right is a table with a password.
Target. Get into the cloning department.
Follow the Safari marker and enter the park. You need to go forward to the reception center where you examined the terminal. Examine the terminal again and select the item that opens the doors.
Target. Disable the faulty cloning machine.
Move along the corridor, kill the crocodile in the room and follow through the red door in front. After the next corridor go down below, into the room with water. Kill the Regular Crocodile Claw and the Albino Crocodile Claw. Interact with the indicated red bar. Disable the current replication procedure.
Target. Kill the remaining crocodile claws in the Safari Territory (15/21).
In your case, the numbers may be different. Exit the niche with the terminal, two more crocodile claws will appear. After killing them, go to the place where they appeared. There is a pipe with a break here. If you go through it to the left, then you will run into the front door. But it is locked. Go back and look at the pipe outside. There is a terminal here. Use it to open that very door. Go outside.
Walk across the bridge located between the tree house and the Reptile House. Behind the cages there will be a trapdoor to the basement called "Bear's Den". Kill the bear and crocodile claw, and then exit through another passage.
You've probably noticed the angry bear sculpture. Go to her. There is a grate fence to the north of it. There is a break in it. Go through the pool and find another crocodile claw.
After the kill, new markers will appear on the map. So, one by one, kill all opponents. After that, return to the primate house and talk to Cyto. You can use medium charisma to convince Cyto to live with new Raider friends. You can just ask him to leave. Or you can attack at all - with or without dialogue. But then you have to kill both Tsito and the gorillas.
Target. Appoint a gang in charge of Safari.
You need to go up to the roof of the reception center. If you look at the front door of this building, then you should look for the stairs to the roof on the right side. Choose the gang to which you will give this territory. Mission "Big Tour" completed!
SUBJECT QUEST "HOUSE, DEAR HOUSE"
Target. Talk to Shank.Go to Shank, who stands near the Yader Town market. Talk to him about everything and agree to be based in the Commonwealth.
Target. Capture a gang outpost.
Decide what to do: try to ask the settlers to leave the territory of the outpost, or destroy them together with the raiders. The first option is chosen.
ATTENTION! When Shank asks which gang you will give the territory to, remember who has how much at their disposal. In total, five different locations were captured. Two gangs went to two, one to the third. Or did you give everything to one? Then the war will definitely break out! If you acted wisely, as described in the proposals earlier, then give the outpost to the gang that has one zone at their disposal.
Next, you will need to select an outpost located not far from the settlements. Shank recommends the following outposts - Potogonka, Krups Mansion, Tuffington Boathouse, and Greentop Nursery. The solution is the Greentop greenhouse.
If the selected settlement belonged to you, then you will lose control over it, after which you will have to recapture it. This was the case in my case with the Greentop greenhouse.
Shank, advisor to the boss.
SUBJECT QUEST "GREENTOP GREENHOUSE: CLEAR UP"
Target. Greentop Greenhouse: persuade residents to leave the settlement.Move to the settlement, talk to the main, marked with a marker. Use charisma several times to avoid wasting covers. On the other hand, you can tell the residents to leave immediately and then offer about 1000 caps.
Target. Build a signal flag for your gang at the workshop in Greentop Greenhouse (or whatever location you choose).
Use the workshop, go to the very last section (new) - "Raiders". Select the first item - flags. Set a signal flag depending on which gang you are giving territory to.
Target. Meet with the squad.Just chat with the marked member of the selected gang, who, in a group with his friends, will arrive in the newly captured settlement.
Target. Talk to Shank.
Chat about everything with Shank, who will inform you that now you need to provide the ranger outpost with supplies.
Target. Get the settlements to supply your gang with supplies.
There are two ways - either decide peacefully, or get into a fight, like last time. The first option is chosen. So, now all gangs have the same number of zones - some have two zones in Yader-Mir, and someone has one zone in Yader-Mir and an outpost on the territory of the Commonwealth. Therefore, you can choose any gang that will look after the settlement, giving supplies to the outpost captured minutes earlier. Make a choice (in our case, the Adepts).
Choose a settlement from the available ones.
SUBJECT QUEST "COUNTRY CROSSING: EXTORTION"
Purpose (optional). Switch on the radio transmitter in the Greentop Greentop settlement.First, return to the captured settlement, the raider outpost. Enter the workbench menu, go to the "Raider - Resources" section and select the "Yader-Mira" transmitter. After creating it, install it anywhere in the location. The task was completed even without being connected to the power supply.
Target. Country Crossing: Convince the villagers to supply your gang with supplies.
Just chat with the settler and try to negotiate using caps or charisma.
SUBJECT QUEST "HOUSE, DEAR HOUSE" (CONTINUED)
Target. Talk to Shank.Return to Yader Town again and talk to Shank. It turns out that enemy raiders are about to attack your outpost in the Commonwealth. It's up to you to talk to them or kill them. Since these are bad people, you can even go into battle without hesitation.
Target. Greentop Greenhouse (or an outpost you captured): meet with a squad of raiders.
Return to the outpost you captured, where one of the three gangs is located. Talk to the gang members to upgrade the objective.
Target. Greentop Greenhouse: Protect the settlement.
You can use charisma to chase away the raiders, or silently attack them.
Target. Talk to Shank.
Report to Shank that you have completed the task. Shank will wrap up the introduction and walk you through the contents of the outpost.
Send Shank to the outpost, or offer to carry out additional operations (to capture other points).
Purpose (optional). Talk to Shank about new operations.
Target. Provide the outpost with everything you need (N%).
If you have this task, then something is missing in the outpost. There should be no problems with food, so the marker will surely point you to the workshop. Get enough energy, bed, and protection. Be sure to add an amplifier to the transmitter that boosts the signal from the Yader-Mira radio wave and, for example, a kiosk with drugs. In general, what improves the mood in the settlement. You need to achieve 100% of the result.
Target. Create Raider Outposts (1/3).
In total, you need three captured and well-functioning outposts. One already exists. Just talk to Shank, choose operations, create an outpost. Click on the outpost you would like to capture. Shank will say if it's possible or not. If not, then choose another location.
When you capture two outposts, and there will be a total of three of them (when capturing, you need to either convince the settlers to leave, or kill them, and then fly a flag through the workshop), then the task will end. But a new one will become available - "Demonstration of Power".
NOTE... If you want to access the tribute chest, you will need to create five more, and in total - eight raider outposts.
SUBJECT QUEST "DEMONSTRATION OF POWER"
Target. Talk to Shank.This happens if one of the gangs does not like the fact that the other has more territories. Return to the indicated place of "Yader-Mir" and talk to the leaders of the gangs who are waiting for you.
There are two options:
- Either look for a previous save and make one of the decisions in favor of the gang (give them territory).
- Either agree with these circumstances and go to the destruction of the gang and its leader.
In any case, one of the gangs will not like something after the previous task. You have to destroy it! You can simply choose which gang you want to get rid of - give the last two outposts from the previous quest to those gangs that you want to leave.
In our walkthrough, a gang of Adepts was destroyed.
After talking with the leaders of the other two gangs, you will have no choice - you need to agree with the harsh punishment of the traitors.
Target. Find and kill Nisha (or the leader whose gang you are destroying).
Go up the hill along the path, kill gang members. Enter the inside of the Yader-Mira power plant. You need to climb to the very top of the power plant, killing opponents along the way. Next, get out on the roof and deal with the last enemies and the leader of the gang.
Power plant "Yader-Mira", where the enemy gang settled.
Target. Take the key from the control center.
Search the body of the gang leader to collect the control center key.
Target. Get to the control center.
Enter the blue rooftop building using the same key.
Target. Activate the main switch.
Interact with the marked remote with a button. So you will return electricity to Yader-Mir.
Target. Talk to Gage.
After speaking with Gage, you will complete the storyline of the Fallout 4: Nula-World add-on to the post-apocalyptic RPG site
FALLOUT 4 ENDINGS: NUKA-WORLD
The game has several endings - one bad and three good.First, you must understand that you cannot keep all three gangs alive. The start of what kind of ending you earn is taken from Yader-Mir. You yourself choose the gangs that will reside in a particular territory.
The first ending. Bad good
SIDE QUEST "SEASON OF HUNTING". GOOD ENDING?
At the beginning of Yader-Mir there is the Yader-Town market. Go to it, the door on the left. Useful items can be purchased here. One of the merchants is named Mackenzie. Talk to her and get an offer. She will offer you to kill all the gang leaders. What will come of it? Check it out!Target. Find and kill Mason.
Target. Find and kill William Black.
Target. Find and kill Maggie Black.
Target. Find and kill Nisha.
In general, you will have to destroy the three leaders (the Operators have two leaders), then return to the market, clear everything there and talk to Mackenzie. So you will free all the slaves and save Yader-Mir. But all tasks related to the storyline and the capture of the park will fail. It seems that the gangs have been destroyed, but you will not get satisfaction from this.
Second / third / fourth endings
You have already received one of them. To take others, you need to pay less attention to the Operators or the Pack, in order to destroy them.
ATTENTION! Depending on which gangs remain, you will receive unique perks - one per gang.
The Operator's Perk is called "Professional"... Increases the level of stealth in the shadows and damage from weapons with a silencer.
The Perk of the Pack is called "Leader of the Pack" (in the abilities section, look for "Alpha Male of the Pack")... Damage resistance is significantly increased, as well as damage done in melee and melee weapons.
The perk of the Adepts is called "Adept"... When you kill enemies with melee weapons, you recover 25% of your action points.
"STRICT DISCIPLINE" SIDE QUEST (REPEATING)
The task is taken in the lair of the Adepts from their leader Nishi. Talk to her to find out about the goal.Target. Rexford Hotel: Collar on target (Scavenger).
Return to the Yader-Mira monorail and ride it to the Commonwealth. Move to a location near the Neighborhood. Approach the indicated point and follow to Neighborhood.
Walk around the building on the left side and go inside the Rexford Hotel. Move towards the goal in the back room opposite the entrance. There are three options:
- Press the CTRL key to enter stealth mode, and then go to the Scavenger and press R to put on the collar (the corresponding inscription will appear). In this case, if you succeed, no one will raise the alarm.
- You can approach the Scavenger and during the dialogue use charisma (easy level) to offer to wear a necklace. But in this case, Markowski and his bandits will attack you, as the Scavenger will raise the alarm.
- The third option is to invite the Scavenger to go with you. Need mid-level charisma! If he agrees, go towards the exit and through the blue door on the right. Go downstairs. Here you can use the second option, inviting the Scavenger to put on the necklace through the dialog box. He will scream, but no one will attack you.
Target. Return to Niche.
Return on the "Yader-Express" to the "Yader-Mir" park, where you will report to Nisha about the completion of the task.
SIDE QUEST "GUARDIAN OF GOODS" (REPEATING)
Target. Meet with the squad.This side quest is taken from the same Niche, the head of the Adepts. A prerequisite is to complete her previous assignment called "Strict discipline."
Move to the Commonwealth, select the closest control point to the marker - for example, "Atomic Cats Garage".
If you follow this route, you will meet several Minutemans along the way. The fact is that it is they who will attack the detachment of Adepts in the future. Do not touch them for now, go further to the indicated building. The task should be updated.
Target. Kill all opponents.
Kill all the minutemans that attack you. Hide inside the building, behind the remains of a car nearby, in order to attack some opponents, and hide from others.
SIDE QUEST "GET TO THROW OUT THE GARBAGE"
Target. Kill the Scavenger at the "Bench" location.The task is given by Nisha, the leader of the Adepts. A prerequisite is to successfully complete the previous mission "Guarding the Goods".
Talk to Nisha and learn about the defector who went to the Operators. You need to eliminate the target. Follow the Commonwealth, move to Diamond City. In the city, go down and to the right. Find the entrance to the "Bench" building. The Scavenger will be sitting on the sofa inside. There are two options:
- Either you kill him in front of everyone and engage in battle with the rest of the characters, among whom there is an important NPC for the original Fallout 4.
- Either you offer the Scavenger to go with you (if you used this option in one of the previous quests, then charisma is not required). Take the Scavenger to the back room and shoot with an accurate headshot.
Target. Return to Niche.
Return to the quest giver in the Adept camp and complete the task.
THE SIDE QUEST "IT WAS SECRET, WILL BECOME EVER
Target. Meet with the squad.The task is taken from Nishi, the head of the Adepts, after completing the quest "We need to throw out the trash" (required!). Talk to the woman in the Adept camp, on the top floor.
Travel to the Commonwealth, to Andrew Station. Move north, where the squad is waiting for you.
Target. Kill the guards near the cache.
Enemies will be everywhere - outside and on the territory of the place where the cache is located. One opponent will probably be at the top. When you kill everyone, return to Yader-Mir and report the work done to Nisha.
ATTENTION! After this task, Nisha will continue to issue new ones, but similar to those that have already existed - to attach a collar to another Scavenger, eliminate him, etc.
SIDE QUEST "ONCE AND FOREVER"
This is the first quest that can be taken from the leader of the Operators - Maggie Black. Just talk to her at the Salon.Target. Kill the Super Mutant Chieftain in Lanky John's Junkyard.
Go to the indicated location in the Commonwealth. There will be a huge number of super mutants here, but your target is marked with a red marker. It is enough to destroy this enemy, and hide from the rest. You can use the rocket launcher to finish off the enemy faster. Return to Maggie and turn in the quest to her.
SIDE QUEST "IMORAL BATTLE"
When you go through the storyline, leave the Commonwealth and return to it again, you will hear a message from a passer-by: someone has come to the test.Target. Talk to Fritsch.
Go inside the specified building "Yader Arcade" and talk to its owner - a raider named Fritch. There are three options for the development of events (a person appeared who followed the same path as you):
1. You are fighting a poor fellow from the Wasteland.
2. You declare that you will not fight. In this case, he will be flooded in the labyrinth.
3. You order Fritch to free the person. The task will fail.
Target. Enter the Yader-Mobile arena.
If you agree to fight, then this task will appear. Prepare for battle. The fight will be held in a 1 versus 1 format.
SIDE QUEST "LID IN THE HAY STACK"
To get the task, you must chat with a blond girl with glasses named Sierra Petrovita. It can be found on your first visit to Yader-Mir, when you head towards Mount Fizztop. Either way, look for her in Yader Town. After communication, agree to help.Target. Put on glasses Mister Caps.
Sierra will give you points. Look for them in your inventory in the "Clothes" section. Put on your glasses. Only in them will you be able to see the hidden drawings. In total, you need to find 10 drawings. These are clues to the whereabouts of Bradburton, the creator of Nuka-Cola.
Let's clarify right away - you will find images of Mister Covers with one of the Latin letters. From them you will need to make a word.
Target. Find the hidden images of Mister Cap in Yader Town.
Put on your glasses! It is necessary! Go to the Fizztop Grill Bar, where your lair is located. From the bar, if you are facing the entrance, move left, west. You will see the Nuka-Cherry sign. Found it? Then go from the sign to the left, along the buildings. On the right, there will be a porch with an entrance to two restrooms. You must go past this porch and turn right. On the wall behind the bushes will be the first hint (picture) Mister Caps (1/10)... This is the letter G.
ATTENTION! You have to go to the clue image and interact with it. Only in this way will this point be counted. By the way, there is only one hint in Yader Town, so you will see how the achieved goal is crossed out.
Target. Find hidden images of Mister Cap in Dry Gorge.
Move to the "Dry Gorge" theater, which is at the beginning of this zone. On the right, there should be an opening with an orange cloth visor and the THEATER sign. But you must turn away from him to the left and walk forward along the fallen pillar on your left hand. Turn left behind the post. There is a stroller diagonally to the right (for reference). But you go ahead, leaving her on the right hand. There will be a small fence in front, and next to it is a haystack (to the left). Behind this fence is a small cemetery with tombstones. On the highest gravestone on the left, by the brickwork, find hint (picture) Mister Caps (2/10)... This is the letter E.
Move in the same location to the point called "Crazy Mulligan's Trolleys". Inside this building, you were still looking for the worm's womb. Go inside through the red door, go into the passage on the right, to which 3-4 steps lead. After the long shaft tunnel you will see a staircase. But to her on the left side there is another descent down, with a yellow fence. Below there is a metal building, on the wall of which, to the right of the entrance, there will be hint (picture) Mister Caps (3/10)... This time with the letter H.
Target. Find hidden images of Mister Cap in Galaxy.
Use fast travel to find yourself in the "Yader Spaceport". Face the entrance, there are stairs to the left and right. Walk to the right of the stairs on the left side! Walk along the "Yader-Spaceport" building and in the place where there will be a narrow passage, on the wall of a high flower bed on the left, find hint (picture) Mister Caps (4/10)... Remember the letter S.
Approach the entrance to the Yader-Spaceport building again, but this time stand with your back to it and walk away, towards the exit from the Galaxy zone. In the center of the location there is some kind of structure with a planet. Before reaching it, turn left. There are steps here. Climb them, go to the right. Behind the next span there will be a signpost. Look at the passage to the non-working escalator staircase, but walk past it to the left. Find the passage behind the bridge with the SPACEWALK sign on top. Approach the passage, but do not go forward, but turn left. Find on the wall hint (picture) Mister Caps (5/10)... This will be the letter R.
Target. Find hidden images of Mr. Cap in Children's Kingdom.
Move to this area and enter the Pavilion of Laughter. Inside the building, go through the door on the left, on which the chain originally hung (before the passage of the story). Continue to the left into the corridor and open the red door. You will find yourself in a room with a rotating floor. Remember that? The floor doesn't rotate here anymore. Unless, of course, you turned it off. After going inside, open the second door if you go to the right (it will be red just like this one).
There will be a small room behind the door with hint (pattern) of Mr. Cap (6/10)... This is the letter F.
Stay in this area. Move to the Yader-King's castle. Do not go inside the theater where you fought Oswald. Go back, cross the bridge. Stand facing the bridge you just came back across. But don't go there, but look to the left. There is a tower with a ruined roof, to which there are steps. Climb up them, go inside the building and follow the stairs to the fourth floor. Just after the last step, look at the wall on the left, where there will be hint (picture) Mister Caps (7/10)... This is the letter I.
Target. Find hidden images of Mister Caps in Safari.
Move to the "Primate House", go inside it. Approach the entrance inside, but on the right side, find a path among the trees. Approach the wall and look even more to the right. That is, now you will be standing with your back to the "House of the Primates". On the brick wall ahead you will see hint (picture) Mister Caps (8/10)... Here is the letter N.
Follow to the roof house of Mister Covers. Go through the passage with the inscription, take turns after the first fork: right, right, left, right. To the right of the tree, if you look at it with your face in the direction of the roller coaster, there will be a brick wall with the desired hint (pattern) of Mr. Cap (9/10)... This is the second letter E.
Target. Find the hidden images of Mr. Caps at the Yader-Cola Bottling Plant.
Move along the World of Freshness marker. Enter inside through a tunnel with water, where there is an inscription in black on blue: "ENTER". Go forward through the tunnel with water, into the corridor with the WORLD OF REFRESHMENT sign on top. Run all the way forward, turn under the arch on the right (you will walk past a model of small multi-storey buildings). Next up is a Wild West layout with cacti and old saloons. You need a third or fourth saloon house on the left side. If you look at this house, then you should go around it on the right side and find on the outer wall hint (picture) Mister Caps (10/10)... This is another letter R.
Target. Return to Sierra Petrovite.
Go back to Yader Town and chat with the girl. It will make a password from letters - REFRESHING.
Target. Take advantage of the digital panel.
The Sierra will be standing near the door you need. There is a panel on the right - enter the received code.
Target. Search the office.
As soon as the password is confirmed, then go inside Bradburton's office. The quest has several endings at once.
Explore the office, but know that you need to climb to the second tier. Use the terminal and read some useful information. You can either hack Bradburton's safe or open it later when you have the key. The inside of the safe is actually nothing related to the quest.
Go to the Nuka-Cola vending machine in the corner, click on the hidden button located on the right outer wall. After opening the secret passage, call the elevator and go downstairs on it. You will find yourself in the lair of Mr. Bradburton and even get to know him. His life has been supported by a special machine for over a century.
You will have immediately three options for completing this quest:
“Either you are acting humanly and kill Bradburton, who is tired of this existence. As a reward, you will get access to his secret vault with powerful weapons. Also in the safe you will find the "Nuka-Cola" formula, which you can pass on to Sierra Petrovita.
- Either you don't touch Bradburton at the request of Sierra Petrovita, for which you get a unique Yader-Mira jumpsuit from the girl.
- Either you agree not to kill Bradburton, get a jumpsuit from Sierra Petrovita, and then you still deal with a desperate man. In this case, you will get both awards, but the angry Sierra will have to be shot.
All that remains of John-Caleb Bradburton, the creator of Nuka-Cola.
SIDE QUEST "PRECIOUS MEDALLIONS"
A robot in the shape of a bottle (red) from the floor of Yader-Cola is walking around the territory of Yader Town. Find him and talk about everything. You will receive another collectible side quest. In total, you will need to find seven medallions. You may have found some of them before.Target. Receive the Ferris Wheel Medallion.
Move to the "Children's Kingdom", to the Ferris wheel (in the lower left corner of the park on the map). There is a medallion machine on the side of the Ferris wheel. Interact with him to get Ferris wheel medallion (1/7).
Target. Receive the Mad Mulligan Mine medallion.
At the location "Dry Gorge", move to the point of the "Crazy Mulligan Trolley". Go inside the building, Mulligan's mine. Go through the passage on the right, go past the descent downward, where there is a metal building with a drawing of Mr. Cap (read the quest above). Move along the wall and note that to the left you can jump off the bridge. There will be stairs up. Go up and in the room ahead, find a machine gun, from where you get Mad Mulligan Mine medallion (2/7)... Or at the entrance, go to the room on the left and find a machine gun, which is probably even easier.
Target. Receive the Tree House Medallion.
Stand at the aisle to the treehouse in the Safari location. Go through the passage with the inscription, turn right at the fork. Then go left, right and the next turn to the left, in front of a metal arch, similar to the entrance passage to the house. Turn left, left again and through the metal arch. Go further, taking turns to the right. There will be two more such arches, and then an elevator leading to the tree. Go up to the tree house and find the machine with medallions inside. Take away tree house medallion (3/7) on the first floor.
Target. Receive the Vault-Tec: Among the Stars Medallion.
To search for this medallion, move to the "Galaxy" zone, to the point "Vault-Tec: Among the Stars". Find not the main entrance, but the back one, with the usual red door and a red EXIT sign above it. To do this, after moving to the point, jump down to the left (if you have power armor). Go through the passage of this building and see a door on the left. Go inside, immediately after the turn on the right there will be a machine with medallions. Take away medallion "Vault-Tec: Among the Stars" (4/7).
Target. Receive the World of Freshness medallion.
Open the map and navigate along the "World of Freshness" marker. The vending machine with medallions is located outside, opposite the Yader-Cola bottling plant. Take away medallion "World of Freshness" (5/7).
Target. Receive the Nuka Racers medallion.
Move to the pavilion of laughter. From here, find the very tracks you walked through the tunnel when you overheard the conversation between Oswald and some wild ghoul. But you don't have to go into the tunnel. When you again find rails with moving cars, then find an automatic machine right next to the fence next to them. Take away medallion "Nuclear Racers" (6/7).
Target. Receive the Nuka-Galaxy Medallion.
Select the control point "Nuka-Galaxy" in the "Galaxy" zone. Climb up and enter through the front door. Move along the corridor until you enter the hall with the rocket rails. Follow the rails to the hall with "Yader-Girl". Climb the steps from her statue and find a medallion machine. Get out of there medallion "Nuka-Galaxy" (7/7).
Target. Receive a reward from Leah.
As soon as you have all 7 medallions (they are in your inventory in the "Miscellaneous" section), then go back to "Nuclear Town" and talk to Leah. As a reward, you will receive "Dark Nuka-Cola", "Nuclear Grapes" and "Quantum Nuka-Cola".
THE HISTORY OF THE MYSTERIOUS MANSION OF THE GRANDCHESTERS
This is, rather, not a quest, but a plot narration. You can learn about the terrible events that happened at the Grandchester Mansion. The main culprit is Lucy. To get to the mansion, you need to go west from the Yader-Express station, beyond the hobology camp. The mansion is visible from afar.During the period of prosperity of the Yader-Mira park, the attraction “Mysterious Mansion Grandchester” was very popular among visitors. By visiting it, one could learn about the terrible history of the Grandchester family. A daughter named Lucy was possessed by the devil, did terrible things. The parents tried to exorcise the demons until, ultimately, Lucy killed them, after which she committed suicide.
Someone unknown turned this mansion, a former attraction, into a huge death trap. Surely someone's ominous presence is hiding behind these traps ...
The mansion consists of linear corridors - you will not be allowed into that part of the building where it is too early to enter. Be careful - neutralize the traps you meet on the way.
Enter the room on the left through the red door. Disarm the trap at the entrance - there will be scales under your feet, and there is a trap on the wall above them. The door will open further. Go there (if the door did not open, then study the hall of the mansion again).
Destroy the robot shooter in the corridor with flamethrowers. Look at the wall on the right and see a box. There is a switch inside - switch it to disarm the trap.
By the way, some doors in the rooms open only after the end of the speaker's speech. When the announcer has finished speaking, a door will open through which it will be possible to leave the upside-down room.
In the kitchen, kill two robots and climb the steps to the next door. It will open after the announcer's speech ends.
After destroying the turret, go to the hall balcony, where you could already visit. Go further, when you are in the children's room, then immediately leave it, as grenades fall from the ropes. In the next room you will meet Zechariah. After killing him, take the key to the Grandchester mansion. It is here that there is a recipe for "Yader-Impact". Read below.
SIDE QUEST "JOURNEY TO THE STARS"
You can get the quest from Dara Hubbell, who lives on the location "Hobology Camp", which is to the west of "Yader Town". But first, it seems, it is imperative to find the Purified One. If you come to the camp without speaking to the man, then most likely the hobologists and Dara will attack you. In short: you must find 5 spacesuits at the location "Vault-Tec: Among the Stars" in the "Galaxy" zone and bring them to Dara.For spacesuits, you will receive 200 caps, but if you use charisma and complete three stages, then raise the reward to 350 caps.
The suits must be removed from the animatrons (alien dummies).
Take the hobologists to the junkyard. Or tell them that it has been cleaned (if you have been before). Once in place, take the power distributor and cores. Approach the alien ship. Install the three fused cores as Dara asks to see a good ending.
If you install four fused cores, ignoring Daru, then all hobologists will die, and you will see a bad ending. If you do not kill them (install three cores), you will receive 100 cartridges for the alien cannon from Dara, and all the hobologists will disappear after that.
OTHER
After the completion of the storyline, several tasks will appear at once in the quest "Miscellaneous". Select it and click on the tasks you want to track.Target. Talk to Lizzie Wyeth.
Chat with the girl who is in the "Salon" of the Operators. You will receive the "Persuasion" grenade from her. Throwing such a projectile at the feet of opponents, you can convince them of something.
Target. Talk to Harvey.
Do you still remember the guy who tried to lure you into Yader-Mir? So you can find it near the Yader Town market. Just chat and decide what to do with him - kill or spare.
Target. Collect the first tribute collected from the Commonwealth.
Return to Mount Fizztop, where the boss's lair is. There is a red chest on the upper balcony, inside of which you will find the first lids from the Commonwealth, looted by the raiders.
WHERE TO FIND ALL YADER-RECIPES?
In total, the game has 15 books with recipes for "Nuclear-something-there".1. In Yader Town, stand near the doors to the Salon, where the Operators are. Walk diagonally from the mountain and you will find Mr. Covers' cafe here. Inside the cafe, go to the room in front and on the counter on the right you will find recipe "Yader-Tsida" (1/15).
2. If you go south from Yader Express, down the map, you will find Evan's house. Chat with the home owner to get recipe for "Yader-Love" (2/15).
3. If you go from the station "Yader-Express" to the west, to the left on the map, you will find the camp of hobologists. Yader Frutti Recipe (3/15) located on one of the tables inside the diner.
4. Move from the hobology camp to the west and slightly down the map. Here you must discover the mysterious Grandchester Mansion. Inside the room with the portrait, on a wooden curbstone lies recipe "Yader-Impact" (4/15)... Where exactly this room is located and how to study the mansion, read the description above.
Note. To get inside the mansion, you need to talk to the robotic ticket collector to the left of the entrance. Either you buy a ticket or use your charisma to convince you that you need to provide free admission. Moreover, you can buy a ticket not with caps, but in pre-war dollars. Only 65 pieces are needed!
5. Move to the "Galaxy" zone and stand facing the "Yader-Spaceport". Go left through the passage labeled STAR MARKET. One of the stands in the back street on the left will have Yader-Breezer recipe (5/15).
6. Go inside the Starlight Cinema. There is a small building in the main hall. Under the roof on the counter lies another "Yader" -recipe (6/15).
7. Go inside the "RobCo Arena", go downstairs, and then turn around and go into the room under the steps. Again, find stands with books where the "Yader" -recipe (7/15).
8. The next place is the nuclear power plant "Yader Town". Inside you need to find a small office with a table on which a fan, terminal and documents are located. On the edge of the table is also Nuclear Power recipe (8/15).
More on this. So, after moving to the location, go inside the building. Go down and then go up. There will be two more paths in the office - either up or down again. Take the path down. From the room with the red remotes, go down to the left. Find the stone steps to the right and go up. As a result, you have to climb up the long span. On the right there will be a room with the corpse of a burnt ghoul (possibly), and on the left - a descent to the office you need.
9. Move to the theater "Dry Gorge" and go to its territory with stands. Look at the stands and to the left of them find a storage (warehouse), where there is a large mannequin bottles from under the "Nuka-Cola" and take away from the table Nuka-Dawn recipe (9/15).
10. Follow the "Dry Gorge" and climb the building where the flagpole for the gang's flag is located. That is, on the same tribunes of the theater, which were written about in the ninth paragraph. There will be a table on which lies recipe "Yader-Extreme" (10/15).
11. In a dry gorge, find an alley with a shooting gallery - a shop signed with two words: "BANDIT ROUNDUP". The tent is located to the right of the tower, on the side of which you could find Dandelion's roboponi. To the right of it, if you look towards the bench, there will be a table with with the recipe for "Yader-Bombochki" (11/15).
12. Follow the "Safari" area and enter the building of the reception center. On one of the admin desks that are located below (form an open circle), find Nuka-Onslaught recipe (12/15).
13. In the "Safari" zone, go to the "Reptile House", located diagonally from the treehouse. You had to pass by it (over the bridge) when you were moving towards the giant snake (roller coaster). Stand with your back to the bridge and go down the steps. Turn right. On the left side in front, you will see a scene. There is a hut behind the stage, inside of which lies on the table recipe for "Yader-Sportsman" (13/15).
14. Move inside the "Pavilion of Laughter" and go to the control room, which became available after passing all the obstacles. That is, after entering, go into the passage on the left and immediately turn into the corridor on the right. On one of the control panels, standing close to each other, lies recipe "Yader-Lixira" (14/15).
15. Go inside the castle "Yader-King", more precisely, inside the theater on the territory of the castle. Where you fought Oswald. On the first floor, find a utility room (go through the audience hall) and look for a room with a curbstone on the right. Take away from the table recipe "Yader-Berries" (15/15).
WHERE TO SEARCH ALL ISSUES OF THE MAGAZINE MAGAZINE?
There are five magazines in total in the supplement. You will learn more about where to find them in this chapter.1. Move to the "Yader-Spaceport" and go around it on the left side. Find the minibus frame behind the gate in the form of a lattice. Near him, on a box, lies the first issue of the "Scavenger!" (1/5).
Impact: Increases the likelihood of being tested for credibility.
2. Next issue, go to the dump to the left of Yader Town. Go to the barn on the right (with a broken gate), go to the room on the left and go up the red metal staircase. Go to the very end on top, where the animatron is located - a turret disguised as an alien. Perhaps, when you came here for the stellar core, you have already destroyed the enemy. The second issue of the "Scavenger!" (2/5) lies on the table next to the safe and animatron.
Impact: + 25% Combat Knife and Switch Knife Damage.
3. Move to the Children's Kingdom area and enter the Pavilion of Laughter. Through the mirror maze, along the platforms rotating in a circle in the water, get to the room with hypnotizing tunnels (hypnosal). Take the first corner on the right. Look to the left. Move forward until it stops (through the tunnel). Lying on the ground on the right the third issue of the "Scavenger!" (3/5).
Impact: + 10% damage in melee combat.
4. Move to the mysterious Grandchester mansion and go inside. If you have not been here, then read our walkthrough above (History of the Grandchester Mansion) to find out how to get into the room with Zachariah (he has the key to the Grandchester Mansion). In this room you could find one and "Nuclear" recipes. There is also a red door to the left of the bed. Hack it, move through the corridor and open the broken door of the same color. Go to the back room filled with all sorts of junk. Immediately after entering, pay attention to the wooden box on the right, on which lies the fourth issue of the "Scavenger!" (4/5).
Impact: + 5% damage from explosions.
5. Move to the theater "Dry Gorge". Move forward and keep to the right to head towards the other exit, where the robot sheriff is. Before reaching it, on the right there will be a red rocket at an angle. Go upstairs along it, jump along the rocks so as to climb the ledge to the left. There will be other ledges to the left. Climb along them to the stone fence of the "Dry Gorge" zone. Turn around and look towards the flagpole. It is on the right, but on the left side, it turns out, there is another territory. Jump down there.
Discovered: "Zone for employees of the Dry Gorge."
Kill the ghouls. You need to go to the roof of the building in the center of the territory. To do this, on the right, find wooden planks, along which you can climb to the roof of another building, and from there - along other wooden planks to the roof of the desired one. Here is a hundred with the fifth issue of the "Scavenger!" (5/5).
Here it is, a hidden area for Sukhoi Gorge employees.
This magazine three different influences, depending on how many covers you have in your backpack. More about this:
- If you have more than 10,000 lids in your backpack, then you get + 1 point to strength and + 1 point to endurance.
- If you have more than 1000 caps in your backpack (but less than 10000), then you get + 2 points to strength and + 2 points to endurance.
- If you have more than 100 caps in your backpack (but less than 1000), then you get + 3 points to strength and + 3 points to endurance.
HOW TO QUICKLY EARN (WIN) ARCADE TICKETS?
This question will be asked by those gamers looking to earn all sorts of achievements in the game, including the Nuka-World expansion. To get one of the achievements, you must spend 100,000 arcade tickets in the Yader-Arcade building. All these tickets can be found on the territory of Yader-Mir. But they come across several hundred maximum.You spend them in this building to get unique weapons or armor. Most of the new weapons and armor (unique) without such tickets and you will not get at all! Here are some basics:
1. Tickets are earned by playing mini-games in the Yader Arcade building.
2. To play these mini-games, you must spend Arcade Tokens, which can be found anywhere. The first of these you will receive from Fritsch, who owns the establishment.
3. All earned or found arcade tickets can be spent in the Yader-Arcada terminal. Interact with the terminal and select "Spend" (Use up), then insert the arcade tickets. You can buy prizes for them!
Where to find arcade tokens:
1. Arcade tokens can be found in garbage cans on the territory of Yader-Mir, or they can be obtained for pre-war money.
2. For one pre-war dollar (let's call this money so) you get 3 arcade tokens. To exchange, use the token machine located inside the building, in the main hall to the left of Fritsch.
3. To start the mini-game, you must interact with the coin slot on the corresponding slot machine. This will spend one arcade token. You will have limited time to complete the mini-game and earn arcade tickets. Each game (slot machine) is different from the other.
And here are some ways to quickly get a huge amount of arcade tickets:
BEST WAY TO GET ARCADE TOKENS.
Go to the shooting gallery on the left side. There is a BANDIT ROUNDUP sign at the top. The slot for the badge is at the bottom of the rack. Take with you a weapon with the maximum clip capacity!The best weapon you could use is the unique Spray n "Pray" submachine gun.
Also, the task is greatly simplified if you use a weapon with an explosive effect. You don't even need to aim. Just shoot at the top left and bottom right corners to destroy each of the targets.
How many arcade tickets can you earn on a dash? The shooting range will allow you to earn about 600 tickets at a time if you use an automatic weapon. When using explosive, you can get about 1000 arcade tickets at a time.
ATTENTION! If you use the legendary explosive automatic weapons, you can earn about 4,000 arcade tickets in one game.
Where can I find the Press and Pray submachine gun? This legendary weapon can be purchased from a merchant named Cricket. Look for these vendors outside Diamond City, in Vault 81 or Bunker Hill.