Sand painting. Sand painting techniques on a light table
Read also
Maia. Mayan. Bakulina. Bakulin.
Look at our palms-
They have become wiser!
Thank you, our dear sand,
You helped all of us to draw!
Explanatory note.
Drawing with sand is one of the most important means of understanding the world and developing aesthetic perception, since it is closely related to independent and creative activity. This is one of the ways to depict the surrounding world. As you master the technique of drawing with sand, the child's inner world is enriched and developed.
Sand painting is a unique art form that combines play, activities that are useful for the development of children, and educational moments. The sooner a person discovers creativity in himself, the easier and more interesting his life will be, because creativity is always a striving forward, for the better, for perfection!
Painting with sand the child is immersed in his own fantasy world. He begins to invent a completely different world where castles, dragons, princes and princesses exist. He becomes a science fiction writer in the literal sense of the word.
This type of creativity is available to children of all ages. The little ones can create simple drawings. At the same time, in order to change a drawing or draw a new one, you do not need additional items such as an eraser or a sharpener, you just need to slide your palm or finger along the sand.
During such activities, the sand, as it were, absorbs all the negative energy of the baby, thereby creating harmony between him and the world around him. Drawing lessons with sand helps to improve the mental well-being of the child, relieve phobia and fear of the unknown.
You will see how sand paintings are born on a small screen in a few moments. The images seem to flow from each other to the accompaniment of musical accompaniment.
Painting with sand calms down, coordination of movements becomes better, and motor skills of the hands develop. For children's development, this kind of art is useful because it develops imaginative thinking. Drawing to music gives a double pleasure - I specially select it, creating a meditating background.
Drawing with sand is especially shown for children with developmental delays. This type of creativity stimulates the accelerated development of both thinking and speech of the child. Psychologists explain this by the fact that when working with sand, there is a colossal change in the figurative and figurative - logical thinking of the child.
Be sure to try this drawing method. To paint with sand on glass, you only need a backlit glass table and sand. Table sand can be purchased at the store. It is best to paint with sand to pleasant music in the twilight. Then an unforgettable atmosphere of magic and creation will appear.
Target:
Mastering the technique of drawing with sand, education of accuracy, frugality, as well as tactile sensitivity through drawing with sand on glass.
Tasks:
1. To develop mental activity, ingenuity, the ability to compare, put forward hypotheses, draw conclusions.
2. Develop cognitive processes: perception, attention, memory, imaginative thinking.
3. Develop fine motor skills of the hands.
4. Development of creativity, imagination in a child, the ability to use fingers to depict what was conceived on the sand.
Preliminary work:
1. Conversation about the properties and purpose of sand.
2. Watching the video "Why do we need sand?"
3. View a presentation on how to paint with sand on glass.
Sand drawing techniques:
1. Drawing with a fist, palm, edge of the thumb, pinch, little fingers.
2. With several fingers at the same time.
3. Symmetrical with two hands.
4. Pouring sand from the cam and cutting off the excess.
5. Sliding your palms over the surface of the sand, perform zigzag and circular movements.
6. Perform zigzag and circular movements with your palm on the edge.
7. Create all kinds of patterns with handprints, fists, knuckles, ribs of the palms.
Course of the lesson:
Educator:
Hello guys! Guess the riddles and find out what we are going to draw with today.
Puzzles:
From the stones he appeared,
The grains were born:
Yellow, red, white
Or light gray.
That he is sea, river.
Guess who he is? (Children sand).
You can bury something in it,
I like to walk on it,
And sleep on it for an hour.
Guess what? (Children sand).
Educator:
Someone draws in gouache,
And someone with a pencil.
I offer you children
Create a drawing with sand.
You fall asleep sand on the glass
What is illuminated from below by light.
And, including imagination,
You draw pictures surprisingly.
Smoothly draw a wave with your fingers,
And streams will float in the picture.
Big fingers towards the lead
And depict the spruce in the picture.
To show the clouds in the sky
Clench your fingers in your fists.
And circling with fists on the glass,
You will draw clouds at the top.
I only told you a grain
How fantasy can develop.
One has only to start drawing
And the ideas can no longer appease.
Educator:
Guys, I suggest you become artists and draw your own drawing.
But first, let's remember the rules for handling sand.
1. You can draw with sand only on glass; you cannot sprinkle sand on the floor;
2. Do not wipe your hands on your clothes;
3. Do not touch your face with your hands, eyes - the smallest grains of sand can get into your eyes;
4. It is necessary to shake off your hands over the table;
5. After work, wash your hands with soap and water.
Educator:
Let's say hello to the sand. Touch it with the fingers of your right and now your left hand. Now smooth out the sand with your palms. Now let's remember the techniques of drawing in the sand. Tell us what you can do to paint in the sand. ( Children's answers.)
That's right, you can draw with one or more fingers, the edge of the palm, the fist, the back of the palm, this part (here and in the future, I simultaneously show and explain to children). If you don't like something or want to change something in your drawing, you can smooth out the sand and continue painting.

"Drawing with sand" for the development of fine motor skills of the fingers.
1. Ask the child to place his palms on the sand and move them in different directions, as if stroking him.
2. Show your child how they can create a variety of patterns using fingerprints.
3. Together, draw numbers, letters, various geometric shapes with your finger, and in general, draw whatever the baby wants.

How to draw a "Flower"
We put a few handfuls of sand on the central part of the glass and begin to draw a flower. To do this, we run our fingers along the sand, creating lines free of sand - these are parts of the flower, which should be of a light shade ( for example, the middle part of each petal). Next, we form the stem of the flower, outlining its contour with straight lines. As a result, the stem and part of the flower itself will be light in color, since the glass in these places will be without sand. The rest of the areas will be covered with sand - these are the painted parts of the flower.
We draw the "Sun"
We pour a thin layer of sand on the glass surface. Then, with a cam, we perform a rotational movement, slightly pressing the brush into the sand. We get an image of the solar disk. Then, with our fingers, draw the rays of the sun. Nearby, you can draw clouds by creating closed wavy lines with your fingers.
Educator:
Guys, you have got very beautiful sand drawings. But it's a pity that they are short-lived and from one breath of the breeze or even your breath, they can disappear, scatter, crumble. Let's take pictures of your sand drawings, and then show them to your parents and you yourself can once again admire your masterpieces.


In custody, I would like to know your opinion Dear colleagues on the use of drawing on glass with sand with children. Thank you for your attention.
Young children love to get dirty, fiddle with loose materials, create fantasy images, and give themselves up to the creative process entirely. Combine the child's hobbies into one whole, you get a drawing in the sand.
Surely you yourself were fascinated by such performances on TV, watched the gorgeous animations of famous world authors. Try repeating the show at home with your child. And our article will tell you how to paint with sand on glass and how to teach a child to make sand compositions.
In this article, you will learn
What is the use of this activity

American animation director Carolyn Leaf gave an interesting idea to teachers and parents on how to organize the kids' leisure time and engage in the development of multidirectional skills at the same time.
She created a sandbox video. The heroes came to life, acted on a luminous board. The artist painted them with her fingers using sand. The idea was picked up by other animators. The method of creating images and plot was highly appreciated.
Gradually, drawing on a special board with sand came into the life of ordinary people. Teachers began to practice such activities with children of different ages. The fascinating method of pedagogical work was studied from the point of view of psychology, physiology, didactics. Practicing innovations teachers and preschool educators noticed the following useful properties of such classes:
- Painting with sand on glass is fun and challenging. 99% of children receive a charge of positive emotions during the lesson, entertainment.
- The method has no special rules. The kid can draw with his palm, one or more fingers, create any shapes and erase them quickly if something does not work out.
- Lack of limitation relieves emotional stress. Children are relaxed, moderately excited, they feel like creators of a unique masterpiece.
- Motility develops. Kindergarteners are tired of plasticine, pencils, it is no less useful to train finger dexterity using a light tablet and sand. Simultaneously with motor skills, speech develops.
- Graphomotor skills are being improved. Schoolchildren develop the ability to repeat the contour, hold the handle correctly, and follow the rhythm of movements.
- Suitable for all ages. Children, schoolchildren and adults draw on the blackboard with pleasure. The magic of free-flowing animation leaves almost no one indifferent.
- Relief from stress. Working with sand is included in the course of psychotherapy for the treatment of neuroses, tics, and insomnia. Healthy children in the classroom also calm down, find peace of mind, forget about troubles.
- A unique method helps to unleash creativity, find yourself. The child shows imagination, shows hidden abilities, is not afraid to evaluate the result.
If we consider the methodology from the point of view of organization and material costs, the following advantages are revealed:
- Consumables are cheap. You don't have to buy sand, use semolina, ground coffee.
- You can make a drawing tablet with your own hands. You will need a lamp, plexiglass, wooden box. The equipment takes up little space in the room and does not require special maintenance.
- Any mom, dad, grandmother can teach a kid to draw with sand. You don't need special education or courses for classes. Look at examples of work on the Internet and feel free to start creating.
Painting materials and tools
Without special home-made or store-bought equipment, you will not be able to learn how to draw in the sand. The set of tools and consumables is small:

On a note! Buy quartz sand in a pet store, shopping centers in the "Toys", "Everything for creativity" department.
Drawing techniques
The art of creating animations is based on simple drawing techniques. In kindergarten, at home, show your child how to hold hands, pour out the sand so that the picture is clear, bright and real. Use the following techniques for beginners.
Pour sand from one palm to another

A great way to start classes. Kids get ready for work, get acquainted with the material, feel its weight, warmth or coolness, texture.
We collect the sand into a fist and scatter
You need to watch how much sand the preschooler picks up in his palm. There should be a little of it so that the movements are easy, the layer of material on the glass is thin.
We pour out the sand with a stream
With the help of a stream from the palm, children draw lines of different thicknesses. If you hold the handle high and let it flow in a thin stream, you get a light version of the line. If you pour it roughly, almost unclenching your fist, you will draw a dark, wide curve. At this stage, it is important to work out both techniques so that the child controls the saturation of the drawing with color, creates almost invisible lines.
We draw with our fingers
Children can use each finger individually or the entire palm. Let them depict grass, hair, trees. Large objects are drawn with a fist - a mountain, a stone. Pads - fruits, stars.
For schoolchildren who have mastered simple drawing techniques, offer these fun exercises.
Maple Leaf
Fill in the outline for the maple leaf, being careful to follow its shape. Correct the lines with your fingers. Move the excess sand to the edge of the drawn sheet to make the outline darker. Draw a petiole. Draw the inner lines (veins) with your fingernail. Place a circle in the area of the petiole with the pad of your finger.
Letters
The material is scattered on the glass from the palm or with a pinch. It is leveled. Against this background, write the letters of the Latin or Slavic alphabet according to the sample. The child learns to be attentive, to repeat the pattern. The graphomotor skill develops.
Water
Spread sand all over the container. With four or five fingers spaced wide apart, draw wavy lines. Use your fingernail to make horizontal lines - these are ripples. Then draw the horizon and remove the excess at the top of the glass. Draw clouds on the same composition.
Clouds
The sand is clenched in a fist. We make circular movements with the hand with a small amplitude, scatter the material over the sandbox. Small lines can then be drawn with a fingernail to make the clouds lush.
Young artists at the initial stage of mastering an exciting hobby will love these exercises using additional tools.
Stencils

Get stamps, coffee stencils, plastic bottle caps. Leave them marks on the sand table. With the help of different figures, great subject compositions are created.
Sieve

It is much easier to disperse sand through a baby sieve. You can form mountains, make a thin coating on glass. The next stage is drawing with your fingers on the resulting sand space.
Funnel

The wide-necked tool helps to make high embankments. Children enthusiastically observe the sand stream, repeat the action with the help of a cam.
How to draw animal tracks

This exercise requires careful finger work. Draw the traces with a cam, making the main background. Small details are drawn with sticks, fingertips, marigolds.
Pendulum
Attach different sized beads to the ropes. Swing the pendulum so that traces of the load remain on the glass. Toddlers learn to control strength, observe the rhythm of movements. It is a great therapy for emotional overload.
Colored lining for background

Colored cardboard and colorful pictures are placed on the glass. Sand is scattered over a thin layer. Children draw circles, zigzags. The colored fragment partially protrudes. It turns out the original picture.
Pattern prints

You can play with a non-standard item with patterns - a toilet paper roll. Apply drawings to it with a glue gun, let dry. Run the tool over the thin surface of the sand, a trace will remain. Girls adore this type of work.
There are many options for the selection of additional elements, tools for creating a sandy masterpiece:
- Take combs with sparse or frequent teeth - you get a wave.
- Toothpicks help to draw the thinnest lines, make the image of the hero expressive, real.
- Children's rakes are suitable for drawing a relief on landscape compositions.
Imagine, do not limit yourself and your child in the creative process.
Sand animation
The child will be able to perform the first simple animation in three or four lessons, having mastered the technical basics of drawing. Invite the student to draw an apple tree on glass. A step-by-step master class is given below:
- Prepare sand and screen. Treat the surface of the table with an antistatic agent, remove excess.
- Gather some sand into your fist and scatter it over the light table. The surface must be evenly coated.

- Draw a trunk with your thumb, press on the entire pad.

- As you climb to the top of the apple tree, sharpen the line. Draw not everything with a pillow, but with a half, then with a nail.

- Use your little finger and forefinger to draw thin and thick branches. Curve the lines to make the apple tree look like a real one.

- Draw the crown. Collect sand, sprinkle generously around the branches, at the top.

- Leave a little for the bottom of the painting. Scatter it under the tree. It will be weed.

- Use your fingerprints to depict apples on the branches. Determine their number yourself. It is important that the circles are not blurry, the edges must be clear.

- If you draw three or four apples under a tree, on the ground, you get an autumn version of the picture.

- Now clear the background. Circle a contour around the crown, remove excess sand from the surface. The tree will have a shape.

On a note! Use a colorful paint kit for animation. With the help of green, yellow, white, gray sand, changing the shade of the image backlight, professionals achieve the effect of a live picture.
How to draw a pig
How to draw a mouse
How to draw a hippo
Play exercises

At home, in kindergarten, in early development classes, kids learn through play. This is the best way to teach complex things through simple things. The high-sided tabletop sandbox and preschool play exercises will help you with this.
Train your fingers
Start your first acquaintance with animation not with theory, but with practice. Give an opportunity to touch, smell, explore the material. Turn on the lights in the sandbox. You can put on quiet music so that the kids plunge into the whole process, they understand that something unusual is going to happen now.
Ask the preschoolers to draw any object or figure on the glass with their finger. Let them play with the sand. At the same time, motor skills, imagination, and attention develop.
Play hide and seek
You will need a rake, shovels and a thick layer of sand. Give the students small toys (Kinder figurines). Ask to bury it unnoticed by others. Arrange a competition who will quickly find a friend's toy with your eyes closed using your fingers.
What a surprise i have
The teacher hides various small objects in the sandbox (buttons, rags, pieces of paper, figurines, balls, coins). The task of the children is to find one object with their hands, guess what it is, by touch. In the process of understanding, feeling the object, you need to talk about your feelings, assumptions.
Treasure
Pour the sand into a deep container or chest. Put pirate treasures inside: beads, coins, map, "gems". You need to search for treasure with one finger. Associate a fascinating story with each find. Tell it yourself or come up with the kids.
A rock
Find a cobblestone on the street. Let it be unpleasant to the touch: cold, slippery, rough and so on. Bury the item in the sand. Ask the children to simultaneously touch an unknown object, tell how they feel, why they feel uncomfortable, and the like.
Continue your group exploration when the stone is removed from the sandbox. Tactile sensations are responsible for the formation of speech, train emotional endurance.
Important! For hide-and-seek games, when children cannot see the object under the sand, choose toys with rounded edges, made of fabric, rubber, so that the little ones do not hurt their fingers.

It is necessary to master an unconventional methodology for early development, entertainment of children after watching video tutorials or recommendations of professionals. It is useful for beginners to know the following:
- Place points with the pads of different fingers. Remember how big they will be. This will help you not to be mistaken in choosing a finger when drawing eyes, fruits, drawing on the body of animals.
- Try to cover the glass with an even layer of sand before class. Use a sieve, funnels, fists a little later.
- Do not smooth the surface with your fingers. The prints leave an unsightly mark.
- When the little ones learn to create simple images, try creating compositions from small details using the tools at hand.
- Professionals minimize the amount of touching the sand. Movements should be sweeping, confident.
- Choose the best drawing for your level. Practice the technique of its creation to perfection. Rehearse the circuit several times.
- Consider the length and width of a stroke before applying it.
- You can draw with sand on a sound and light board, a black polished table, a kitchen baking sheet. The most important thing is the contrast between the surface and the bulk material.
Important! Watch master classes for free on the Web. Show the children some complex compositions on video from time to time. This gives impetus to development, spurs interest and desire to improve the technique of drawing.
How to make a table for sand animation with your own hands
Play activities with the family are much more beneficial for young toddlers than group activities in development centers. A backlit sand drawing tablet can be made at home from scrap materials. Dads will need:
- wooden box;
- a suitable piece of plexiglass;
- nails;
- electrical tape, scotch tape;
- paint on wood;
- flashlight, lamp.

The manufacturing process will take no more than 1-2 hours, and there will be no limit to children's joy. Make the table bigger so that the whole family can enjoy it at the same time. The instruction consists of the following steps:
- Clear the wooden box from excess, reduce the height of the sides. The average depth of space is 10-15 centimeters.
- Remove the bottom cover or cut a slot for glass installation.
- Place the transparent piece on the bottom half.
- Secure the glass carefully with the strips from below.
- On the sides, make compartments for storing small things (sticks, sieves, rakes). To do this, nail the planks, stepping back a couple of centimeters from the edge.
- Set the legs to the table. Choose the height according to the height and age of the youngest child.
- Place a bright lantern or light bulb with good wattage under the table.
- The workplace for the little artist is ready.

Watch a video tutorial on how to make a light table for painting with sand with your own hands at home:
Interesting fact! In Tibet, India, the tradition of creating images of the Supreme God with the help of multi-colored grains of sand has been preserved. This art has a name - mandala. Bright round pictures are made only by monks dedicated to tantric secrets. It takes 1-2 weeks to make one mandala. The picture consists of millions of grains of sand.
Compositions made of sand cannot be hung on the wall, left as a keepsake to show to friends and relatives. This is the only disadvantage of such creativity. But there is a way out. Record successful activities on the camera, take pictures of drawings. Make a video by adding music to your slides.
IMPORTANT! * when copying the materials of the article, be sure to indicate the active link to the first
Painting with sand on glass, or sand animation, is a very young, one might say, young art form. It appeared in the 70s of the 20th century in the West, and moved to us quite recently. But thanks to its originality and entertainment, it immediately won many hearts. To draw with sand on glass, you need not so much: sand and a special table with lighting. The peculiarity of the technique of drawing with sand on glass is in its interactivity - before the eyes of the admiring audience, the pictures "sprout" one from the other, creating a whimsical row. This art requires great skill from the artist, because the creation of a picture takes place in front of the audience and leaves no room for error. At the same time, it is very important not only to be able to draw, but also to feel the sand, so as not to spoil the picture with a careless movement.
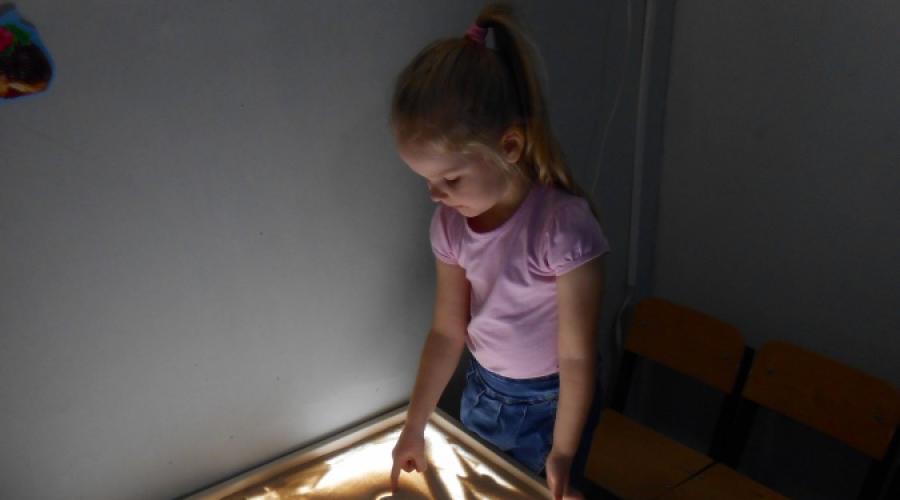
Sand drawing for children
Like any other sand game, drawing on glass is very attractive for children. The sand is pleasant to the touch and easy to handle. In addition to the development of creativity and spatial thinking, sand animation has a positive effect on the health of the child, developing the motor skills of his fingers and relieving stress, relieving the child of stress and raising his spirits. Sand painting has been successfully used to correct behavior in hyperactive and highly excitable children, bringing them to inner harmony. Even toddlers can master drawing with sand, creating countless drawings on one surface. Children develop a sense of symmetry as they can draw with the sand at the same time with their left and right hands.
In order to teach a child to draw with sand on glass, there is no need to conduct a special master class. It is enough to buy a table for drawing with sand, quartz sand and give the child's imagination to express itself. If it is not possible to purchase the necessary equipment, you can do it yourself, and as a material for drawing, you can use ordinary sand from a sandbox, having previously washed it with water and calcined it in the oven.
Workshop on making a table for drawing with sand

Sand painting in kindergarten
Sand painting is very often used in developmental classes.  in kindergarten. Even children with special needs can easily cope with drawing with sand, because sand is a natural material for them, which they are not afraid of and are happy to tinker with it. In addition to drawing on glass, kids master the technique of painting with colored sand. To do this, the outline of the drawing is applied on a sheet of paper and the area that should be painted over is first coated with glue, and then colored sand is sifted onto it. Painting with colored sand is an activity that requires certain skills and perseverance, but the result is worth it. As a result, the paintings are bright and unusual. You can also prepare the sand for these purposes yourself by washing and calcining it, and then painting it with food dyes.
Painting with sand on glass is a new trend in art that is rapidly gaining popularity. All the magic of bewitching is that the picture appears in front of the public. At first glance, light and simple movements draw wonderful images, which can subsequently be transformed into other objects or figures, leading the viewer into a mysterious wandering following the artist's imagination.
The gaze is presented with a story that always leaves a mark not only on the glass, but also in the hearts of the audience.
Usually such shows last from 5 to 15 minutes.
The popularity of sand shows
Thanks to these characteristics, the sand show has proven itself as a means of cultural recreation. Therefore, when organizing various events, they often invite animation artists to perform.
It can be corporate parties, weddings, and various other events. The customer can order his own individual story, which gives a special uniqueness.
Thus, the organizer of the event has a guarantee that none of those present will be bored watching this part of the program.
How to learn to paint with sand on glass
In view of such a demand for sand painting representations, the need for specialists in this art form is increasing.
This can be learned in studios that provide such conditions, or personally from the master. But we must remember that the one who teaches you will not just waste his time.
Firstly, no one is interested in preparing a competitor for themselves. After all, in order to learn from someone personally, you need to have daily meetings with him. This means that you have to live in the same area, which means that soon there will be another specialist in your area.
Would you personally teach someone your profession just like that?
Most likely it will be a mutually beneficial cooperation.
Either you want him to pay for tuition, or to share income, working under your supervision, etc.
There is an exit
Now, if you lived far from the teacher, then he is not afraid of competition, since the customer is not interested in ordering an artist from far away, paying additional travel expenses. Well, perhaps, if this is a very unique artist.
And then the Internet comes to the rescue!
With the help of the Internet, you can get education at a distance. After training, you don't owe anyone anything. Learn how and when you want.
Like the idea?
Just think, how will you immediately become famous? You will be invited to all parties. You will be introduced as musical artists.
At school, all teachers will immediately respect, since any event will need your presence.
- Teacher's Day - You are asked to make a story about teachers.
- The last call is its own story.
Any holiday has its own story. You are irreplaceable! Do you have such an artist in your school? Why don't you become this unique talent?
And after school, there are more chances to go to university (like good athletes). When people (teachers) have a good attitude towards you, then grades begin to grow, and sins are forgiven ...
So, do you want to learn?
Do you want to find a teacher who is ready to give you the education you need, without then sharing with him?
Series: drawing lessons for children.
Sand painting, as an unconventional direction of the Fine Arts, is unusually expressive and extremely popular all over the world. What are the mesmerizing sand show: when the artists perform almost magical metamorphoses with the help of beautiful music on glowing glass with the help of sand. Many people like this spectacular sight. And now it has become available to you at home!
How can a child (and maybe you) benefit from drawing with sand?
Like any other art activity, sand painting(including as well as communication with natural material) - develops tactile sensitivity and finger motor skills, spatial perception, thinking and attention,imagination and fantasy- all this together contributes to harmonious development of the child's personality... To this list, we can add that when drawing with sand, the ability to adapt to changing conditions, research interest, and cognitive activity develops.
But that's not all!
You know about the direction sand psychotherapy and psychocorrection? This is a new (he is not more than 30 years old), but very relevant in our time, way to relieve psychological stress, avoid depression, fears and phobias, calm down, harmonize the inner world, cheer yourself up.
Sand Is a meditative material that grounds all negative emotions on itself. Within an hour of drawing with sand, all physical and emotional processes are stabilized.
This lesson especially recommended by specialists for hyperactive and over-excitable children, after all, it helps to better understand your feelings and the feelings of other people, get the necessary social communication skills, develop a positive attitude towards yourself and others.
Both children and adults who are fond of drawing in the sand are balanced, flexible, sociable and very creative people.
Take a look at this sand drawing video for kids:
What do you need to paint with sand at home?
1) Sand. The sand can be "dug up" even in the sandbox in the yard, sift it thoroughly, rinse it, and bake it in the oven (within 1-2 hours). Only after that, you can offer it to your child. It would be great to find large river, sea sand - different shades, particle sizes and structures.
2) Table - a tablet for drawing with sand (with lighting) can be done at home.
Mini-guide for making a table (tablet) for drawing with sand at home:
It is better if a man does it, but a woman can do it.
It will come in handy for us: a wooden box (strong, dense, or made independently from solid wood or good pieces of chipboard), a piece of plexiglass (smaller around the perimeter than the box, plexiglass does not break, therefore it is safest). It is good if the glass itself is matte, but even if it is transparent, it is not difficult to fix it by pasting it with a translucent colored or white film, or painting it with paint on the inside. Small wooden blocks are useful for the legs of the table. You also need a strong construction tape, or tape. Small carnations and a hammer. As a backlight, you can use a bright flashlight, a desk lamp, a small soffit, or just any lamp.

Step 1.
We select or make our own box. It should look something like the picture. The width and length of the future countertop is approximately 0.7 * 1m. Or at your discretion.

Step 2.
Make a rectangular hole inside the box(where the glass will then be inserted) for the tablet. The picture shows: how to make compartments from the side for scrap materials (for example, pebbles and transparent glass for mosaics - additions to a sand pattern).
The sides of the box at the future table will "look" upwards - they protect the sand from spilling onto the floor.

Step 3.
From polished(so that there are no splinters on the fingers during operation) we make the legs of the wooden bars for the table.

Step 4.
Glue a piece of plexiglass construction tape to the tree, straight into the hole which we did at step 2... Plexiglas is lightweight - therefore it must hold. But if you do, as they say, for centuries - then the glass can be "sewn" to the table with wooden slats, with the help of small nails.

Step 5
Making the backlight- we put any light source under the table, or on its side - so that the light illuminates the tablet for drawing with sand from the inside.
Now you're done!
Let's start drawing!
 The sand table is ready, nice music included(for example, the album "Mozart Effect" specially for "dreaming and painting" which you can download for free), the curtains are drawn(you need to create a slight darkness), candles lit. Use the secrets of aromatherapy: aromas of lavender, cedar, incense, mandarin, grapefruit, patchouli contribute to creativity and personality harmonization.
All is ready? The magic begins!
<Мы специально не будем писать сейчас о способах рисования песком, так как это все обязательно родится внутри Вас и Вашего ребенка, при соответствующем настрое.
In addition, in order to understand how this is done approximately, it is enough to watch the video presented above (and below - at the end of the article). Better to see once ..>
Ideas for drawing with sand with a child:
With the help of painting on the sand, you can not only draw static pictures, you can and should do whole sand animation, "Frame by frame" recreating fairy tales, instructive stories... Fairytale therapy to help you!
And to to bring up cognitive activity in a child: can "Travel" to different countries, telling about what kind of people (traditions), plants and animals live there.

Along with sand, you can use as a mosaic - pebbles - pebbles, translucent colored glass(ground, cut-safe). For example, as in the picture on the right. These details will help diversify your sand painting practice.
Nice to the touch, clean and crumbly sand will allow you and your child to easily embody the most fantastic ideas on glass!
We also note several important rules for drawing with sand together with a child:
1) The child only needs to be offered options for games and tasks, and not to force him to follow a strict program.
2) The structure of the lesson should be adapted to the interests of the child himself.
3) Create a space for his self-expression, and do not set rigid frames and rules.
4) Appreciate his initiative and opinion, but not tacit agreement with you.
5) Stimulate the development of creative situations with questions, but not ready-made answers.
6) Support your child in finding their own non-standard solutions to the tasks you have set.
7) Appreciate the natural wisdom of the child and his uniqueness, but do not teach him "to be like everyone else."
Thus, created in these simple rules creative sand painting classes will help you cultivate real giftedness!
*********************************************************************************************************************************************************************
P.S .: Finally, we cannot fail to note what heights it can reach drawing in the sand.
Ksenia Simonova draws about the Second World War on the sand "You are always there":
“I would like this story to be heard in a new way,” says Ksenia Simonova. “Many children do not watch war films, for them it is boring and incomprehensible. Moreover, we, unfortunately, are rewriting history, it is scary to read textbooks. I wanted the theme of war to become relevant again with the help of such a rather fashionable technique. "
This video can be fully shown to a child of primary school and school age, not only as a masterpiece of the art of sand painting and animation, but also as a memory of the war.