Mod firmware for Samsung 5300. Firmware for Samsung Android devices through the Odin program
Read also
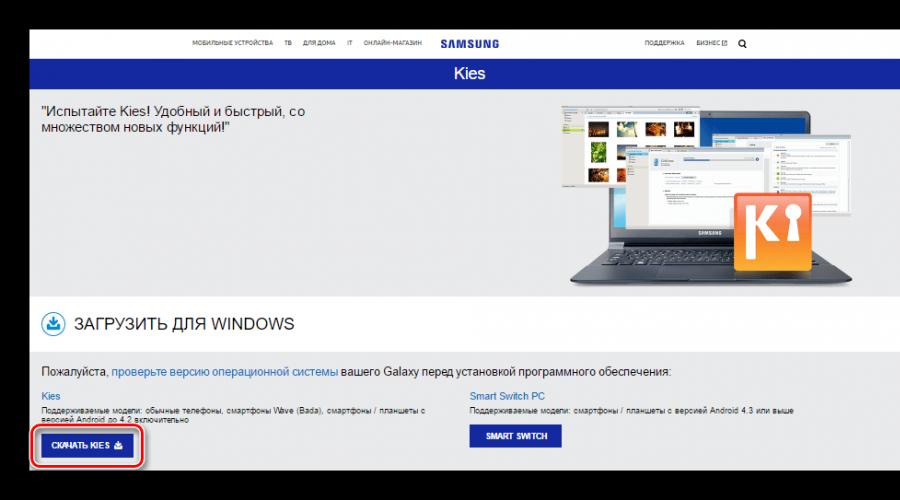
The first phone to come into view in the new 2013 is the Samsung Galaxy Pocket (S5300). Today it is the most affordable smartphone from Samsung. Its distinctive feature is 3 GB of its built-in memory, which eliminates the problem of space for your favorite programs almost completely. The price reduction was due to a small, 2.8-inch screen with a resolution of 240 by 320 that does not inspire optimism. But the smartphone “keeps” the charge well, extending the time the device is away from charging by two or three days. What is available for improvement? We will replace the boring, official firmware with Joy OS, which is made as close as possible to Apple's iOS. First, install the Kies program on your computer ( http://yadi.sk/d/AA0NYUmd1Zd8i). It includes drivers for our mobile hardware. First of all, to implement our tasks, you need Root (this is the same as the administrator in your Windows). Getting it can not be called difficult, however, you have to slightly spread your fingers. Transfer to a memory card (without it, unfortunately, in any way) this archive ( http://yadi.sk/d/-OIDPPPDV1ZdGs). Do not forget to remove the deuce from the name, it is forbidden to unpack the archive itself! And now the skill in spreading your fingers will come in handy - simultaneously hold down the sound rocker up, the button with the house and the power button. Hold firmly until a short menu appears on the screen of the switched off phone. You will have to go through the points here with the sound keys, and apply the selected one with the button with the house. It is clear that we select install update and the specified update.zip archive. The phone will immediately execute the command, then reboot safely with the reboot item. Everything, you received an indulgence for further action.
Download and transfer to a memory card ( http://yadi.sk/d/CeN_vh2E1Zf98) ClockWorkMod recovery, this archive will make the firmware simple and mundane. Unlike Samsung's text recovery, it does not check the firmware for an official signature from the manufacturer. You will again have to show the wonders of the flexibility of your fingers by holding the same 3 buttons on the switched off phone - with a house, sound up and on. We hope you get used to it and easily repeat the installation, this time choosing a freshly downloaded archive. The phone will report - everything is installed, you will have to reboot again.
The next, extremely important step is to download and install Joy OS, an alternative firmware for the Galaxy Pocket. The archive waiting to be transferred to the memory card is located here ( http://yadi.sk/d/6QXhQgcn1ZgrS). Transfer it to a memory card with a perfect mouse movement, without unpacking, without creating folders. We recall the newfound skills and with a spread of three fingers go to recovery. If everything is done correctly, then a text menu will appear on the screen, with the inscription CWM Recovery. Don't see the inscription? So, you are in the native bootloader, and he does not know how to install unofficial. Therefore, turn off the phone again - you may need to hold down the same combination, but with the sound key down.
In the open menu, use the sound keys to go to the items nandroid-Backup (or backup and restore), select backup. This action creates a copy of your official firmware, just in case of a fire. Having calmed our conscience, we proceed directly to installing the Joy OS firmware. But first, let's clear the phone's memory of settings and files that are unusual for the new version of your mobile operating system. This is a must! Choose wipe data, wipe cache, wipe dalvik cache (advanced). Having done this, install the archive with the firmware through the install from sd card item. After a couple of moments, the firmware will be successfully installed, reboot via reboot in the menu. Before you is a good imitation of the iOS interface, but not only in appearance, the benefits of flashing. The authors of the assembly have optimized the consumption of RAM by applications, cleaned up the excess, edited everything so that your device speeds up, showing not illusory increased performance. Good luck getting used to a prettier phone!
Install optional products - DriverDoc (Solvusoft) | | | |
This page contains information about installing the latest Samsung GSM(3G) GT-S5300 driver downloads using the Samsung Driver Update Tool.
Samsung GSM(3G) GT-S5300 drivers are tiny programs that enable your Mobile Phone hardware to communicate with your operating system software. Maintaining updated Samsung GSM(3G) GT-S5300 software prevents crashes and maximizes hardware and system performance. Using outdated or corrupt Samsung GSM(3G) GT-S5300 drivers can cause system errors, crashes, or cause your computer or hardware to fail. Moreover, installing the wrong Samsung drivers can make these problems worse.
Advice: If you are inexperienced with updating Samsung device drivers manually, we highly recommend downloading the Samsung GSM(3G) GT-S5300 Driver Utility. This tool will download and update the correct Samsung GSM(3G) GT-S5300 driver versions automatically, protecting you against installing the wrong GSM(3G) GT-S5300 drivers.
About the author: Jay Geeter ( jay-geater) is President and CEO of Solvusoft Corporation, a global software company focused on innovative utility programs. He has been passionate about computers all his life and loves everything related to computers, software and new technologies.
Despite the high level of reliability of Android devices manufactured by Samsung, one of the leaders in the world market of smartphones and tablet computers, users are often puzzled by the possibility or need to flash the device. For Samsung Android devices, the best solution for software manipulation and recovery is the program.
It does not matter for what purpose the procedure for flashing a Samsung Android device is carried out. Having resorted to using the powerful and functional Odin software, it turns out that working with a smartphone or tablet is not so difficult as it might seem at first glance. We will deal step by step with the procedure for installing various types of firmware and their components.
Important! The Odin application, if the user does it incorrectly, can damage the device! All actions in the program the user performs at his own peril and risk. The site administration and the author of the article are not responsible for the possible negative consequences of following the instructions below!
Drivers will need to be installed to enable Odin to communicate with the device. Fortunately, Samsung has taken care of its users and the installation process usually does not cause any problems. The only inconvenience is the fact that the drivers are included with Samsung's proprietary software for servicing mobile devices - Kies (for older models) or Smart Switch (for new models). It should be noted that when flashing through Odin with Kies simultaneously installed in the system, various failures and critical errors may occur. Therefore, after installing the drivers, Kies must be uninstalled.


Step 2: Put your device into download mode
The Odin program is able to interact with a Samsung device only if the latter is in a special Download mode.


Step 3: Firmware
Using the Odin program, it is possible to install single- and multi-file firmware (service), as well as individual software components.
Installing single-file firmware
- Download the ODIN program and firmware. Unpack everything into a separate folder on drive C.
- Run Odin as Administrator. The program does not require installation, so to run it, you need to right-click on the file Odin3.exe in the folder containing the application. Then select from the drop-down menu "Run as Administrator".
- We charge the battery of the device by at least 60%, put it into the mode Download and connect to the USB port located on the back of the PC, i.e. directly to the motherboard. When connecting, Odin should determine the device, as evidenced by the filling in the blue color of the field ID:COM, displaying the port number in the same field, as well as the inscription Added!! in the log field (tab log).
- To add a single-file firmware image to Odin, press the button "AP"(in versions Odyn up to 3.09 - the button PDA)
- Specify the path to the file for the program.
- After pressing the button "Open" in the Explorer window, Odin will start checking the MD5 amount of the proposed file. Upon completion of the hash sum check, the name of the image file is displayed in the field "AP (PDA)". Go to tab Options.
- When using a single-file firmware in the tab Options All checkboxes must be cleared except for F. Reset Time" and "Auto Reboot".
- Having defined the necessary parameters, press the button Start.
- The process of writing information to the device memory sections will begin, accompanied by displaying the names of the device memory sections being written in the upper right corner of the window and filling in the progress bar located above the field ID:COM. Also in the process, the log field is filled with inscriptions about ongoing procedures.
- Upon completion of the process, in the square in the upper left corner of the program, the inscription is displayed on a green background "PASS". This indicates the successful completion of the firmware. You can disconnect the device from the computer's USB port and start it by long pressing the power button. When installing a single-file firmware, user data, unless explicitly specified in the Odin settings, is not affected in most cases.

Necessarily! If installed, remove Samsung Kies! I'm on my way: "Control Panel" — "Programs and Features" — "Delete".


Installing a multi-file (service) firmware
When restoring a Samsung device after serious failures, installing modified software, and in some other cases, a so-called multi-file firmware will be required. In fact, this is a service solution, but the described method is widely used by ordinary users.
Multi-file firmware is called because it is a collection of several image files, and, in some cases, a PIT file.

Firmware with PIT file
The PIT file and its addition to ODIN are the tools used to repartition device memory. This method of carrying out the device recovery process can be used in conjunction with both single-file and multi-file firmware.
The use of a PIT file when flashing is permissible only in extreme cases, for example, if there are serious problems with the device's performance.


Installation of individual software components
In addition to installing the entire firmware, Odin makes it possible to write individual components of the software platform into the device - the kernel, modem, recovery, etc.
For example, consider installing custom recovery via ODIN.

It should be noted that the above methods of working with Odin are applicable to most Samsung devices. At the same time, they cannot claim the role of absolutely universal instructions due to the presence of a wide variety of firmware, a large model range of devices, and small differences in the list of options used in specific applications.