How to draw spring? Step-by-step instructions with a photo. How to draw a beautiful spring nature landscape with a pencil and paints in stages for beginners? How to draw an easy spring landscape with a pencil for beginners? Light pencil drawings on the theme of spring
What is spring made of? We draw spring in stages.
How to draw a beautiful spring nature landscape with a pencil step by step for beginners?
If you think a little, then spring can be added from:
- Blue sky
- Bright sun
- White clouds
- Green grass and leaves on trees
- First spring flowers
- Merry birdsong
- Buzzing bees over flowers
- Warm spring rain
All this beauty can be drawn in a picture about spring. The landscape should be started by drawing the horizon line. With the horizon line drawn, you can start drawing clouds and sun in the sky and buildings, trees and people on earth.

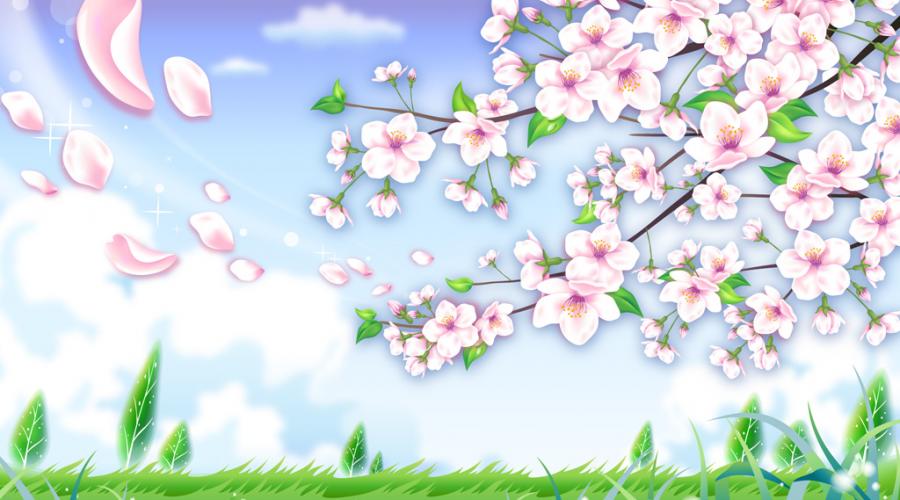
How to draw a cherry branch?
To do this, you can use the technique of phased drawing. Draw a branch first, and then flowers and leaves. Here's how to draw cherry flowers. First, a flower consisting of five petals is drawn, and then the stamens are drawn.

Then the flowers are painted with crayons or watercolors.

VIDEO: How to draw cherry flowers in watercolor?
In the spring everyone gathered and admired the dandelions. And if you draw a picture about spring, then these flowers can be in the foreground of the picture.

To do this, it is enough to draw flowers with cloves on long legs and jagged leaves at the bottom. Then paint the flower petals with yellow and orange-yellow paint.


How to draw a spring landscape?
If in the picture the houses and trees are visible from afar, then the small details of the houses and trees are not drawn. They blend in with the general background and color of the house or tree. Branches and leaves are drawn on trees that are visible up close.

First, the outlines of the tree are drawn, then they are painted over with one color and with the help of a darker green color and shadows, they give the tree a natural look.

VIDEO: How to draw a tree?
How do I draw trees in bloom that are visible from afar?
Flowering trees are painted according to the same principle, but instead of green foliage, there is a pink or white-pink crown. If a pond is drawn next to it, then clouds and trees are reflected in it, but their color is less intense.

If you are drawing a blooming garden with pencils, you can first draw the outlines of the trees, then paint over them with pink and light green strokes, and then paint over the trunks to finish drawing the branches with brown or black pencil.

Pictures can be drawn in a "cartoon" style. Then flowers and birds can be painted without chiaroscuro.

Or draw several large flowers on the general white-pink background of the tree.

How to paint a beautiful spring landscape of nature with paints, watercolors, gouache? step by step for beginners?
It is difficult to paint with watercolors because there is a possibility of paint spreading and mixing of paints of different colors. Good watercolors are needed to help the paint flow less. You can try applying a different color after the first coat has dried.

VIDEO: How to draw a spring landscape?
Children's drawings are not always perfect, but this may be the mystery of their appeal.

How to draw a spring landscape in stages?
First, draw the horizon line with colored pencils, as well as the outlines of the clouds and trees.


Now paint the picture with paints.

Gouache drawings are brighter and more saturated. But drawing with such paints is more difficult because the paints fall on the paper too hard.

But, with certain skills and such paints, you can paint bright pictures. This is what a gouache-painted spring meadow looks like.

Here's how to draw chamomile with gouache. Such skill does not come immediately and real artists hone it for years.
VIDEO: How to draw daisies with gouache?
A flowering tree can be painted with pale pink strokes. Leave the leaf white on the crown of the tree and apply pink-white spots with a wide brush. draw the branches of the trees and the trunk after the crown of the tree is drawn.

How to draw an easy landscape in spring with a pencil for beginners?
Walking in a park, forest or meadow in spring can give you a good mood and inspire you to paint beautiful pictures about spring. And it would be nice to take pencils and a sketchbook right for a walk and try to draw a landscape from nature.

But, you can draw from memory. Or, turning on your imagination, draw unprecedented trees and flowers.

The pencil spring landscape includes blue skies, green trees and grass, and a body of water that reflects the sky.

It is not necessary to achieve similarity with the surrounding world, the main thing is that the drawing is interesting and bright.

Spring landscape "Bee and flowers"
Simple and light and beautiful landscapes of spring: drawings for sketching
Can you imagine spring without blue skies, green meadows and dandelions? All this beauty is easy to draw with pencils or paints.

Cheerful singing of birds in spring can also inspire painting about spring.
Spring landscape "Smiling flowers and the sun"
It is not necessary to carefully draw every leaf and blade of grass. With wide enough strokes to convey the volume and color of the road of grass and trees.

You can paint a lot of sky, a green field and a wonderful spring landscape is ready.

It can also turn out if flowering trees are drawn with pink circles.

If you insert a child's drawing into a beautiful frame, you will get a wonderful picture that you can use to decorate your house.

VIDEO: How to paint a landscape with watercolors?
A bird on a branch
This work will be done in watercolor. In advance, you should prepare a sheet of watercolor paper (for example, you can take FONTENAY 300 g / m², cotton), brushes: a large flat squirrel, as well as round columns No. 6.
After transferring the sketch with a flat soft brush, water should be applied to the background (while doing this, try very hard not to touch the outlines of the bird and the flowers, the flowers should remain unpainted almost until the very end of the work).
Apply color spots quickly to a damp surface, for them use a mixture of green, ocher, ultramarine and a small amount of purple-pink. Your goal is to achieve a background that is varied in color, but at the same time quite blurry.
While the paint is still wet, apply drops of alcohol on the background with a miniature brush. This will allow the painting to acquire an additional striking effect of sunbeams.
So, the background is finished, the following manipulations must be carried out with the leaves. They should be worked out on dry paper. With a medium brush, apply all the same shades as for the background, adding only the cobalt blue.
The next in line is the main character of our work. To color the bird, use iron oxide red ocher, light red and green again, ocher and cobalt blue. If the background around the bird needs to be made darker, then you will need to apply water to the right place in advance, and then touch it with paint. Remember that cotton paper allows the paint to flow great no matter when you wet the sheet. And, of course, don't forget about the alcoholic treatment: small round white specks will allow your creation to shimmer beautifully.
Use sepia for the eye, beak and legs, for the branch - a mixture of violet-pink and sepia. Do not forget about the shadows on the bird, make sure that in some places it is darker than the background, and in some places it is lighter.
In some places, the background surface will need to be "strengthened", but do not forget about moisture. In parallel with this, very carefully touch the flowers, for them take a mixture of purple-pink with ocher.
Take care of the flowers very carefully at the very end, for them mix ocher with violet-pink, as well as ocher with ultramarine.
Teachers and parents will be interested.
How to paint a spring landscape with oil paints
It should be noted right away that working with this type of paint requires experience and certain skills. Oil paints are rich and thick, but it is precisely these properties that make it possible to create real masterpieces of painting.
The landscape should be done on special cardboard or canvas. Previously, the canvas should be covered with a special primer, the quality of which will determine the final result. Let's say right away that it will not work to write on an unprocessed canvas - the paint will simply eat away at the material.
In this type of painting, rather hard brushes are used, they should be prepared in sufficient quantity, because in the process they are not washed. It is obligatory to have a palette knife - a horn or steel knife, which is used to clean the palette, mix colors, and also remove excess layers of the coloring composition from the canvas. The palette is used to create the desired colors.
In order for the child to better understand the world in which he lives, at home, in preschool and school institutions, the seasons, their names, months, their order are studied with him.
Each season has its own and kids like to draw each of them. To help your child depict spring, you need to look at the ready-made pictures drawn for children. So the child will understand what should be paid attention to.
How can you draw spring for children?
It should be explained to the kids that spring is a time of bright colors and unrestrained imagination. Which you need to give free rein and draw a masterpiece. For smaller children who do not yet know what various artistic techniques are, you can try to draw the simplest and most uncomplicated drawings of spring. For example, yellow dandelions on a green lawn.

When we draw spring with children in stages, we can depict various signs of this season that are familiar to a child - starlings that have arrived in a birdhouse, running streams, remnants of melting snow, the first leaves and snowdrops. Everything that the young artist's fantasy tells can be embodied on a sheet of paper.

How to paint spring with paints?
Both small children and more experienced artists can paint with paints. Toddlers are more likely to work with watercolors or gouache, although different materials can be used.
Before starting to paint, you should draw a sketch with a simple pencil. All lines are drawn without pressure, so that, if necessary, you can correct the image without prejudice to the picture.
Paints can be applied directly from the tube or mixed to achieve the desired color in the palette, and can also be thinned with a little water for a soft pastel shade.
After one color has been applied, it is necessary to wait for it to dry completely, and only then proceed to the next shade so that the colors do not smudge, especially for small details.
 |
 |
When we draw spring with children, the child's memory and attention are trained. He remembers what colors certain objects and plants have, their names. Children with well-developed artistic abilities can paint such landscapes that they just fit to decorate the walls in the room or give them as a souvenir by sending
Drawing spring elements with a pencil.
Spring is the most beautiful time of the year. In spring, nature wakes up, birds fly in from warm regions, the sun shines brightly and gives all the warmth to us. During this period of time, each person changes a little, shakes himself up from the winter frosty weather. Often I want to depict spring on canvas of paper, and together with it all the beauty.
If you have never been seriously interested in drawing before, this is not a big deal. We offer you and your children several methods, thanks to which you will be able to draw a landscape, and even an image of a person, after a few workouts.
How to draw spring with a pencil step by step for beginners and children?
First, you need to stock up on special accessories that will be useful to you while drawing, namely:
- Paper. Give preference to the A3 format. But as a beginner, you can also use an A4 sheet.
- Tablet. To do this, you can take an ordinary wooden board or plywood of medium thickness. You will attach a piece of paper to this tablet.
- Clips and buttons.
- Various pencils. For the initial stage, you will need a hard pencil, and for the final design, a softer one.
- Office knife. With this you will sharpen your pencils.
- With an eraser. But don't overuse it. With an eraser, you can depict the highlights.
Spring landscape is the perfect drawing that you can present to mom, grandmother, sister. Whatever image of spring you decide to draw, be it spring drops, flowers or trees, all these elements imply a combination of individual details (lines, shapes, strokes).
It is these details that allow you to create the integrity of the entire picture. So, let's start working miracles.
The first version of the spring landscape:
- Draw the horizon and the road on a piece of paper. Draw the horizon not in the center of the picture, but a little higher. Add two elongated and curved rulers that should connect away from you. Draw some large ovals on the paper - these will be stones, and place them along the edges of the road wherever you like. Draw three bushes in the picture, depicting them in wavy lines. This way you define the carriageway.
- Draw trees in the picture. Draw a tree and twigs on the left side of the picture, plus bark (it should have elongated vertical stripes). To depict the birch on the right side, you need to draw small lines horizontally, but its trunk should be slightly smaller than the trunk of the first tree.
- When you fill in the birch bark, you should know that the stripes on the trunk should only be horizontal, not vertical. The resulting trees will look bare, add leaves accordingly. You will learn how to draw them in the next step.

- Add the leaves. Draw a wavy ruler along the paper so that it sits slightly above the horizon. This will indicate the tops of all trees that are far away. Draw twigs on the trees - make them a little curved. Draw a lot of leaves and place them wherever you want on the branches. Your imagination should work here. Place one tree in the distance in the picture, and another bush near the road. Draw oblong shapes on the roadway, resembling large boulders.


- Draw the road in every detail. Draw the lines so that they are slightly parallel to create a rut on the road. Add some grass near the edge of the driveway, around it, and near each bush. The grass should be vertical or with a minimum slope.

- Sketch some parts of the picture. Shade the area between the horizon line and the top area of the trees. Use the same method to shade the bushes along the road. Draw some short grass-like stripes on the road.


The spring landscape is ready!
The second version of the spring landscape:
- First, outline the frame of your painting. Step back from the edges of the sheet, make a frame with a ruler (there should be a distance of approximately 5 mm from the edge). Then draw a curved line on the paper at the bottom of the painting. Slightly to the right, draw two curved lines - short and small. These rulers will represent the land where the entire landscape will be located.

 Picture frames, ground
 - Draw the trees. Using lush waves, show the trees in the picture, arrange them on the left side. Add paths and paths running away into the distance.
- Draw houses with roofs and windows near the trees.


- Near the houses themselves, using special ornaments, depict thick Christmas trees standing on both sides of the houses. Draw clouds in the sky using wavy lines.
- Draw a close-up of the grass in front. Draw them sharp so that they grow in different directions. Vladi draw freestanding bushes and trees. Maybe you want to show poplar in the picture, then add a tall and rather lush crown to the trees at the top.

- In front of the landscape in the grass, draw a variety of flowers, but only those that bloom with the arrival of spring.

- The picture is almost ready, but it does not yet have bright colors. If you want the drawing to please you and your loved ones, be sure to color it. Make the trees with bright red foliage, the sky is blue, the houses are brown. In general, show your imagination and you will definitely get the perfect gift.

How to draw a spring girl with a pencil for children in stages?
The frosty winter is over, and a warm spring has come to replace it. The bright sun, singing birds, flowers - all this sometimes inspires to draw a spring girl.
You have decided to draw a beautiful spring girl, but you do not know how to depict her in the picture, then use our tips: draw one girl in a beautiful full-length dress, and depict the second as a cute face and decorate her to your liking.
First option:
- Draw a diagram of your spring, or rather the pose you want it to be in. In doing so, you must take into account the anatomy of the human body. Remember, the person's head should be 1/7 of the body, elbows and knees should be in the center of the arms and legs. The ridge should bend towards the front.
- Draw the volume of the body. The figure of a woman is very similar to an hourglass, keep this in mind when drawing the body of a spring girl. In order to make your drawing more realistic, consider many anatomical parameters of the body. If you decide to draw a girl with pubescent hands, the palms of the hands and the beginning of the legs must be at the same level. Make sure that your elbows are on the waistline.
- Draw the female body using smooth lines with streamlined shapes. Typically, the shoulders are 1/2 of the head. Draw smooth lines from the neck, passing into the shoulders, and then into the arms. Women's hips are wider than in the silhouette of a man, but the calves of the legs are more graceful. The foot is the size of the face.
- The most important and important point is the drawing of the upper part of the girl, or rather her head. There are some small details and strokes that you need to paint carefully. Draw the facial contours with a pencil under the number H3. From the very beginning, sketch out the eyes, nose and lips, and after that you can depict small elements. The distance between the right and left eyes should be the size of one eye. The extreme points of the mouth are located in the middle of both eyes. When drawing the nose, pay special attention to light and shade and feathering. Apply them when you draw cheekbones, dimples, chin.


- Draw the girl's hair with a B6 pencil. You will get natural and softer lines.
- Now you should think about the girl's clothes. Use rendering. Here you have to mark the folds of the clothes, formed from the figure or posture of the model. If your spring is in a half-turn, then folds will appear at the waistline on the outfit. When depicting a dress, you must imagine how the outfit will slowly fall from the girl - you must convey this on paper.
- Very often, many novice artists do not know how to draw palms and fingers. Yes, it is very difficult to depict the correct position of the hands and fingers on paper. Use your own hands, let them become a model for you and feel free to draw.
- Finish the drawing with the background. Since you and I are drawing a spring girl, then depict her against the background of nature. To do this, you can apply the first two drawings with spring landscapes.
Second option:
- Draw the circumference of the head. Just make sure that you get not an even circle, but a circle stretched a little down and a little up. Draw curves in the resulting circle. Make sure to keep the proportions and get the perfect result.
- Add additional additional elements (a pair of diagonal lines and dots).
- Now you can draw the face of the spring girl. First, paint the facial contours and neck of the model.
- Using additional rulers and suitable points, draw the girl's eyes.
- Add long eyelashes to the eyes. Now the resulting look from the girl looks more expressive.
- Using additional diagonal lines draw the eyebrows.


- Start at the top point, which is on the vertical ruler, and draw the nose, bringing the line to the near point.
- At this stage, draw the lips of the girl. In this case, you can focus on an additional line, which is located horizontally, and on four points.
- The face of the spring girl is ready. You only have to add some elements and remove additional rulers with the eraser. Do this very carefully, do not touch the main lines.
- Draw the girl's hair. You will need guide lines. It is for them that you will have to bring out the entire hairstyle of your beauty. In the hair, draw small flowers, leaves and other elements that are associated with spring.
Video: Drawing process "Girls of Spring"
Drawings with children in pencil on the topic: spring has come
Many parents rack their brains and try to find methods of drawing spring. In our material you can find several good options on the theme "Spring has come" and embody ideas with your child on a piece of paper.
The first option - "Sakura has blossomed":
Let's draw with you a pencil drawing on which we will depict a branch and a sakura tree. Sakura is a symbol of spring. When this plant blooms, it gives us its beauty and magic. So, let's get to work:
- You can start drawing a blossoming sakura branch. Draw on it many small flowers and several flowering inflorescences.
- First, draw the petals, inside there will be a circle with stamens.
- Next, draw several opening buds above the drawn flower.
- Then came the next color.
- The last will be a branch, do not forget to draw unblown buds at the end.
- At the edge of the branch, draw flowers that are already in full bloom.


Let's also try to draw a whole sakura tree, because it will be much better.:
- Drawing a tree is not at all difficult - you just need to draw a circle and a trunk with branches to begin with. The circle will help us outline the boundaries of future branches.


- Now draw additional ones from the main branches until the tree is lush and beautiful. Here's how in the picture.

- Continue drawing branches, which should now go from the trunk itself and intertwine with the branches already drawn. Do not draw the branches straight - they should be winding, the lines - from thick to thin.

- The drawing is almost ready, you just need to delete the auxiliary lines and draw the main ones.

- You can leave the drawing in black and white, but in the spring you really want bright colors and joy. Let's decorate it. As a reminder, sakura blossoms pink.


Video: Drawing sakura with a pencil in stages
How to draw a spring snowdrop with a pencil?
- First, sketch out your snowdrop - the outline of the stem and bud.
- Next, carefully draw each element: draw petals on the bud, leaves on the stem.
- Once you are done drawing the strokes, erase the additional lines with the eraser.
- Shade some parts of the flower, shade it and give the whole picture volume.

Everything. Your flower is ready.
Video: Drawing snowdrops with a pencil in stages
How to draw a spring tulip flower?
- First, draw a vertical ruler, maybe a little curved. In the future, you will get a tulip stem from it. Add an oval bud on top. Make all the lines thin, almost invisible, so that later you can easily erase them.


- Sketch the leaves: use a thin stripe to draw the silhouette of an irregular tulip. Draw one sheet of paper curved slightly at the bottom.
- Draw the stem very carefully and smoothly.


- Start drawing the petals of the flower, however, you need to keep the shape of the bud.


- Take colored pencils. Choose a bright red pencil for the bud, and a bright green for the leaves and stem. Color all areas with your chosen shades.
- First, shade the areas with pencils, light even shades, leaving no gaps. Stroke along the elements, but not across. You should have uniform and light colors.

- Shade some elements of the petals, overlay the color of the pencil in several layers.
- Shade the stem and leaf on the inside. You can use the same pencil.
- To make your flower more realistic, apply shaded touches in some places to make the tulip look three-dimensional.

Video: Drawing tulips with a pencil in stages
How to draw a spring daffodil flower?
- Sketch it. Draw a circle by hand, the diameter of which should be about 8 cm. Place three small circles at the top on the right side - these will be the places where the daffodils bloom.
- Next, arrange the flower buds. In the middle of the small circles, sketch out the petals, but do not draw them, just sketch out the shape. Draw the curls with thin lines in any order.
- Draw flowers, highlight every detail. Place the curls and the wreath itself.
- Draw small flowers around the circumference of your wreath.
- Decorate the petals with veins like live daffodils. Everything. You just have to paint the drawing.


- Finally, let's draw another daffodil, which turned sideways.

Video: Drawing daffodils with a pencil in stages
Drawing is one of the few ways available for a small child to express themselves and demonstrate their inner world to others. In the process of creating an image on paper, the baby learns to concentrate, focus and accurately draw thin lines, which, of course, has a beneficial effect on the development of his intellect, as well as spatial-figurative and abstract thinking.
In addition, it is in the drawings that little boys and girls express their attitude, emotions and associations that a particular phenomenon arouses in them. Often, it is much easier for children to reflect their thoughts on paper than to formulate and convey in words.
It is for these reasons that children's visual arts are encouraged in all schools and kindergartens. In these institutions, exhibitions and competitions of works by pupils and students are often held, timed to a specific topic. In particular, the seasons are a favorite theme for creating personalized masterpieces.
With the arrival of each of them, boys and girls are very often given the task to draw how the child sees the changes taking place in nature. This can be done in various ways. In this article we will tell you what can be children's drawings on the theme of "Spring" with paints and pencils, and what associations are most often evoked in children and adults this time of year.
Children's drawings about spring in pencil and paints
Of course, in such drawings, children try to reflect what they see on the street while walking. Most often, the arrival of spring is associated in babies with the appearance of a bright sun in the sky, melting of snow and ice, the appearance of the first green leaves and grass, the return of migratory birds to their native places, and so on.
As a rule, children's drawings on the theme "Early Spring Has Come" are a landscape in which the transition from a cold snowy winter to a warmer season is clearly traced. At the same time, a bright sun is shining in the sky, the first snowdrops are breaking through from under the snow, and the fast river, which is no longer bound by a thick layer of ice, carries away the remaining small ice floes.
In addition, the arrival of spring can be associated with the Shrovetide holiday for kids, since on the last day of Shrovetide week, adults and children see off the cold winter and meet the next season. Although this holiday is mostly celebrated in February, it is inextricably linked with the onset of spring and can be used as the main idea of children's drawing.
In early spring, International Women's Day is also celebrated - 8 March. On this day, it is customary to give women beautiful flowers and gifts, so a child can create a beautiful one with his own hands and hand it over or You can draw it with pencils, paints or any other tools immediately on a sheet of cardboard or on paper, which should later be glued to a cardboard base postcards.
In general, the "flower" theme is the main idea of all such drawings. It is in spring that nature begins to play with new colors, and all plants come to life. The vast majority of flowers bloom and bring great joy to adults and children.
A drawing about spring in kindergarten can be an image of a single flower, bouquet or composition, as well as any plot situation associated with the onset of this time of year. So, a child can portray himself while walking with his mother and describe all that is happening at this time with nature.
In our photo gallery you can see examples of drawings made by children on the spring theme.
 |
 |
 |