Interesting wish tree options for your wedding. How to make an unusual wedding wish tree with your own hands A wish tree for a wedding
Read also
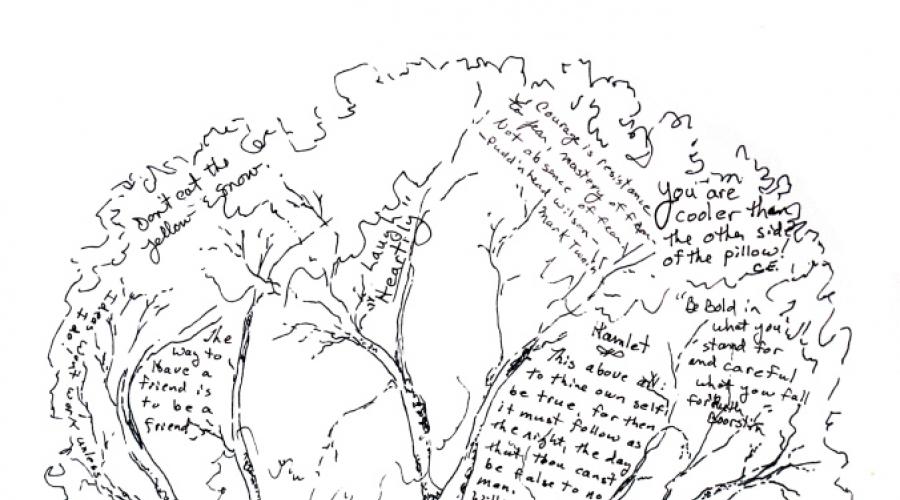
At weddings, it has become fashionable to leave guests' fingerprints on the wish tree. However, there are few beautiful templates on the Internet. In the article 10 tree templates for leaving prints with wishes for the newlyweds and step-by-step instructions on how to make a wishing tree with your own hands. Templates can be downloaded in large sizes.
In addition to the template itself, printed and placed in a frame, you will need stamp inks. These are easy to find in a craft store or for artists. Even in Auchan they are sold in the children's department. Buy paints in three or four colors. The drawing will be brighter and more colorful. And don't forget to provide wet wipes so guests can wipe off paint from their fingers. You can put a test piece of paper on which guests can practice leaving fingerprints.
In addition, you will need pens of different colors so that guests can sign their fingerprints. You can ask guests to leave a couple of congratulatory words in their fingerprints. For example, wealth, prosperity, love.
So, how to make a wishing tree with your own hands:
- Decide on the size of the tree and buy the appropriate frame. The size must be at least A3 so that all wishes fit. Only if the wedding is for a narrow circle of relatives, about 10 people, then you can get by with a tree the size of a sheet of office paper. It’s better to choose the wish tree template you like in advance to be sure that the file size and length-width ratio will allow you to fit it into the purchased frame.
- Print a template to fit the frame. Large format printing is common these days, so this won't be a problem.
- Insert the template into the frame, but remove the glass first. There must be access to a sheet with a drawn tree.
- Place a frame with a wishing tree on a separate table at your wedding. Place paints, pens and napkins nearby.
- Inform guests during the holiday program that they can come to the table and leave their wishes and fingerprints. Or leave a frame on the table with an explanation that everyone is invited to leave a piece of their kind thoughts on the wish tree.
Templates at the end of the article.
After all the prints have been left, you can return the glass to the frame.
You can download wish tree templates for free. Below are 10 large size wishing tree templates. Just click on them, open them in a new window and download the template.
Useful tips

Wishing tree templates. Enlarge by click!


I offer a master class for future brides and grooms on making a wish tree. Simple and priceless!
I think that such a masterpiece will take pride of place in the newlyweds’ family nest and will be proudly displayed many years later.
What do you need to prepare to bring the idea of the “Wish Tree” to life at your holiday?
- You need paper. Can be in A4 format. I would prefer a larger size, for example A3. This question is at your discretion. However, it seems to me that if many guests are invited to a wedding (and sometimes up to a hundred or even more!), then in order for everyone to have enough space, an appropriate canvas is needed.
- Think about what the template will be. It is not at all necessary that it be a tree, where the leaves will be fingerprints of guests. You can come up with your own sketch: silhouettes of lovers surrounded by colored prints, or these same prints as balloons, or as a rainbow, etc.
- You can draw the template yourself or ask someone who is better at drawing techniques. You can apply it with a brush, a pencil or even a gel (ballpoint) pen. However, in order to make life easier for future newlyweds, at the end of the article I suggest downloading several templates for the “wish tree”.
- If you downloaded my templates or found a picture on the Internet that matches your needs, then print it out.
- Next, you will need stamp pads in the desired colors. It is their palette that will determine the color of the leaves on wedding tree desires. You can get them in scrapbooking stores, at “Everything for Drawing” stores, or you can view and order them through online stores. On my life’s journey I have come across the following types of stamping inks from the famous Japanese company Tsukineko: pads of the Versacolor, Memento, StazOn, Opalite, Brilliance, VersaFine, Encore Ultimate Mettalic series. See pictures below for clarity.
- Prepare several pens, preferably gel-based ones, and wet wipes for your hands. The latter, of course, will not get rid of stamp inks on your fingers, but they will not be superfluous. This paint is permanent, so it will only come off over time, after repeated hand washing with soap.
- Inform guests: at the wedding banquet, tell them what a “wishing tree” is and what should be done with it. Show by your own example! Dip your finger into the pad, leave your fingerprint on the canvas and use a gel pen to write your names side by side.
When Wishing Tree will be ready, when everyone has “signed” on it, then the canvas can be inserted into a frame. Nowadays various photo frames of all sizes and styles are sold, but I would recommend contacting a framing shop.


You can download examples of templates for a Wish Tree for a wedding directly from my website:


For those who are busy preparing for a wedding, I advise you to read the following articles.
The process of preparing for a wedding is accompanied by a search for memorable gifts for the newlyweds. How you choose a surprise for the bride and groom depends on your imagination. It’s a great idea to make a souvenir with your own hands, because it’s nice to receive such a surprise. A wish tree is considered an original wedding gift: it serves to ensure that all guests can leave their wishes to the wedding heroes. A DIY wedding wish tree is easy to make. How to make this souvenir yourself?
How to make a wedding wish tree with your own hands?
To create a wedding souvenir for the newlyweds yourself, you need to stock up on available materials and use your imagination. Think through all the details of your craft, consider several possible souvenir options, and only then start creating it. There are several varieties of this gift: paper, wire, created using living branches. Let's look at how to create each variety, as well as the necessary materials.

Paper wish tree
A paper souvenir is the best option for a wedding. It can easily fit on a banquet table, where all guests can leave their wishes to the newlyweds. Plus, you don’t need to put in a lot of effort to give this priceless gift.
What materials will you need?
To make a paper craft, you need to purchase high-quality paper, as well as a frame into which the template will subsequently be inserted. The size of the frame depends on the sheet format. You will also need bright plug pillows, a pen and napkins in the future. It is worth saying that ready-made templates for this paper souvenir are now available for sale.

Stages of creation
Follow the step-by-step instructions to help you make a wonderful paper product:
- Draw the trunk, as well as the branches, let the plant symbolize the newlyweds who are creating a young family. It is advisable to sketch with a black pencil or felt-tip pen. In addition, you can buy or print the plant templates you like.
- Insert the template into the frame. It would be nice to decorate the finished craft with beads, artificial flowers, and ribbons - this will make it original.
- During the celebration, guests take turns writing their wishes on a branch, after which they leave a fingerprint using stamp pads. Don't forget to place napkins nearby so guests can wipe off any remaining paint from their fingers.
If you have difficulty creating a paper tree, watch the video master class, which clearly describes step-by-step instructions for creating a wish tree with your own hands:
To ensure that this special moment remains in the memory of the newlyweds for life, take a photo or video during the process of guests leaving wishes. Viewing wedding photos and videos is a great way to refresh your impressions.
Paper tree templates
The template is the basis of the craft. As mentioned above, you can draw templates yourself or print ready-made ones. If you're not good at drawing or don't have time to create a template by hand, use the templates below. Color the black and white templates, decorate them with stylish decorative elements - and you will have an unusual craft!


Wire tree?
This option is as simple as paper. To create it you need a minimum of materials that can be found in every home. In addition, the process of creating a product will not take much time.

Necessary materials
To make such a tree, you will need a small glass or vase, where the tree structure will subsequently be placed. The composition is created using a bundle of thin golden fishing line and pieces of wire. Also purchase corrugated cardboard, double-sided tape, artificial glass flowers or birds for decoration. Additional materials are scissors, rice, stapler, colored paper - all of them will help you bring your idea to life.

Stages of creation
Step-by-step instructions will help you make a craft using wire for a wedding yourself:
- Fill a vase or glass with rice. Wrap the container in a rectangular piece of corrugated cardboard and secure it with tape or a stapler.
- Next, create sheets of paper where those present at the wedding will write their wishes. Cut out cardboard and paper hearts, the number of which should be equal to the number of guests at the wedding.
- Attach cardboard and paper hearts to each other using glue. In the upper part of the heart, make a small hole through which you need to thread a piece of wire. Thanks to it, the heart will be attached to the tree structure.
- Place decorative ornaments such as birds or flowers on long pieces of wire. They should be attached to the wire using tape or glue.
- Insert a bunch of golden fishing line into the vase, which will serve as the basis and decoration of the composition. Next, insert a wire with decorations at the end. Hearts for wishes must be hung on fishing line or wire.
As you can see, a DIY wire wish tree for a wedding is easy to make; you just need to acquire the necessary materials and be patient.
Tree of living branches
An original and special souvenir created using living branches will complement the wedding ceremony and surprise the guests. The fashion for such a tree came to us relatively recently. More and more newlyweds prefer to decorate their wedding with this craft, which is made from natural materials. To create it, you will need available materials, which you can purchase at any stationery store. Let's take a closer look at what you need to buy for your wish tree.

Necessary materials
The main element you will need is a few living branches. Their length should be approximately 1 m. Clean them from hard bark growths, if any. To paint the branches, buy a regular spray with gold or silver paint. You will also need a vase, decorative stones, sheets of thick colored paper, ribbons, and a hole punch.
Stages of creation
Let's look at how to make a wish tree from branches with your own hands for a wedding. Follow the detailed step-by-step instructions:

- Spray the cleaned branches and leave them to dry.
- Fill the vase with decorative stones. Insert dried branches into it. Make sure they are stable in the vase.
- Cut out paper hearts or cards for guests to write wishes for the newlyweds.
- Use a hole punch to make holes in the leaves. Thread the pieces of ribbon through them and tie them.
- Hang leaves for wishes.
It is advisable to make a corresponding sign next to the wish tree. Don't forget to place pens or markers next to the vase so that guests can leave wishes.
Pictures of trees
To make the craft beautiful, look at the pictures of the finished souvenirs. In addition, the pictures will become a source of fresh, original ideas if you are not able to come up with the design of a wish tree yourself.

If you have a major celebration coming up, then questions about the location of the celebration and the list of guests have probably already been resolved. But how to complement and diversify the holiday? How to stand out from the crowd and create a fabulous atmosphere? A three-dimensional tree for wishes, made by yourself, will come to the rescue in solving these issues.
Trees for wishes come in different types: on posters, with fingerprints and others, but in our article we are talking about the classic version, stylized as a real tree. Special tags of different formats and colors are hung on it, with wishes from the guests. The number of cards must match or even exceed the number of invitees.
Advanced event agencies and decor studios have long been using such art objects to decorate events, but they charge huge sums for handmade items. After studying this master class, you can make an amazing tree yourself for up to $5.
List of required materials:
tree branches; clamps; white and silver/gold spray paint; flower pot 3 liters; 1.5-2 kg of gravel or stones (liter jar); alabaster 2 kg; water; silicone hot glue in a gun; PVA; corrugated paper; scissors; hole puncher; lighter and candle; tape 5 cm - 3 meters; tape 0.5 cm - at the rate of 20 cm per 1 tag; pieces of fabric for decorating the base; half-cardboard colored A4 - at the rate of 1 sheet for 6 tags; white/colored paper - at the rate of 1 sheet for 6 tags; ballpoint pens; small box - for delivery; half beads, any glass beads for decoration;
Wood processing
You should start by selecting a high-quality basis for future design know-how, namely, carefully consider all the plants growing around your house. Acacia is ideal. The branch you choose should resemble a real tree: thick at the base and branching into many tiny branches towards the end.Advice! Break off the branch as close to the base as possible. You can stock up on a few copies just in case.
Next, we place the branches in the hottest place in the house or on the street so that the greenery wilts and the inside dries out (2-5 days). After which they must be cleared of leaves and buds, minimally damaging the bark and the smallest shoots.

We open with the first layer of white spray paint. Everything should be applied from 4 to 7 layers, depending on the degree to which the desired effect is achieved, with breaks until each layer is completely dry. Some branches in the finale can be shaded with silver or gold.

After finishing painting, you can start “planting” the tree in a pot. To do this, pour 1 kg of alabaster into a pot, pour in water in portions and stir until smooth, the consistency of thick sour cream. Having mixed thoroughly, pour out the crushed stone and press it into the alabaster, stirring gently.


We clamp the painted branches in three places at the base, with an interval of 10-15 centimeters, with clamps and lower them into the pot. At this stage the layer of alabaster and stones should be approximately halfway up the pot. We install the tree as needed and let the mixture harden - 6-8 hours. During this period, it is best to support the tree on both sides so that it does not lean, or hang it upward using threads, hooking it onto a cornice or chandelier.

Advice! If the clamps are too noticeable, they can be painted over with leftover paint from the spray can.
When the bottom layer of alabaster has completely hardened, dilute another 1 kg of the same mixture in a separate bowl and carefully pour it on both sides of the tree. We are waiting for complete hardening and proceed to decorating the base and branches.

The easiest way is to cover the unevenness of the alabaster with artificial moss/plants or fabric. Our version uses a rectangular piece of chiffon fabric. We bait it with thread into folds and wrap it around the trunk.

Advice! Secure the baited folds at the base with a clamp or thread so that they do not come out.
We glue the remaining edge of the fabric with hot glue along the inner contour of the pot, tucking the cut area inward, and laying out the folds evenly and beautifully.
We decorate the pot itself with a ribbon and a bow using a glue gun.

In addition, roses made of corrugated paper or ribbons can revive the branches until wishes appear on them. The creation of similar roses has been described dozens of times on the Internet, use any master class. It is convenient to attach roses using hot glue.

Advice! You should not make them too many or large; remember, they are just an addition to the main purpose of the tree.

Tags for wishes
The card on which guests will write can be of any shape and size. To save paper, we suggest investing in dimensions of 10*10 cm. This will allow you to create 6 tags on one A4 sheet. The easiest way to do this is on a computer in programs such as Microsoft Word or Photoshop, depending on which one you are more comfortable with. Let's describe the capabilities for Microsoft Word.Open a new document and go to the "Insert" tab.

Select the “Shapes” item and the appropriate model in the menu that appears. Draw the shape you like.

If you do not accurately specify the dimensions manually, you can correct them by right-clicking on the object in the “Auto Shape Format” menu.

In the “Size” tab, set the parameters 9 cm by 9 cm, and the figure will change automatically.

After that, add the text and all the inscriptions that you want to see on the front side. As a rule, the first letters of the first and last name, the date of the celebration, and other key points are located here. After that, copy the object several times.

Place 6 identical cells on a sheet and print on colored half-cardboard. Set the number of A4 copies in accordance with the desired number of cards. Then we cut along the line.

It’s difficult to adjust the layout of the back so that when you turn the sheet over, it prints evenly, but we don’t need that. The reverse side, on which guests will take notes, can generally be left as is. Or download their template online and print 6 units on plain paper and cut it out again. Set the number of A4 copies in accordance with the desired number of cards. Next, we glue both parts together using PVA and place them under a press, having previously lined them with newspapers so that moisture is absorbed.

We wait for it to dry completely, take it out from under pressure and make holes in the upper part of each tag with a hole punch. If you don’t have a curly one, then a regular one for binders will do, only instead of two holes you put the tag under one.

We arm ourselves with 0.5 tape. We divide it into the required number of segments, based on calculations of 15 cm per 1 tag. After this, we singe the edges of the tape on both sides.

Advice! If the amount of work is large, it will be convenient to use a candle instead of a lighter.

We pull the piece through the hole in the tag and fasten it with a glue gun. The card is ready!
Handles and stand
To complete the picture, you can also decorate the pens with which guests will write.
Just wrap them with the remaining tape or fabric, securing them with silicone glue in stages.

You can place a large number of tags in a beautiful box. Make it from ribbons and corrugated paper.

Advice! Think in advance about transporting such a large object, and if time and opportunities allow, then install it initially in the celebration room. In our case, transportation was carried out in the trunk of a station wagon.
It is best to place the tree on a table, in a visible place. Be sure to inform guests of its availability and offer to fill out the tag. And soon your home will be decorated with a beautiful hand-made art object.

We wish you a happy holiday and best wishes.
The process of preparing for a wedding is accompanied by a search for memorable gifts for the newlyweds. How you choose a surprise for the bride and groom depends on your imagination. It’s a great idea to make a souvenir with your own hands, because it’s nice to receive such a surprise. A wish tree is considered an original wedding gift: it serves to ensure that all guests can leave their wishes to the wedding heroes. A DIY wedding wish tree is easy to make. How to make this souvenir yourself?
How to make a wedding wish tree with your own hands?
To create a wedding souvenir for the newlyweds yourself, you need to stock up on available materials and use your imagination. Think through all the details of your craft, consider several possible souvenir options, and only then start creating it. There are several varieties of this gift: paper, wire, created using living branches. Let's look at how to create each variety, as well as the necessary materials.
Paper wish tree
A paper souvenir is the best option for a wedding. It can easily fit on a banquet table, where all guests can leave their wishes to the newlyweds. Plus, you don’t need to put in a lot of effort to give this priceless gift.
What materials will you need?
To make a paper craft, you need to purchase high-quality paper, as well as a frame into which the template will subsequently be inserted. The size of the frame depends on the sheet format. You will also need bright plug pillows, a pen and napkins in the future. It is worth saying that ready-made templates for this paper souvenir are now available for sale.
Stages of creation
Follow the step-by-step instructions to help you make a wonderful paper product:
- Draw the trunk, as well as the branches, let the plant symbolize the newlyweds who are creating a young family. It is advisable to sketch with a black pencil or felt-tip pen. In addition, you can buy or print the plant templates you like.
- Insert the template into the frame. It would be nice to decorate the finished craft with beads, artificial flowers, and ribbons - this will make it original.
- During the celebration, guests take turns writing their wishes on a branch, after which they leave a fingerprint using stamp pads. Don't forget to place napkins nearby so guests can wipe off any remaining paint from their fingers.
If you have difficulty creating a paper tree, watch the video master class, which clearly describes step-by-step instructions for creating a wish tree with your own hands:
To ensure that this special moment remains in the memory of the newlyweds for life, take a photo or video during the process of guests leaving wishes. Viewing wedding photos and videos is a great way to refresh your impressions.
Paper tree templates
The template is the basis of the craft. As mentioned above, you can draw templates yourself or print ready-made ones. If you're not good at drawing or don't have time to create a template by hand, use the templates below. Color the black and white templates, decorate them with stylish decorative elements - and you will have an unusual craft!
Wire tree?
This option is as simple as paper. To create it you need a minimum of materials that can be found in every home. In addition, the process of creating a product will not take much time.
Necessary materials
To make such a tree, you will need a small glass or vase, where the tree structure will subsequently be placed. The composition is created using a bundle of thin golden fishing line and pieces of wire. Also purchase corrugated cardboard, double-sided tape, artificial glass flowers or birds for decoration. Additional materials are scissors, rice, stapler, colored paper - all of them will help you bring your idea to life.
Stages of creation
Step-by-step instructions will help you make a craft using wire for a wedding yourself:
- Fill a vase or glass with rice. Wrap the container in a rectangular piece of corrugated cardboard and secure it with tape or a stapler.
- Next, create sheets of paper where those present at the wedding will write their wishes. Cut out cardboard and paper hearts, the number of which should be equal to the number of guests at the wedding.
- Attach cardboard and paper hearts to each other using glue. In the upper part of the heart, make a small hole through which you need to thread a piece of wire. Thanks to it, the heart will be attached to the tree structure.
- Place decorative ornaments such as birds or flowers on long pieces of wire. They should be attached to the wire using tape or glue.
- Insert a bunch of golden fishing line into the vase, which will serve as the basis and decoration of the composition. Next, insert a wire with decorations at the end. Hearts for wishes must be hung on fishing line or wire.
As you can see, a DIY wire wish tree for a wedding is easy to make; you just need to acquire the necessary materials and be patient.
Tree of living branches
An original and special souvenir created using living branches will complement the wedding ceremony and surprise the guests. The fashion for such a tree came to us relatively recently. More and more newlyweds prefer to decorate their wedding with this craft, which is made from natural materials. To create it, you will need available materials, which you can purchase at any stationery store. Let's take a closer look at what you need to buy for your wish tree.
Necessary materials
The main element you will need is a few living branches. Their length should be approximately 1 m. Clean them from hard bark growths, if any. To paint the branches, buy a regular spray with gold or silver paint. You will also need a vase, decorative stones, sheets of thick colored paper, ribbons, and a hole punch.
Stages of creation
Let's look at how to make a wish tree from branches with your own hands for a wedding. Follow the detailed step-by-step instructions:
- Spray the cleaned branches and leave them to dry.
- Fill the vase with decorative stones. Insert dried branches into it. Make sure they are stable in the vase.
- Cut out paper hearts or cards for guests to write wishes for the newlyweds.
- Use a hole punch to make holes in the leaves. Thread the pieces of ribbon through them and tie them.
- Hang leaves for wishes.
It is advisable to make a corresponding sign next to the wish tree. Don't forget to place pens or markers next to the vase so that guests can leave wishes.
Pictures of trees
To make the craft beautiful, look at the pictures of the finished souvenirs. In addition, the pictures will become a source of fresh, original ideas if you are not able to come up with the design of a wish tree yourself.